We are supported by our audience. When you purchase through links on our site, we may earn an affiliate commission, at no extra cost for you. Learn more. Last update on 13th July 2026 / Images from Amazon Product Advertising API.
To use stippling for miniature painting, you’ll load a round sable brush with slightly thinned paint and create controlled dots instead of brush strokes. Start with your darkest base tones, then build up lighter highlights through multiple thin layers. Use a 70% paint to 30% medium ratio for ideal consistency. Control your brush pressure-light tapping creates delicate dots while firmer pressure produces larger textures. Focus stippling in shadow areas and concentrate highlights where light naturally hits the model. This technique excels at simulating weathered surfaces, rust, and complex textures that traditional brushwork can’t achieve. Master these fundamentals to open up advanced weathering effects.
Notable Insights
- Use round sable brushes with slightly thinned paint, applying dots through light tapping motions rather than continuous strokes.
- Start with darkest base tones first, then progressively build up to lighter highlights using multiple thin layers.
- Control brush pressure carefully – light tapping creates delicate dots while firmer pressure produces larger textured effects.
- Focus densest stippling in highlight areas and shadow regions to create realistic three-dimensional depth and texture.
- Maintain consistent paint loading by dabbing brush lightly and reloading frequently to ensure uniform dot formation.
Understanding the Fundamentals of Stippling
While traditional brush strokes create continuous lines and smooth color shifts, stippling fundamentally changes your approach by building up paint through countless deliberate dots.
You’ll create these dots by gently dabbing your brush tip directly onto the miniature’s surface rather than dragging it across. This technique originated in classical pointillism, where artists like Georges Seurat built entire paintings through dot applications.
Stippling excels at texture creation, allowing you to simulate rough surfaces like rust, chipped paint, or weathered leather through varied dot densities.
You’ll also discover its effectiveness in color theory applications, as layering different colored dots creates optical mixing effects. The key lies in controlling your paint consistency and brush loading-too much paint creates smears, while too little produces barely visible marks. Unlike glazing techniques that may require 5-10 hours of work, stippling delivers results in just 30 minutes to an hour. Stippling offers a forgiving approach for new painters while providing enough depth and nuance to challenge experienced miniature artists.
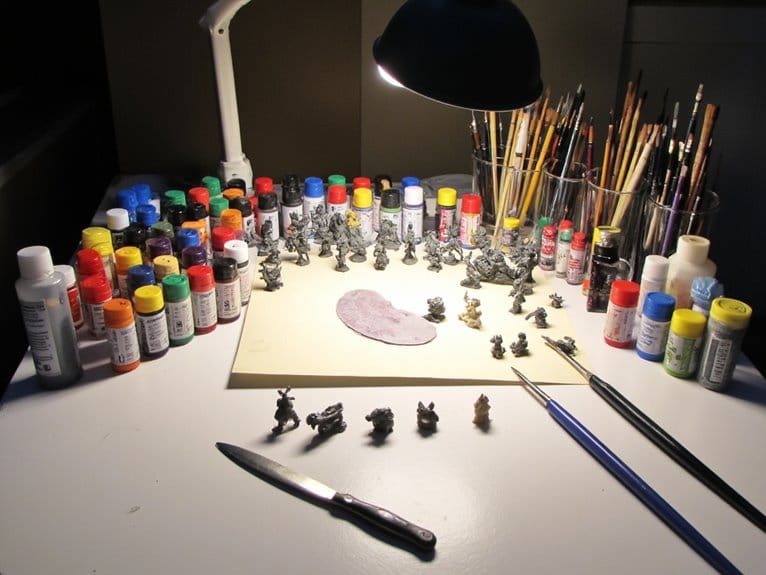
Essential Tools and Materials for Success
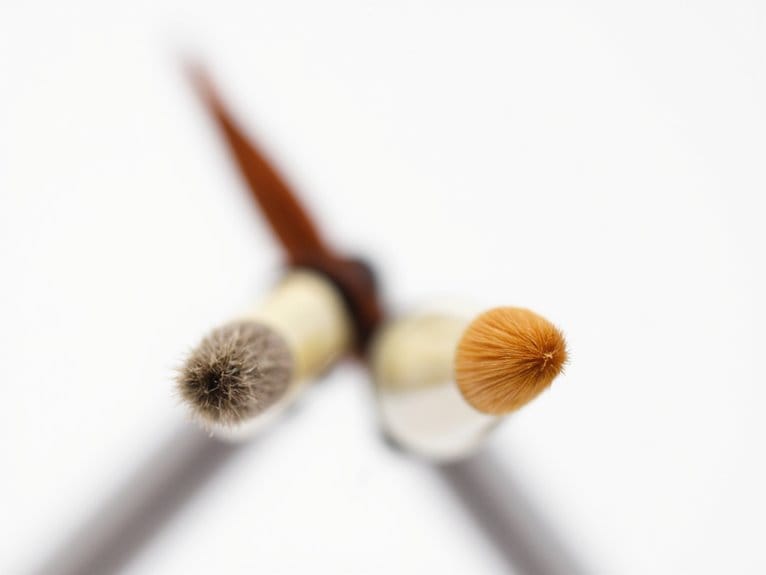
Success with stippling depends heavily on selecting the right tools and preparing your materials properly. Different brush types serve specific functions in stippling work.
Round sable brushes like W&N Series 7 Miniature provide exceptional precision for detailed stippling patterns. Synthetic or mixed sable/synthetic brushes offer superior stiffness and resilience, creating better dot definition than pure sable options. Premium synthetic nylon bristles ensure durability and precision while maintaining consistent performance across extended painting sessions.
Choose synthetic or mixed synthetic-sable brushes over pure sable for stippling work to achieve superior stiffness and sharper dot definition.
Household sponges work effectively for larger textured areas at minimal cost. They’re more practical than expensive artist sponges for miniature work. For specialized dry brushing effects that complement stippling, consider investing in dry brush sets with ergonomic handles that reduce hand fatigue during extended painting sessions.
Paint consistency proves critical-thin your acrylics like Vallejo Model Color to prevent blotching while avoiding over-thinning that causes uneven coverage. These paints feature high pigmentation and exceptional adherence to multiple surfaces, making them ideal for stippling techniques. Use a wet palette to maintain workable paint consistency throughout sessions. Start with a dry palette when you need thicker paint application for more pronounced stippling effects.
Paper towels control excess paint on tools, ensuring precise application control for professional results. Professional stippling work benefits from using specialized brushes designed specifically for miniature painting techniques.
Step-by-Step Application Methods
You’ll achieve the best stippling results by following a systematic approach that begins with proper paint preparation and builds texture through controlled layering.
Start by loading your stippling brush or sponge with paint that’s slightly thinned but maintains enough body to create distinct dots rather than watery smears.
Apply your darkest base tones first, then progressively work toward lighter highlights using the dark-to-light layering method to build natural depth and realistic texture gradients.
Choose papers with high permeability to optimize moisture transfer from your palette’s sponge layer to maintain consistent paint consistency throughout your stippling work.
To maintain your paint’s workability throughout extended stippling sessions, consider using a wet palette that can keep your acrylics fresh for 8+ hours and reduce paint waste by 60-80%.
Add 1-2 drops of flow improver per 10 drops of paint to prevent tip dry and extend working time for more detailed stippling applications.
When selecting paints for stippling work, look for water-based formulas that offer excellent self-leveling properties and superior opacity to ensure consistent dot formation and coverage.
Paint Loading and Preparation
Proper paint loading consistently determines whether your stippling technique produces clean, controlled dots or messy blotches that ruin the miniature’s surface detail.
Dab your brush lightly into paint rather than fully submerging it. This controlled approach prevents overloading and maintains dot precision. Blot excess paint on your palette edge or paper towel to achieve ideal loading levels.
Thin your paint to medium consistency for controlled application.
Different paint types require specific adjustments-acrylics need water or medium, while enamels may require specialized thinners. Test consistency on practice surfaces before applying to your miniature. Reload frequently to maintain consistent opacity and dot size throughout your session.
Monitor paint drying rates during application. Adjust thinning levels dynamically as environmental conditions change your paint’s working time and flow characteristics. Choose high-concentration pigments for rich, intense colors that enhance surface details without requiring multiple coats.
For paints that have been sitting unused, proper preparation with stainless steel balls ensures even pigment distribution before thinning for stippling applications. Use quality brushes with synthetic bristles that resist shedding and maintain their shape throughout detailed stippling work. Clean your brush thoroughly with specialized cleaners between color changes to prevent unwanted paint mixing that could muddy your stippling effects.
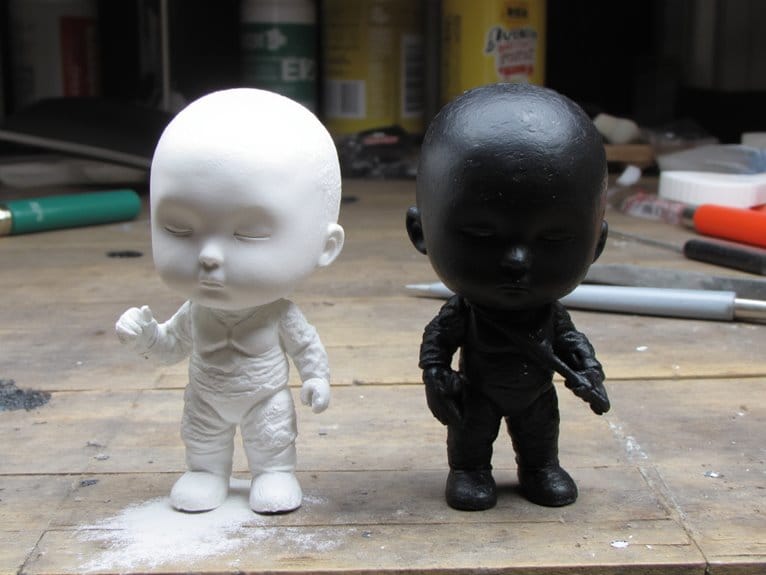
Layering Dark to Light
Once you’ve mastered paint loading fundamentals, building effective stippled layers requires a methodical dark-to-light approach that creates natural depth and luminosity.
Begin with your darkest shade layering using controlled stippling motions to establish a solid foundation. Apply paint with light, deliberate dabs rather than sweeping strokes, concentrating more intensive stipple application in shadow areas where depth is essential.
Progress to midtone shifts by layering lighter colors over your dark base. Use slightly diluted paint to maintain transparency while avoiding coverage loss. Combine stippling with glazing techniques for smoother color blending within midtones. Build layers patiently through repeated thin coats. Apply thin layers for best protection and finish quality when transitioning between color gradients.
Finally, apply highlights starting with tones close to your midtones, progressively building to the lightest shades on raised surfaces. Focus on edges and details where light naturally hits. For enhanced color vibrancy and superior opacity in your stippled highlights, consider using high pigment concentration inks that deliver professional-grade performance. Ensure your acrylic-based primer has fully cured before beginning stippling techniques, as insufficient drying time can cause paint to lift or blend improperly. Allow adequate drying time between layers to prevent paint lifting and ensure proper adhesion when building complex stippled effects.
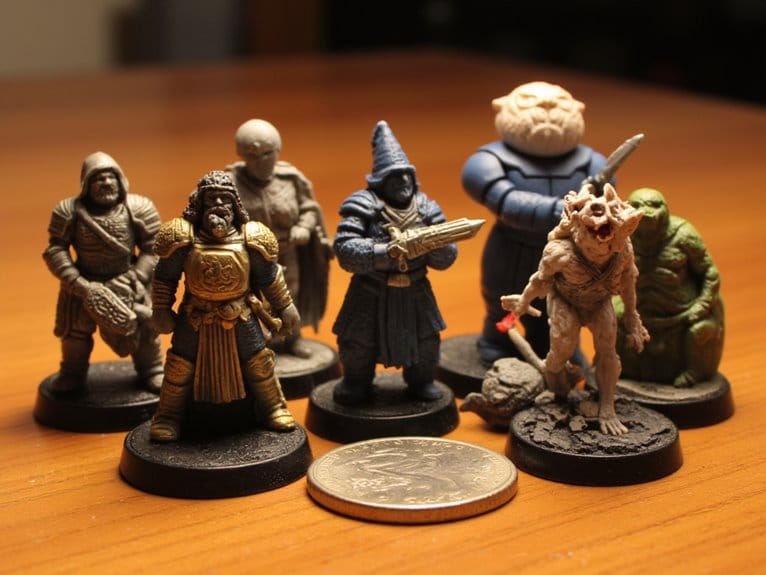
Creating Realistic Effects and Textures

When you master stippling’s fundamental mechanics, you can transform flat miniature surfaces into convincing three-dimensional textures that rival professionally painted models.
This technique excels at creating weathered armor, battle damage, and organic surfaces through controlled dot placement and density variation.
Your brush selection determines texture scale. Fine detail brushes produce precise damage effects on weapon edges. Stippling brushes cover larger areas like weathered vehicle hulls efficiently.
Proper brush choice controls your stippling scale-detail brushes for precise effects, stippling brushes for broader weathered surfaces.
Paint consistency must balance definition and blendability-thin enough for smooth color shifts, thick enough to maintain distinct dots.
Build texture variation gradually through multiple passes. Start with base tones, then add darker dots for depth and lighter ones for highlights.
This layering approach creates convincing surface irregularities. Apply miniature washes over your stippled texture to enhance depth and create more realistic weathering effects.
- Vary dot density to simulate natural wear patterns
- Combine multiple colors for realistic material degradation
- Adjust brush pressure for size variation
- Layer stippling with washes for enhanced depth
For miniatures requiring custom terrain pieces as backgrounds, using PLA and PETG materials in 3D printing provides the durability needed to withstand repeated handling during painting sessions.
Benefits and Common Challenges
While stippling offers considerable advantages for miniature painting, it also presents specific technical challenges that require understanding and preparation. You’ll gain speed advantages through quick coverage capabilities, making it ideal for efficient painting sessions.
The technique provides extensive texture variety, from smooth surfaces to battle-worn finishes. Visual blending becomes achievable as small dots create optical illusions of seamless gradients.
However, challenges exist. Precision control depends heavily on proper brush selection – wrong sizes compromise results considerably.
Paint consistency proves critical; thick paint creates blotchy textures while over-diluted paint lacks opacity. Water-based formulas ensure easier cleanup and maintenance when stippling mistakes occur, especially on detailed miniature surfaces. Common misconceptions lead many painters to underutilize this versatile technique.
Uniformity risks emerge when dots appear too patterned, reducing realism. Time-intensive detailing on small areas requires patience despite overall speed benefits. Professional-grade paints with high-purity pigments deliver superior coverage and color intensity essential for achieving consistent stippling effects. The stippling technique works particularly well on 28mm scale miniatures where the dot patterns create realistic weathering effects on armor and weapons. Specialized wash sets can enhance stippling effects by adding depth and shadow between the stippled textures.
Expert Tips for Mastering the Technique
You’ll achieve professional stippling results by mastering three critical control elements that separate novice work from expert-level texture effects.
Paint consistency requires precise thinning ratios-typically 70% paint to 30% medium-while progressive layering demands patience as you build effects through multiple passes of varying dot density.
Brush pressure control becomes your primary tool for creating consistent dot sizes, requiring light tapping motions with minimal downward force to prevent paint from spreading beyond intended contact points.
Paint Consistency Control Methods
The foundation of successful stippling lies in achieving the precise paint consistency that allows maximum control over each individual dot you place on your miniature.
Paint viscosity control determines your stippling success. Your paint should resemble textured spatter-thick enough to maintain coverage, thin enough to flow smoothly. Thinning mediums like water or acrylic medium improve blending capability during application.
Essential Paint Consistency Control Methods:
- Test consistency on palette paper – Paint should hold shape without spreading or clumping
- Add thinner gradually – Small increments prevent over-dilution and maintain opacity control
- Dab excess paint before application – Remove surplus paint on cloth to prevent uncontrolled blobs
- Adjust for environmental conditions – Humidity affects drying speed and requires consistency modifications
Professional paint thinners designed for miniatures provide superior viscosity control and maintain adhesion properties that prevent paint separation during detailed stippling work.
Excessively thin paint creates weak coverage. Overly thick paint clogs brushes and loses detail definition. Higher pigment concentration in quality paints enables better coverage with fewer stippling layers, reducing the risk of obscuring fine miniature details.
When consistency issues arise from paint buildup, water-based solutions offer safe removal options that preserve the underlying detail work without damaging delicate miniature surfaces. Once your stippling work is complete, applying protective finishes helps preserve the textural details and color vibrancy of your carefully crafted stippling effects.
Progressive Layering Strategies
Once you’ve mastered paint consistency, progressive layering alters your stippling from basic texture work into sophisticated gradient control. Start with sparse stippling dots using your darkest base color to map basic areas without full coverage. Gradually increase stipple density in subsequent layers, building saturation while maintaining dot distinctness.
Each intermediate color should slightly overlap the previous layer, creating visual confusion that eliminates banding. Apply 3-5 color transitions between base and highlight shades for seamless blends.
Focus density control on edges-keep applications lighter to naturally fade into adjoining paintwork. Your final layers concentrate the densest stippling in highlight areas, tapering toward base tones. This systematic approach guarantees smooth gradients while preserving texture integrity.
Brush Pressure Techniques
Mastering brush pressure control transforms stippling from random texture application into precise artistic technique. Your brush weight becomes a critical variable in achieving consistent results across different miniature surfaces.
Pressure modulation directly affects paint deposition patterns. Light pressure creates delicate dots for fine details, while firmer pressure produces larger texture elements. Consistency prevents unwanted variations, but deliberate pressure changes simulate realistic weathering effects.
Essential Pressure Control Methods:
- Vertical tapping motion – Apply consistent downward pressure for uniform dot formation
- Graduated pressure buildup – Start light, gradually increase for layered texture effects
- Quick release technique – Minimize contact time to maintain sharp dot edges
- Pressure cycling – Alternate between light and firm applications for organic randomness
Match your pressure to paint consistency. Thinned paints require gentle application, while thicker formulations demand firmer contact to break surface tension effectively. When working on extensive miniature painting projects, consider using siphon-feed systems that provide larger paint capacity to reduce frequent interruptions during detailed stippling work.
On a final note
You’ve now mastered stippling’s core principles and practical applications. This technique requires consistent practice to develop proper brush control and paint consistency. Start with basic textures before attempting complex surfaces like weathered metal or organic materials. Your success depends on maintaining steady hand movements and proper paint viscosity. Don’t rush the process-quality stippling can’t be hurried. With dedicated practice, you’ll achieve professional-grade miniature finishes that greatly enhance your painting portfolio.