We are supported by our audience. When you purchase through links on our site, we may earn an affiliate commission, at no extra cost for you. Learn more. Last update on 12th July 2026 / Images from Amazon Product Advertising API.
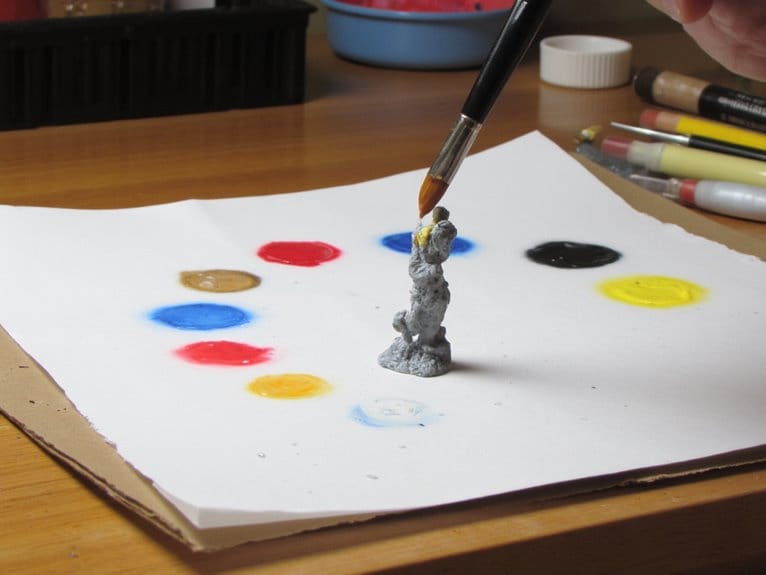
Start by cleaning your miniature with warm soapy water and removing mold lines with a hobby knife. Apply a thin coat of matte primer using an airbrush or brush for ideal paint adhesion. Use high-quality acrylic paints thinned to heavy cream consistency, applying multiple thin layers rather than thick coats. Focus on base colors first, then add highlights to raised surfaces and shadows to recesses using detail brushes. The complete process involves additional advanced techniques for professional results.
Notable Insights
- Clean the miniature thoroughly and apply primer for proper paint adhesion and vibrant color results.
- Start with 3-5 core acrylic colors and invest in quality detail brushes sized 0 or 00.
- Thin paints to heavy cream consistency and apply multiple thin layers rather than thick coats.
- Use highlighting on raised surfaces and shading in recessed areas to create depth and dimension.
- Protect finished miniatures with thin varnish coats and store them properly to prevent damage.
Getting Your Miniature Ready for Paint
Before you can achieve professional-looking results on your miniature, you’ll need to complete several essential preparation steps that directly impact paint adhesion and final quality.
Start with thorough mold line removal using a hobby knife or fine files to eliminate flash and surface imperfections. Remove stubborn lines with small files or sandpaper for ideal smoothness.
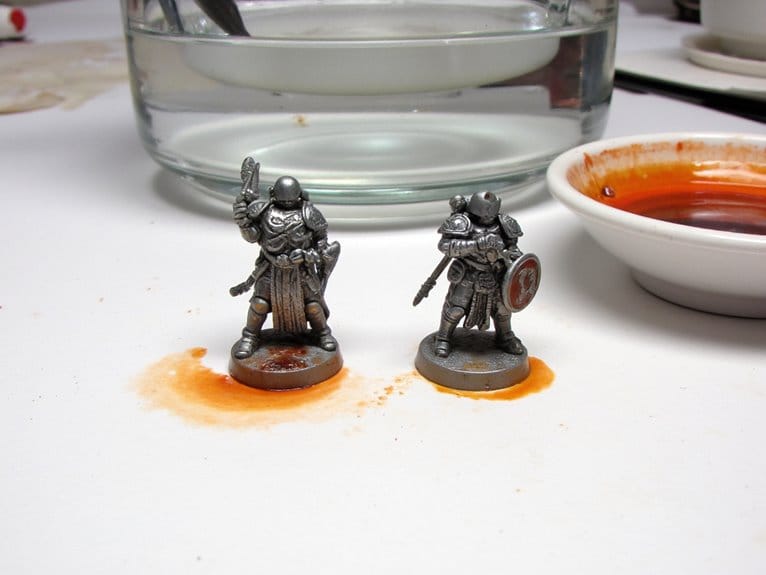
Complete miniature cleaning by washing plastic or resin pieces in warm soapy water. Scrub gently with a toothbrush to eliminate manufacturing residues, oils, and release agents. Rinse thoroughly and allow complete drying before proceeding. If you make a mistake during the painting process, you can use specialized paint removers that are safe for plastic, resin, and metal surfaces.
Apply primer in thin, even coats to enhance paint adhesion. Choose white, black, or grey primer based on your desired color brightness. Use a spray can for the most efficient and even coverage. Hold the spray can approximately 10-12 inches from the surface and use a consistent spraying motion to ensure even coverage without runs or drips. Apply primers in temperatures between 55-75°F with humidity below 60% for optimal drying and adhesion results.
Allow 24 hours curing time for maximum surface hardness before painting begins. If you plan to attach your miniature to a scenic base later, use CA glue for instant bonding capabilities across multiple materials. Consider removing bases before priming to prevent paint drips from affecting your work surface.
Essential Brushes and Paints You’ll Need
Your brush selection and paint quality will determine the success of your miniature painting project.
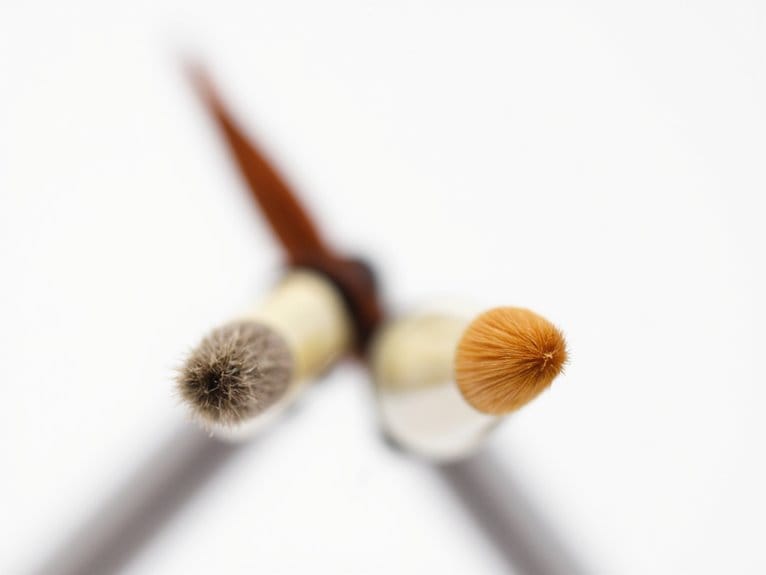
You’ll need specific brush types ranging from detail brushes in size 0 or 00 for fine work to round brushes with sharp points for general application, plus flat brushes for dry brushing techniques.
Start with high-quality acrylic paints in 3-5 core colors that match your miniature’s theme, and always apply a proper primer first to guarantee paint adhesion and durability. The Regiment Brush holds large amounts of paint while remaining versatile enough for both coverage and detail work, making it an essential tool for beginners.
Look for brushes with synthetic nylon bristles that resist shedding and maintain their shape through multiple cleanings, as this will save you frustration during detailed miniature work.
Consider investing in brushes with triangular handle designs that provide enhanced grip and control while reducing hand fatigue during longer painting sessions.
For specialized techniques like weathering effects, sizes #6 and #13 are ideal for creating realistic wear patterns and covering larger areas of your miniature.
Beginner painters should consider comprehensive kits that include essential colors and tools, as these all-in-one solutions provide everything needed to start painting immediately while ensuring color compatibility.
Brush Types and Sizes
While choosing the right brush might seem overwhelming at first, understanding the fundamental types and their specific applications will streamline your miniature painting process substantially.
Round brushes serve as your primary workhorses, offering pointed tips for detail work and wide bellies for paint retention. A size 2 round brush provides ideal versatility for most applications.
Flat brushes excel at dry brushing and broad coverage but lack precision for fine details.
Detail brushes in sizes -1/0 to -10/0 handle intricate highlights and facial features. Larger brushes (sizes 0-3) efficiently cover base layers and terrain elements.
Modern synthetic brushes offer excellent color retention and minimal shedding while maintaining compatibility with acrylics, watercolors, and other paint mediums commonly used in miniature painting. For beginners, pre-thinned paints with particle sizes under 35 micrometers provide optimal flow and reduce clogging issues when transitioning from brush to airbrush techniques.
Proper brush selection depends on your project’s specific requirements, while consistent brush maintenance guarantees longevity and performance retention throughout extended painting sessions. Ergonomic triangular handles reduce hand fatigue during extended use and improve overall control for detailed work. Investing in quality brush cleaners becomes essential for protecting expensive brushes costing $20 or more, as proper maintenance significantly extends their lifespan and preserves bristle integrity.
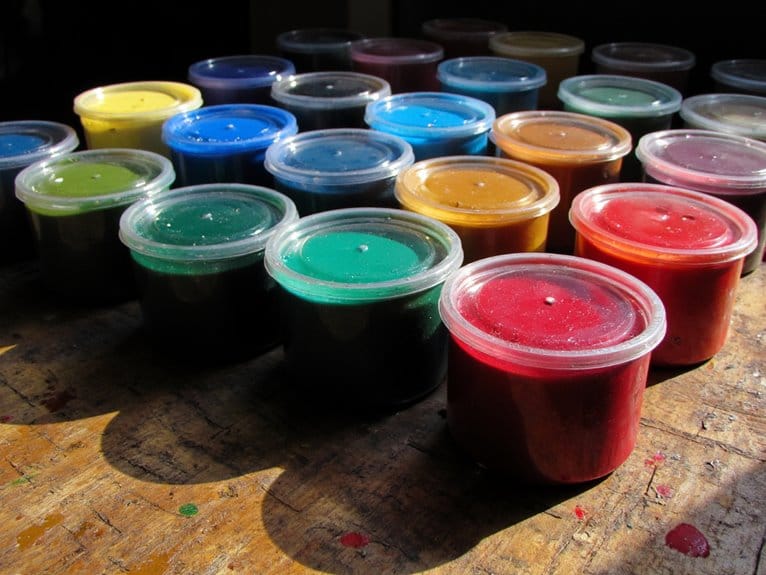
Basic Paint Colors
Just as your brush selection forms the foundation of your painting toolkit, your paint palette determines the quality and versatility of your finished miniatures.
Essential color theory starts with primary colors: red, yellow, and blue. These pure pigments enable unlimited mixing possibilities. Add black (preferably Payne’s Grey), white, and burnt umber brown for complete coverage.
Your starter palette should include:
- Primary Colors – Phthalocyanine blue, clear magenta, and transparent yellow for vibrant mixing
- Neutrals – Off-black variants, pure white, and rich browns for depth and highlights
- Specialized Paints – Metallic colors for weapons and armor details
Single-pigment paints produce cleaner mixes than multi-pigment formulations.
Transparent paints excel in blending techniques and glazing applications, while opaque base paints provide solid coverage for initial layers. Consider different paint types such as base paints for foundation layers, layer paints for smooth highlights, and Contrast Paints that combine base and shade properties for easy one-coat application. For beginners seeking efficient results, contrast paints work best over light primers like white or light gray to achieve vibrant outcomes.
When selecting skin tones for your miniatures, water-based acrylic paints offer non-toxic formulas that are ideal for indoor hobby setups and provide easier cleanup compared to solvent-based alternatives. Look for paints that meet ASTM D-4236 safety certification standards to ensure you’re working with properly tested, non-toxic materials.
Quality Primer Options
Before any paint touches your miniature’s surface, proper primer application determines whether your carefully applied colors will adhere permanently or chip away with handling.
You’ll need to choose between three primer types: airbrush, brush-on, and spray can options, each offering distinct advantages for different situations.
For primer comparison, Vallejo Surface Primer provides versatile airbrush and brush-on compatibility in 60ml bottles with excellent detail preservation.
Army Painter Airbrush Primer delivers quick-drying matte finishes specifically for airbrush users.
Citadel Spray Primer balances coverage and detail retention but costs more.
Badger Stynylrex excels at preventing paint peeling on plastic, metal, and resin surfaces.
FolkArt Clear Primer offers fast-drying water-based coverage that preserves surface textures while ensuring paint adhesion in under 15 minutes.
Select matte primers over glossy alternatives.
Matte surfaces create microscopic roughness that enhances acrylic paint adhesion, while glossy primers cause poor grip and require additional coats.
Vallejo Model Color provides water-based formulations that deliver superior opacity and lightfastness with complete adherence to plastic, metal, and polyester surfaces.
For beginners starting their first miniature project, the Game Color Introduction Set offers 16 essential colors with excellent self-leveling properties that make application forgiving for new painters.
When selecting paints for your miniatures, prioritize formulations that meet ASTM D-4236 safety standards to ensure non-toxic application during your painting sessions.
Priming and Applying Your Base Colors
Now that you’ve assembled your brush and paint collection, you’ll need to establish a solid foundation before applying any colors to your miniature.
Proper primer selection and application creates the essential bond between your miniature’s surface and subsequent paint layers, while strategic base coat planning determines your project’s final appearance.
These foundational steps require specific techniques for ideal paint adhesion, coverage consistency, and color vibrancy. Different finish types will also impact how your colors appear, with glossy finishes enhancing vibrancy and depth while matte finishes reduce glare for more natural-looking surfaces.
If you need to fill gaps or repair small imperfections before priming, consider using epoxy putty which can be sanded and painted once it cures completely.
Once your base colors are complete, consider applying a clear coat to protect your work and enhance the final appearance with either a glossy or matte finish. Wait 24 hours after painting before applying any protective varnish to ensure your acrylic paints have completely cured.
Primer Selection and Application
Three distinct primer application methods dominate miniature painting: airbrush primer, brush-on primer, and spray can primer. Each method delivers specific advantages depending on your skill level and project requirements.
Airbrush primers provide superior control and smoother finishes but demand specialized equipment. When using airbrush application, proper maintenance between primer sessions requires fast-acting cleaners specifically designed for water-based acrylics to prevent paint buildup and clogging. Spray cans offer efficient, economical solutions perfect for beginners. Brush-on primers enable precise application for corrections but risk detail obscuration when applied thickly.
Your primer color selection greatly impacts final results:
1. White primer enhances brightness and vibrancy for lighter
After priming, using a wet palette will keep your acrylic paints workable for hours and significantly reduce paint waste during your painting session. High-permeability papers with 200+ GSM can prevent your acrylics from drying for 8 or more hours compared to standard options that only provide 2 hours of working time. Essential tools like precision tweezers and deburring tools can help handle delicate miniature pieces safely and smooth any imperfections during the base preparation process.
Base Coat Techniques
Once your primer has fully cured, achieving professional base coat results depends on mastering paint consistency and application technique.
Your basecoat consistency should resemble heavy cream-thin enough for smooth flow yet thick enough to prevent pooling. Add water or acrylic medium drop by drop until you reach this texture. For optimal paint flow, consider using a flow improver with the recommended starting ratio of 1-2 drops per 10 drops of paint to enhance fluidity while maintaining color intensity.
Proper brush control requires loading minimal paint onto your brush tip. Start with hard-to-reach areas first to avoid overpainting completed sections. Apply two to three thin layers rather than one thick coat. This preserves miniature details while building solid coverage.
Allow each layer to dry completely before applying the next. Use synthetic brushes for ideal acrylic performance and maintain their points by rolling on damp towels between strokes. Remember that assembly and painting require additional time investment, but mastering these foundational techniques will significantly improve your finished miniatures.
Color Planning Methods
Your base coat’s success depends heavily on the color scheme you’ve planned and the primer preparation that supports it. Effective color planning prevents costly mistakes and guarantees your miniature achieves its intended visual impact.
Start with defining your miniature’s emotional theme-aggressive red schemes for warriors, calming blues for mystics. Apply color theory principles using the color wheel to select complementary or analogous combinations that create visual balance. Digital tools like Photoshop allow you to test schemes on grayscale miniature photos before committing paint to model.
Three essential color planning steps:
- Choose a dominant color based on the character’s role and setting
- Select 2-3 supporting colors using color wheel relationships for harmony
- Add unifying undertones by mixing small amounts of your dominant color into all paints
This systematic approach guarantees color harmony throughout your miniature.
Basic Techniques for Adding Depth and Detail
While basic color application forms the foundation of miniature painting, achieving professional-looking results requires mastering techniques that create visual depth and enhance sculpted details.
Highlighting techniques focus on raised surfaces where light naturally strikes, using colors slightly lighter than your base coat. Apply shading methods through selective washing in recessed areas with thinned paints to deepen shadows.
Light placement determines highlighting success – apply lighter tones to peaks while washing shadows into recesses with diluted paint.
Dry brushing effectively highlights textured surfaces by dragging a nearly dry brush across raised areas.
Layering strategies build depth through successive thin coats, shifting from shadows to highlights gradually. Color blending requires patience as each layer must dry completely before applying the next.
Essential detailing tips include using fine-pointed brushes for precise lines and keeping brush strokes controlled.
Multiple thin applications always surpass single thick passes for maintaining detail clarity.
Choosing and Mixing the Right Colors
Mastering depth and detail techniques means little if you can’t select and mix colors that bring your miniature to life.
Color harmony creates visual cohesion through understanding primary colors (red, yellow, blue) and their combinations. Secondary colors emerge from mixing primaries: red + yellow = orange, blue + red = violet, yellow + blue = green.
Consider these fundamental principles:
- Use complementary colors sparingly – Red vs. green or blue vs. orange create vibrant contrast but can overwhelm miniatures.
- Apply temperature contrasts strategically – Warm foregrounds with cool backgrounds guide viewer focus effectively.
- Mix muted shades with complementary hues – Adding small amounts of opposite colors creates naturalistic finishes.
Start with primary colors and mix gradually. Test combinations on your palette first.
Thin paints appropriately to preserve detail while maintaining color intensity.
Protecting Your Finished Work
After hours of careful painting and detailing, protecting your miniature becomes essential to preserve the investment you’ve made in time and materials.
Apply protective layers using multiple thin coats of varnish rather than one thick application. Spray from 10-12 inches away using sweeping motions that start off the miniature and continue past it.
Allow each coat to cure for 24 hours before handling. Use gloss varnish for maximum protection, then apply matte varnish over it to reduce shine without sacrificing durability. These finishing touches shield your work from scratches, chipping, and wear during gameplay.
Store miniatures in padded cases and avoid excessive sunlight exposure. Proper environmental controls with low moisture prevent paint degradation and preserve your completed project’s appearance.
On a final note
You’ve completed your first miniature painting project. Apply a matte or satin varnish within 24 hours to protect the paint layers from handling damage. Store your brushes in synthetic brush soap to maintain bristle integrity. Clean your palette immediately after each session. Document your color recipes for future reference. Practice these fundamental techniques on additional figures to develop muscle memory and improve your brush control consistency.