We are supported by our audience. When you purchase through links on our site, we may earn an affiliate commission, at no extra cost for you. Learn more. Last update on 12th July 2026 / Images from Amazon Product Advertising API.
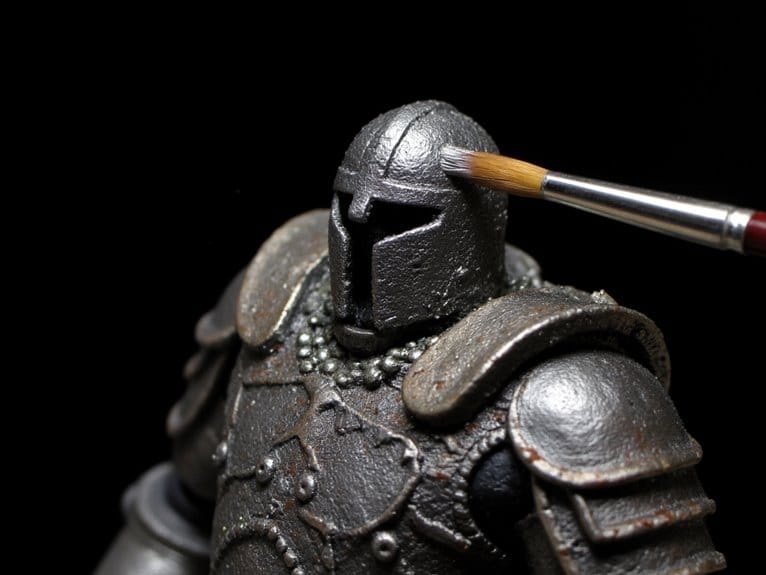
You’ll achieve realistic rust effects by first priming your miniature with black or dark gray, then applying texture mediums like Citadel’s Typhus Corrosion for base corrosion. Use natural sponges to dab dark brown and burnt umber in irregular patterns, building layers gradually. Add reddish-brown and orange tones with stippling brushes, varying paint consistency for authentic oxidation gradients. Finish with metallic highlights on raised edges to simulate exposed metal beneath the corrosion. Advanced techniques below reveal professional weathering secrets.
Notable Insights
- Prime miniatures with black or dark gray paint and ensure surfaces are clean for better rust paint adhesion.
- Apply base rust colors using reddish browns and oranges, building layers gradually from dark to light tones.
- Use sponges and stippling brushes to create irregular, natural-looking rust texture patterns across the miniature’s surface.
- Layer specialty rust products like Typhus Corrosion or pigment powders for realistic oxidation effects and depth.
- Add metallic highlights on raised edges and seal with varnish to protect the weathered rust finish.
Essential Materials and Tools for Rust Effects
Three fundamental categories of materials determine your rust painting success: specialized paints, application tools, and surface preparation products.
Your tool selection begins with acrylic paints in reddish browns and orange rust hues for base layering. Pigment powders add natural texture and vibrant oxidation colors. Specialized products like Dirty Down Rust Water Soluble Paint deliver realistic effects.
Chemical reactors activate oxide powders for authentic corrosion development over 20+ minutes.
Application tools include stippling brushes with stiff bristles for random patches. Foam sponges provide controlled patina application through dabbing methods. Small brushes or airbrushes create fine rust speckles. Water drops applied to specific areas create an enhanced yellowing effect that adds realism to the rust appearance. Cotton swabs enable streaking techniques that simulate water running down surfaces for additional weathering authenticity.
Material benefits extend to texture paints like Agrellan Earth, which simulate surface corrosion buildup. Black primer enhances rust depth beneath paint layers, while matt varnishes protect finished effects. Chemical compatibility between your base primer and rust paints ensures proper adhesion and prevents peeling during the weathering process. Apply thin layers of varnish over completed rust effects to maintain the weathered appearance while providing long-term protection against handling damage. Miniature washes from manufacturers like Vallejo or Army Painter enhance depth through weathering effects that simulate years of oxidation and environmental exposure. Precision applicator tips allow controlled placement of rust effects in intricate detail areas of your miniatures.
Surface Preparation and Base Priming Techniques
Before you can achieve convincing rust effects, proper surface preparation forms the foundation that determines your final paint quality and adhesion strength.
Remove all mold lines and flash using hobby knives or fine files. Wash your miniatures with dish soap and warm water to eliminate release agents and manufacturing oils. Use a soft toothbrush to reach recesses during cleaning.
Complete assembly and conversions before surface prep to avoid damaging painted surfaces later. Fill gaps with putty and smooth before priming.
For priming techniques, select colors based on your rust scheme-black or dark gray creates deep shadows. Apply thin primer layers maintaining 7-8 inches distance with spray primers. Consider zenithal priming to simulate natural light patterns where rust forms prominently.
Allow 24-hour curing time before painting. Shake your paint bottles thoroughly before use to ensure proper pigment distribution for consistent rust effect coverage.
Creating Texture With Mediums and Specialty Paints
Transform your miniature’s smooth surface into convincingly weathered metal by incorporating specialized texture mediums that replicate the irregular, pitted appearance of genuine rust corrosion.
Citadel’s Typhus Corrosion provides pre-formulated granularity that creates authentic surface variation. Apply this medium directly after priming to establish uneven topography where rust colors naturally collect.
AMMO’s U-Rust system offers reactive components that chemically interact over 20+ minutes, forming evolving rust textures with genuine color variation. Combine Reactor Type 1 and Type 2 wet-on-wet for maximum effect.
Agrellan Earth creates cracked, oxidized metal surfaces for enhanced realism.
Use stippling techniques with stiff bristle brushes to randomize rust patches. These specialty paints should target focal areas before base coating. High pigmentation paints ensure maximum coverage and color saturation when building up rust effects over textured surfaces.
Layer multiple texture mediums with varying particle sizes to simulate different rust stages, from fine oxidation powder to coarse flaking metal. For stubborn paint residue or primer buildup on metal miniatures, ultrasonic cleaners operating at 40-42kHz frequency can effectively remove contaminants without damaging delicate details.
Acrylic surface primers provide exceptional adhesion to diverse materials including resin and metal, ensuring your texture mediums bond properly to the miniature’s surface.
For gap-filling and structural repairs before texturing, epoxy putty provides excellent adhesion to metal miniatures and can be sanded smooth once cured.
Building Rust Color Layers With Sponge Techniques
Start your rust effect by loading a natural sponge with dark brown or sepia paint, then blot excess paint onto paper towel until only minimal pigment remains.
Apply the base rust layer using light dabbing motions on areas where corrosion naturally occurs-metal edges, bolt heads, and worn surfaces.
This foundation layer establishes the deepest rust tones and creates the irregular texture that you’ll build upon with subsequent lighter colors.
For enhanced realism, consider adding texture paint like Vallejo’s Earth Textures after your rust colors have dried to create authentic weathered surfaces with dimensional depth.
Base Rust Application
The sponge technique forms the cornerstone of realistic rust application, allowing you to create natural, irregular patterns that mirror authentic corrosion on metal surfaces. Begin by dabbing your prepared sponge gently onto the miniature, avoiding dragging motions that create uniform coverage. Focus on natural rust-prone areas where moisture accumulates: edges, panels, bolts, and recesses.
| Technique | Pressure Level | Result |
|---|---|---|
| Light dabbing | Minimal contact | Subtle rust spots |
| Medium pressure | Moderate contact | Dense rust patches |
| Heavy application | Full contact | Avoid – creates unrealistic coverage |
Vary your pressure deliberately – lighter touches produce subtle effects while heavier pressure creates denser spots. Build layers gradually using multiple rust hues for effective rust blending. Start with dark browns, then add reddish tones and oranges. This layered approach creates depth and realistic paint finishes.
Layering Dark Tones
Dark rust tones establish the foundation for convincing corrosion effects, creating shadows and depth that lighter colors will later enhance.
You’ll start with the darkest colors to build proper contrast techniques that simulate real oxidation patterns.
Begin with burnt umber or dark sienna as your base layer. These colors represent the deepest corrosion areas where metal has completely oxidized. Apply them using light sponge dabbing motions, focusing on recesses and edges where rust naturally accumulates.
Your layering sequence should follow this progression:
- Load sponge lightly with dark brown paint, removing excess on paper towel
- Dab irregularly across surface, leaving gaps for subsequent layers
- Allow each application to dry completely before adding next tone
- Maintain transparency to preserve underlying texture and detail
This depth simulation technique creates realistic shadow areas that enhance dimensional appearance when you add lighter rust tones later.
Using specialized brushes like detail rounds and angled spot brushes can help achieve more precise rust effects in tight areas where sponge techniques might be too broad for intricate weathering work.
Advanced Texturing Methods Using Foam and Stippling
You can achieve professional-level rust textures by combining foam stamp techniques with precision stippling methods that create authentic corrosion patterns.
Foam stamps allow you to press irregular surface textures directly onto your miniature, while stippling brushes build up random, organic rust spots through controlled dabbing motions.
These layered texture applications work together to simulate the complex surface variations found in real weathered metal, giving your miniatures depth that goes beyond simple paint effects.
Foam Stamp Techniques
Breaking away from traditional brush techniques opens up exciting possibilities for creating realistic rust textures on miniatures through foam stamping methods. Foam stamp benefits include superior texture control and repeatable pattern application that brushes can’t achieve.
Cut blister foam into manageable pieces using X-acto knives for precise shapes. Load dark reddish-brown paint mixed with black onto torn foam edges without thinning. Pat the foam on paper towels to control paint amount, then press straight down with consistent pressure and lift vertically.
Essential foam stamping techniques:
- Rotate foam pieces between applications to avoid repetitive patterns
- Focus on exposed edges, bolts, and joints where natural corrosion occurs
- Use multi-layer stamping with different foam pieces for complex texture depth
- Apply mica powders with light water spritzing for authentic grungy appearance
Stippling Brush Methods
While foam stamping excels at creating broad rust textures, stippling brushes offer superior precision for detailed weathering work on miniatures. These tools feature short, firm bristles that deliver controlled dot patterns through gentle dabbing motions rather than traditional techniques using brush strokes.
You’ll achieve ideal results by varying your paint consistency. Thinner, glaze-like mixtures create smooth gradients, while thicker paints produce rougher textures. Load your brush moderately and adjust pressure to control dot size and opacity. Build layers gradually, avoiding uniform patterns that look artificial.
Stippling brush techniques excel in confined areas where foam stamps can’t reach. You can precisely target specific spots without affecting surrounding details.
Combine different brush sizes-larger ones for base textures, smaller ones for refined highlights and shadows on corroded surfaces. Professional miniature painters often turn to dry brushes specifically designed for weathering techniques, as these specialized tools maintain their shape and provide consistent texture application across multiple painting sessions.
Layered Texture Application
Advanced texturing demands combining multiple application methods to achieve convincing rust effects that surpass what single techniques can produce.
You’ll create depth by layering foam clay over scored EVA foam surfaces, building irregular corrosion patterns that mimic real metal decay. Advanced layering requires strategic color placement using translucent brown washes over gray base coats.
These texturing techniques work together for maximum realism:
- Score EVA foam with rotary tools for deep pitting, then apply foam clay spikes for rust flakes
- Layer translucent brown washes over gray bases before honey brown dry brushing
- Use different foam densities – larger pores for rough patches, smaller for fine details
- Combine wire brush scratches with pencil tip impressions for embedded bolt heads
Control sponge pressure carefully during application to preserve porous textures while avoiding blotchy paint distribution. High-pigment formulations deliver superior opacity when building up rust layers, ensuring each application maintains color intensity without requiring excessive coats. Professional modelers often enhance rust effects with weathering powders that add realistic dust and oxidation depth to the surface texture.
Complete your weathered miniature base by adding static grass tufts around rusted elements to simulate overgrown terrain where metal decay naturally occurs.
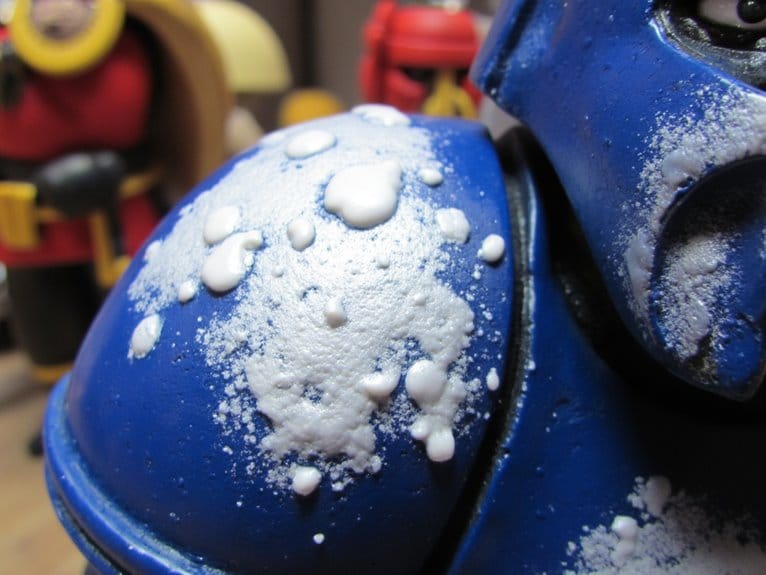
Water Effects for Realistic Oxidation Patterns
Why limit your rust effects to dry, static appearances when water interaction creates the most convincing oxidation patterns?
Water accumulation creates natural rust gradients that transform miniature surfaces from amateur to professional quality.
Standing water promotes oxidation variability through moisture retention in crevices and low points.
Start with PVA glue mixed 2:1 with water, layered with tissue paper for shallow puddles.
Apply Vallejo Extra Heavy Gel in thin coats for moving water textures over painted rust bases.
Blue Elmer’s glue creates glossy accumulation spots that trigger realistic corrosion patterns.
Build water surfaces using multiple thin layers of clear resin or Mod Podge.
Allow complete drying between applications to prevent shrinkage.
Position water effects where moisture naturally collects, referencing real oxidation photos for authentic placement patterns.
Metallic Highlights and Exposed Metal Details
The strategic placement of metallic highlights transforms flat rust effects into three-dimensional surfaces that capture and reflect light naturally.
Strategic metallic placement breathes life into rust effects, creating convincing three-dimensional surfaces that interact with light authentically.
Position your miniature under direct light to identify where natural reflections would occur. Start with dark metallic base coats like gunmetal beneath rust layers for authentic aged metal simulation.
Your metallic layering technique should progress from midtones to brightest points using 50/50 ratios of silver and gunmetal. Apply thin glazes over rust areas to reveal underlying metal without overwhelming existing textures.
Essential highlighting steps include:
- Use true-metallic paints containing metal flakes for realistic light reflection
- Focus highlights on raised edges where rust naturally wears away
- Employ small domed brushes for precise application on texture points
- Blend shifts with diluted metallics to create convincing reflective surfaces
For optimal results with airbrush metallic paints, maintain proper thinning ratios and ensure your equipment can handle the metal particle content without clogging. When airbrushing metallics, select equipment with 0.3mm nozzles for the best balance between detail control and paint flow capacity. Specialty metallic formulations with fine particle sizes under 35 micrometers help reduce equipment clogging while maintaining coverage quality.
When working on intricate metallic details, select brushes with triangular handles for enhanced control and reduced hand fatigue during extended painting sessions.
Specialty Rust Products and Professional Weathering Solutions
You’ve mastered the basic rust painting techniques, but specialized products can elevate your weathering effects to professional standards.
Commercial rust effect products like Pro Acryl NEWSH Acrylic Weathering Medium offer superior control and safety compared to traditional solvent-based alternatives. These dedicated weathering solutions work alongside advanced techniques such as post-shading and decal integration to create convincingly aged miniatures.
Commercial Rust Effect Products
While traditional paint mixing offers flexibility, commercial rust effect products deliver specialized formulations engineered specifically for realistic weathering applications.
These products incorporate fine particles and chemical-inspired pigments that replicate natural oxidation patterns more effectively than standard acrylics.
Brand comparisons reveal distinct approaches to rust simulation. Effect variations range from fresh orange oxidation to deep brown corrosion stages, each targeting specific weathering scenarios.
Key commercial rust products include:
- Warpaints Fanatic Effects Fresh Rust – Orange-toned with visible particles for texture
- Dirty Down Rust – Yellow/orange oxidation effects designed for layering applications
- U-Rust by Ammo – Chemical-inspired tones spanning fresh to aged oxidation
- Pigment-based solutions – Alcohol-mixed formulations providing natural variation control
These specialized formulations eliminate guesswork while delivering consistent results across different miniature materials and surface preparations.
For optimal adhesion on plastic miniatures, proper surface preparation ensures maximum bonding strength between the rust effects and the underlying model material.
Professional Weathering Techniques
Moving beyond basic products elevates your rust effects through advanced weathering techniques that combine specialty materials with professional application methods. Master rust color mixing by combining acrylic rust tones with Lahmian Medium to create controlled, translucent layers.
Apply these mixtures in recesses for realistic corrosion accumulation. Use stippling techniques with coral sponges at 90-degree angles to deposit irregular rust spots. This mimics natural oxidation patterns effectively.
Dry brushing with Ryza Rust and Fire Dragon Bright builds depth on metallic surfaces through selective layering. Environmental factors influence your approach considerably.
Combine rust effects with dust or mud using sponged-on powders for layered realism. Seal weathering powders with matt varnish to prevent loss during handling, though expect minimal pigment reduction.
Ensure proper paint mixing before application by using stainless steel mixing balls or vortex mixers to achieve consistent color distribution and prevent pigment separation in your rust effect paints. For optimal results, use high-quality nylon bristles that maintain their shape and resist shedding during detailed weathering applications.
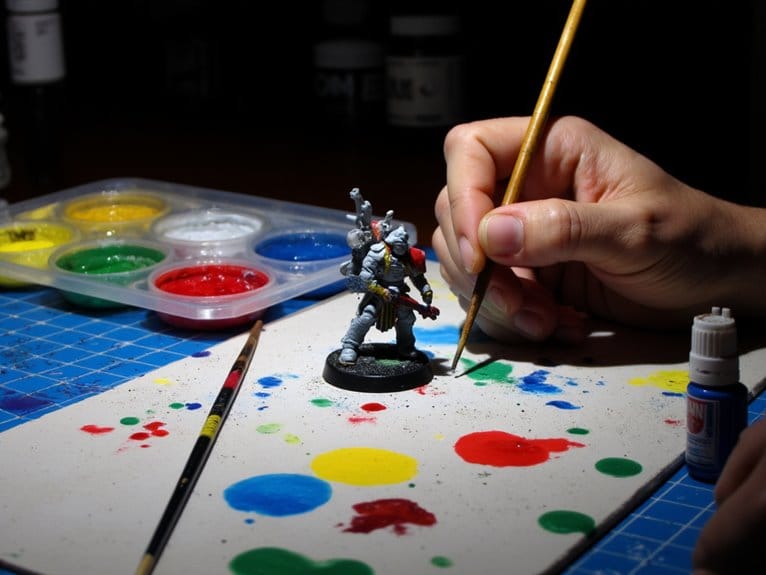
Scale-Specific Techniques and Natural Placement Strategies
When painting rust on miniatures, the scale demands specialized techniques that differ greatly from full-size weathering methods. You’ll need to control paint application precisely to maintain detail definition while creating convincing corrosion effects.
Use torn styrofoam ends and stippling techniques to apply rust color at miniature scale. Dab excess paint onto paper towels before application to prevent overwhelming fine details. Build texture variations through multiple thin layers rather than single heavy coats.
Natural rust placement follows real-world corrosion patterns:
- Recessed areas – corners, seams, and joints where moisture accumulates
- Metal components – bolts, rivets, and mechanical parts prone to oxidation
- Wear points – edges and surfaces where paint chips naturally occur
- Gravity lines – vertical streaks following water runoff patterns
Layer dark brown base tones, orange mid-tones, and burnt red highlights for realistic depth and variation. For enhanced realism, consider incorporating metallic pigments into your rust effects to simulate the natural metal oxidation process that creates authentic weathering patterns.
Troubleshooting Common Rust Painting Mistakes
Even experienced miniature painters fall into predictable traps when attempting rust effects, and recognizing these common mistakes will save you hours of frustration and rework. You’ll achieve better results by avoiding uniform application patterns and maintaining proper rust color variation throughout your piece.
| Common Mistake | Solution |
|---|---|
| Uniform rust placement | Randomize application using different tools and angles |
| Too bright rust colors | Layer darker tones and add metallic highlights |
| Missing texture preparation | Apply crackle or mud effects before rust |
| Inadequate sealing | Use varnish before applying rust layers |
Surface preparation determines your final quality. Apply texturing mediums like Agrellan Earth before rust painting. Maintain exposed metal realism by leaving strategic areas untouched. Fix mistakes immediately using thin base coat layers. For optimal brush adhesion and paint flow, maintain your workspace at 72-75°F environments during the painting process, as cooler temperatures can affect paint viscosity and drying times.
Consider using wash sets specifically designed for weathering effects to achieve more realistic depth and shadow in your rust work. Once your rust effects are complete, protect your work with a matte finish clear coat to reduce glare and preserve the natural weathered appearance. If you’re working with high-resolution resin miniatures printed at 9K or above, the exceptional detail clarity will make any painting inconsistencies more noticeable, requiring extra attention to blending and layering techniques.
On a final note
You’ve mastered the essential techniques for creating convincing rust effects on miniatures. Start with proper surface preparation, then build texture using specialized mediums. Apply rust colors in thin layers using sponge techniques for natural variation. Add metallic highlights where metal would show through corrosion. Remember that less is often more-subtle weathering appears more realistic than heavy-handed effects. Practice these methods on test pieces before applying them to your finished models.