We are supported by our audience. When you purchase through links on our site, we may earn an affiliate commission, at no extra cost for you. Learn more. Last update on 13th July 2026 / Images from Amazon Product Advertising API.
You’ll glaze miniatures by mixing paint with acrylic medium at a 2:1 ratio, creating translucent layers that build depth and smooth color shifts. Thin your paint to heavy cream consistency, then apply multiple passes with a fine brush (sizes 0-2), allowing each layer to completely dry. Start with zenithal priming and work from dark to midtones, covering 90% of the previous layer. Test consistency on paper towels first to avoid coffee stain effects. Master these fundamentals to access advanced techniques and professional-quality results.
Notable Insights
- Thin paint with liquid acrylic medium (2 parts medium to 1 part paint) for transparent, adhesive glazes.
- Use fine brushes (sizes 0-2) with sparsely loaded paint, building depth through multiple thin layers.
- Apply glazes from dark to midtones, covering 90% of previous layers for smooth color transitions.
- Allow each layer to dry completely before applying the next to prevent peeling and disruption.
- Start with zenithal priming and direct brushstrokes toward the intended light source for enhanced depth.
Understanding the Glazing Technique and Its Purpose
While traditional painting techniques rely on opaque layers to build color, glazing transforms miniature painting through translucent applications that preserve underlying detail.
You’re applying multiple layers of heavily diluted paint to create seamless color shifts and enhanced depth effects.
Glazing history traces back to classical oil painting, where artists layered transparent pigments for luminous results.
Modern miniature glazing techniques adapt these principles using specialized mediums that maintain paint adhesion while achieving translucency.
You’ll use glaze mediums rather than simple water dilution to prevent pooling and guarantee controlled application.
The technique acts as a color filter, enriching saturation without obscuring previous work.
Your highlights and shadows remain visible beneath each translucent layer.
This creates visual depth impossible through opaque layering alone, unifying diverse colors across your miniature for professional cohesion.
Glazing promotes active engagement with your miniature, encouraging experimentation and creating a more dynamic painting process compared to traditional layering methods.
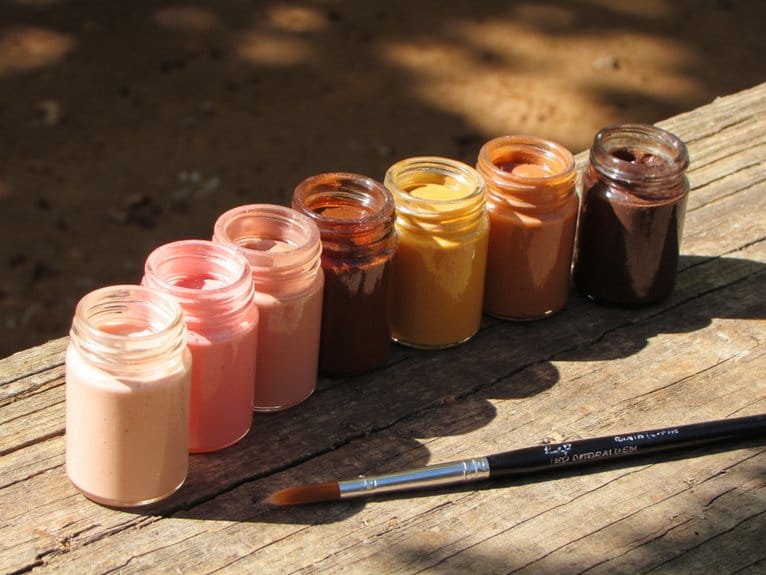
Achieving proper consistency requires maintaining a milk-like transparency that allows underlying details to show through while still providing sufficient pigment coverage.
Preparing Paint for Optimal Glazing Results
Proper paint preparation determines whether your glaze achieves smooth, transparent coverage or creates streaky, uneven results that obscure miniature details.
You’ll need to thin your paint using a liquid acrylic medium rather than water alone, as medium maintains binder strength and prevents the paint from breaking down during application.
Testing your glaze consistency on a paper towel or palette before touching your miniature guarantees you’ve achieved the right balance of opacity and flow for controlled, predictable results.
A recommended starting point is mixing 2 parts medium to 1 part paint, which provides an effective foundation for creating custom glazes with proper transparency and flow characteristics.
Water-based paints offer non-toxic formulas that provide a safer working environment while maintaining excellent flow characteristics essential for smooth glaze application.
Thinning Paint Properly
Three fundamental approaches exist for thinning paint to achieve ideal glazing results: water dilution, glaze medium suspension, and ink-based alternatives.
Water represents the simplest method, though it can dilute pigment suspension and create uneven coverage. The standard paint viscosity for glazing requires thinning ratios of approximately 2:1 water to paint, balancing translucency with pigment presence.
Glaze mediums offer superior performance by maintaining uniform pigment distribution throughout application. These dedicated thinning agents prevent separation issues common with water-based solutions, particularly in lighter colors.
Inks provide intense color without pigment clumping since they’re dye-based rather than pigment-based.
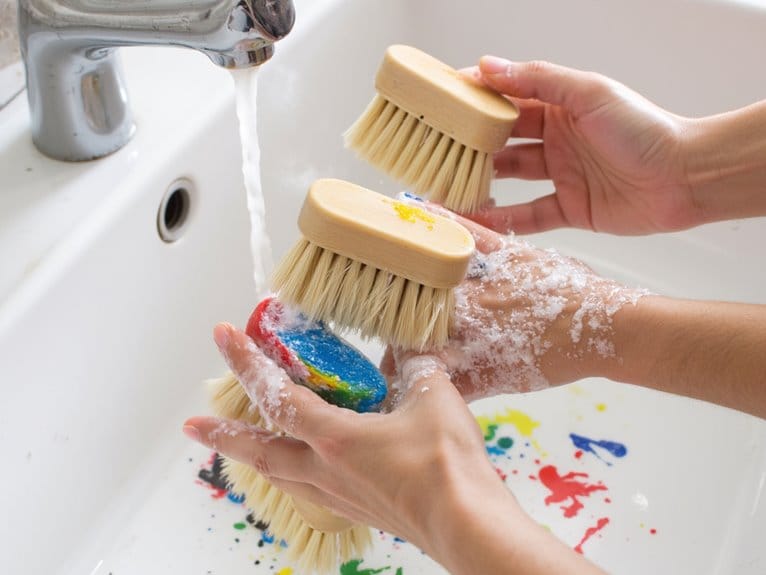
You’ll achieve consistent results by avoiding over-thinning, which compromises adhesion and color intensity. Always maintain continuous stirring to guarantee even pigment distribution after thinning. Proper brush cleaner selection helps maintain equipment performance and ensures your brushes remain effective for detailed glazing work throughout extended painting sessions.
Testing Glaze Consistency
Testing glaze consistency serves as the critical bridge between thinning your paint and achieving professional-quality results on your miniatures.
Proper glaze transparency testing requires applying single layers on test surfaces to observe color changes and flow characteristics. You’ll want to monitor how your glaze dries evenly versus creating undesirable “coffee stain” effects that indicate overly watery mixtures.
Effective drying effect evaluation involves testing glaze behavior on vertical surfaces to make certain it doesn’t run excessively. Apply test strokes using your brush’s side rather than the tip for even distribution.
Dab excess glaze on wet paper towels before application to prevent concentrated paint blobs.
Document your pigment-to-medium ratios using precision scales for reproducible results.
Test multiple thin coats with varying drying times to evaluate final color effects and build consistent glaze recipes. Water-based acrylic paints cure in one hour and provide the consistent drying times essential for layering multiple glazes effectively. For repairs or modifications to cured miniature parts, consider that professional-grade epoxy putties maintain excellent detail retention and can be sanded or painted after the standard 24-hour curing period.
High-quality acrylic paints with excellent pigmentation and self-leveling properties will produce more consistent glazing results than budget alternatives. Chemical compatibility between your base primer and glaze medium ensures optimal adhesion and prevents unexpected reactions that could compromise your miniature’s finish.
Essential Tools and Materials for Glazing
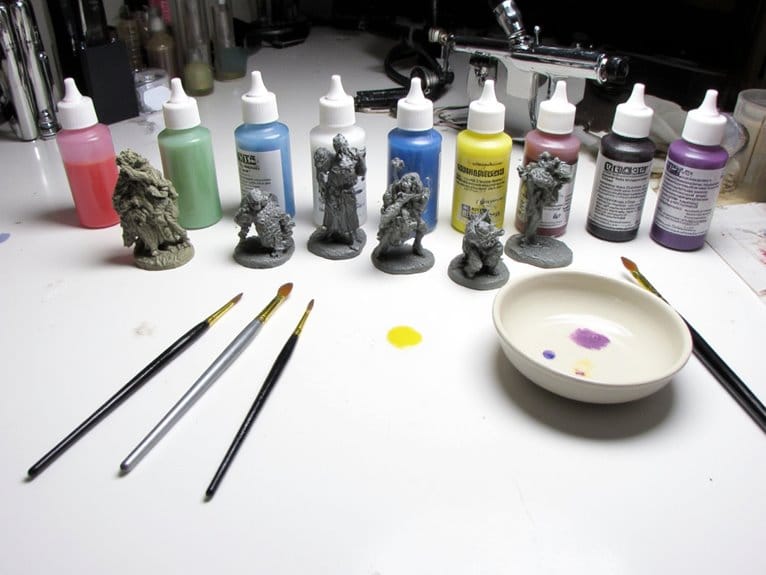
Five essential categories of tools and materials form the foundation for successful glazing work on miniatures. Fine detail brushes with synthetic or Kolinsky sable bristles in sizes 0-2 provide controlled application. Proper brush maintenance prevents paint buildup and guarantees smooth strokes.
You’ll need multiple brushes to avoid unwanted color mixing during layering sessions.
Glazing mediums like Citadel Lahmian Medium or Liquitex clear slow-dry medium thin paint while preserving color intensity and transparency. Art store alternatives offer larger quantities at lower costs than hobby-specific brands.
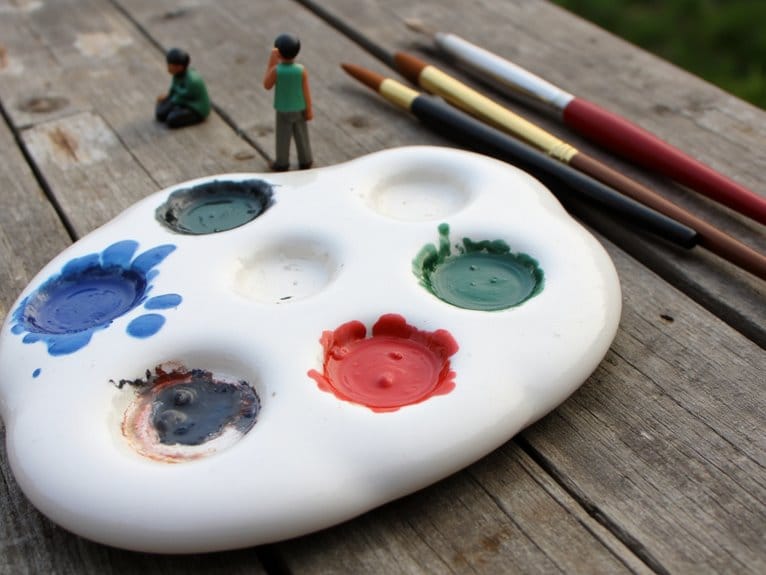
Smart palette selection includes non-porous surfaces with wells for organized mixing. Wet palettes keep glaze mixtures moist longer during extended sessions and can maintain paint workability for up to a week with proper moisture retention.
Additional essentials include clean water containers, good lighting, magnification tools, and lint-free cloths for controlled application and cleanup. Quality synthetic bristles resist shedding and provide consistent performance across multiple paint mediums. Triangular handle designs enhance grip and reduce hand fatigue during extended glazing sessions. Premium Japanese nylon bristles offer exceptional durability and maintain their shape through repeated use across acrylics, watercolors, and other paint types.
Step-by-Step Application Process
You’ll achieve professional glazing results by following three critical steps that control paint flow and color development.
First, prepare your paint consistency by mixing one drop of paint with two drops of water or glaze medium to create the translucent coverage needed for smooth color shifts.
Next, apply thin layers using a sparsely loaded brush, building depth gradually through multiple passes rather than attempting to achieve the desired effect in a single heavy application.
Prepare Paint Consistency
When preparing paint for glazing miniatures, achieving the correct consistency forms the foundation of successful transparent layering techniques. You’ll need to thin your paint to a heavy cream consistency that flows smoothly without obscuring surface details.
Paint viscosity varies greatly between brands and colors, so you must test each mixture individually. Start with your base paint and add thinner drop by drop-water for acrylics or appropriate solvents for oils.
Glazing mediums like flow improvers maintain proper surface tension while preserving paint adhesion. Test consistency by dragging a loaded brush across a smooth surface. The paint should flow evenly without pooling or skipping.
Mix thoroughly on your palette and maintain this consistency throughout your glazing session for uniform results.
Apply Thin Layers
The systematic application of thin glaze layers requires methodical brush control and strategic paint placement to achieve professional transparency effects.
Start with even, smooth brush strokes in consistent directions to prevent uneven paint concentration. Plan your stroke endings carefully since paint accumulates at these points, creating thickness variations.
Apply glaze layering progressively, targeting smaller areas with each successive coat. This approach controls layer buildup and manages shifts effectively. Use a soft brush that’s wet but not overloaded-excess paint causes pooling and compromises transparency.
Allow each layer to dry completely before applying the next. Initial layers appear negligible, but they contribute cumulatively to smooth gradations.
Maintain brush control by keeping consistent pressure and angle throughout application. Multiple thin coats produce superior luminous finishes compared to fewer thick layers.
Build Gradual Depth
Building glazed depth requires a systematic foundation that begins before you touch your first color. Start with zenithal priming using dark base coats in recesses and lighter primers from above. This creates your initial contrast foundation.
Apply glazes in multiple thin layers, working from dark to midtones. Each layer should cover approximately 90% of the previous application, creating smooth tonal shifts. Direct your brushstrokes toward your intended light source to guide visual depth perception.
Build glaze depth gradually by layering lighter glazes over darker ones. Increase opacity incrementally with each application. Use fresh paint mixtures to prevent dried glaze from disrupting gradient development. Properly mixed glazes using stainless steel mixing balls ensure consistent color distribution and prevent pigment separation during extended painting sessions.
Focus tonal variation on surface orientation relative to your light source. Apply fewer layers in highlighted areas and increase density in shadows for enhanced realism. Water-based formulas ensure easy cleanup with soap and water between color transitions. Consider using a wet palette to maintain your glaze consistency throughout extended painting sessions, as these systems can keep your mixed glazes workable for 8+ hours.
Achieving Smooth Color Transitions and Effects
Since achieving smooth color changes requires precise control over paint application, you’ll need to master the fundamental technique of layered glazing with properly diluted paints.
Dilute your paint to an 8:1 to 10:1 water-to-paint ratio for ideal flow. Apply each glaze layer covering 90% or less of the previous layer to create seamless gradients. For even better paint control and smoother application, consider adding flow improvers at a ratio of 1-2 drops per 10 drops of paint to enhance fluidity without compromising color intensity.
Color blending demands strategic use of nearby spectrum colors rather than pure highlights and shadows. Mix intermediary shades between your base and target colors, then layer these progressively from dark to light. This builds natural shifts without harsh contrasts.
Light dynamics play an essential role in realistic effects. Apply lighter glazes where light naturally hits raised surfaces. Use complementary or analogous muted colors for subtle depth shifts. For enhanced depth effects, miniature washes can be applied between glaze layers to create natural shadow transitions and improve overall contrast. Ensure surfaces are clean and free from dust before applying glazes, as proper surface preparation is essential for achieving optimal adhesion and preventing peeling or uneven coverage.
Plan your color application order carefully to prevent muddying, and emphasize localized color shifts in recessed areas for maximum realism. For beginners seeking faster results, contrast paints can provide base, shade, and highlight effects in a single application before adding glazed details.
Common Challenges and How to Overcome Them
Even with perfect technique, glazing miniatures presents several persistent challenges that can frustrate painters at every skill level.
Crawling creates bare patches when glazes fail to adhere properly due to high surface tension. Crawling remedies include adding small amounts of gum or flux to improve adhesion. Matte glazes exhibit greater susceptibility than glossy alternatives.
Pinholing produces tiny craters from firing cycle issues and composition imbalances. Clay bodies with high grog content increase this risk considerably.
Blistering causes include excessive soluble fluxes like borax and potassium carbonate. Thick application and inadequate clay preparation worsen bubble formation.
Paint consistency problems manifest as splotchy, chalky finishes. You’ll encounter pooling with overly diluted glazes.
Maintain slightly moist brushes and control dilution carefully. Allow complete drying between layers to prevent peeling or lifting previous coats.
Best Practices for Professional-Quality Results
While mastering glazing techniques requires patience and practice, achieving professional-quality results depends on following several fundamental principles that separate amateur work from expert finishes.
Start with proper surface preparation. Your base layers must be completely smooth and fully cured before glazing begins. Any texture irregularities will show through transparent glaze layers.
Surface imperfections become magnified under transparent glazes, making meticulous base preparation the foundation of professional-quality finishes.
Master glaze color theory by understanding how transparent colors interact optically. Warm glazes over cool bases create complex color shifts that add depth. Test color combinations on practice surfaces first.
Maintain consistent paint-to-medium ratios throughout your project. Document successful mixtures for repeatability across multiple sessions.
Ensure finish durability by allowing each layer to cure completely. Rush jobs result in soft, easily damaged surfaces. Apply a final protective coat only after all glazing work is complete and fully hardened.
Quality formulations with high-purity pigments provide the best foundation for consistent glazing results across multiple miniatures. Water-based acrylic paints offer easier cleanup and faster drying times compared to solvent-based alternatives, making them ideal for extended glazing sessions.
Consider your desired final appearance when selecting protective finishes, as matte finishes reduce glare and work perfectly for skin tones and natural materials, while glossy options enhance vibrancy for metallic surfaces. Once your glazing work is complete, protect your investment with a quality protective varnish that offers UV stability and scratch resistance to preserve your detailed work for years to come.
On a final note
You’ve mastered the fundamental glazing techniques that’ll transform your miniatures from basic paint jobs to professional-quality pieces. Remember to maintain thin paint consistency at 10:1 ratios, control brush loading, and build layers gradually. Don’t rush the drying process between applications. Practice these methods on test pieces before tackling your prize models. With consistent application and patience, you’ll achieve smooth changes and realistic depth that elevates your entire collection.