We are supported by our audience. When you purchase through links on our site, we may earn an affiliate commission, at no extra cost for you. Learn more. Last update on 5th June 2026 / Images from Amazon Product Advertising API.
Start by gathering essential brushes in sizes 2, 1, 000, and 5/0, plus a wet palette for proper paint thinning. Choose 2-3 base colors for visual cohesion and select primer based on your desired effects-black for shadows, white for vibrancy, grey for neutrality. Apply thin, even coats using proper brush control with downstrokes and minimal paint loading. Add depth with washes, paint fine details, then protect with clear varnish. The complete process involves strategic preparation and technique mastery.
Notable Insights
- Gather essential brushes (sizes 2, 1, 000, 5/0), wet palette, bright lighting, and primer for proper setup.
- Choose 2-3 base colors for your faction and plan your army’s color scheme before starting.
- Prime miniatures with thin, even coats using black, white, or grey primer based on desired effects.
- Apply paint in thin layers using proper brush control techniques and maintain consistency across all models.
- Protect finished miniatures with clear varnish and create textured bases using natural materials like sand.
Gathering Your Tools and Setting Up Your Workspace
Before you apply your first brushstroke to a Warhammer miniature, you’ll need the right tools and a properly organized workspace. Essential brushes include sizes 2, 1, 000, and 5/0 for thorough coverage. Start with synthetic brushes-they’re cost-effective and maintain shape well. The FOXBIT 7 Set Brushes offer professional performance at a lower cost and are specifically praised for their precision work on Warhammer figures.
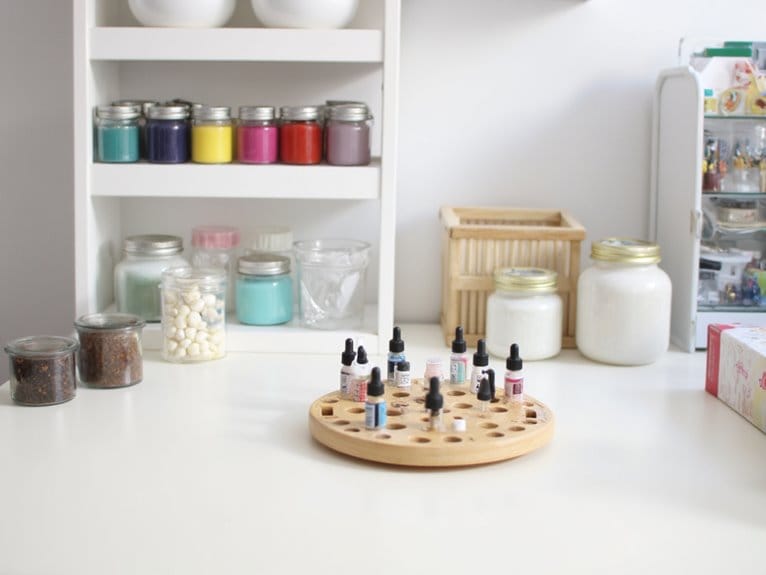
You’ll need a wet palette to thin paints properly, as paint straight from pots creates poor finishes.
Workspace organization directly impacts your painting quality. Position bright, natural-appearing lights to reveal true colors and fine details. Arrange brushes, paints, and palettes within arm’s reach to maintain workflow efficiency.
Use a miniature holder to stabilize models during painting, reducing hand fatigue and improving precision. A painting handle with 360-degree rotation provides enhanced control for detailed work and reduces strain during extended sessions. Keep a sharp hobby knife and fine-grit files nearby for mold line removal and surface preparation. Today’s painters can choose from multiple paint brands offering various formulations including speedpaints and contrast paints for different techniques and effects. For your first army, consider starting with a beginner-friendly kit that includes essential colors and tools to get you painting right away. Always apply primer to bare plastic miniatures first, as it creates the textured surface necessary for proper paint adhesion. When basing your finished models, ensure you have the appropriate precision applicator tips for controlled glue placement on intricate miniature bases.
Choosing the Right Models and Planning Your Color Scheme
Which army will capture your imagination for hundreds of hours of assembly, painting, and gameplay? Faction selection determines your painting journey’s direction. Space Marines offer forgiving details for beginners, while Tyranids provide organic surfaces ideal for experimenting with paint techniques.
Your color palette should complement your chosen faction’s lore. Start with 2-3 base colors for visual cohesion. Consider unit roles when planning schemes-characters need distinctive highlights, battleline troops require efficient batch painting methods. Popular paint brands like Vallejo, Citadel, and Army Painter offer faction-specific colors that ensure authentic army appearance. Base paints provide the solid coverage with high pigment density needed to establish your army’s foundation colors effectively.
For beginners starting their first army, consider paint sets with dropper-top designs that offer precise application control and prevent waste during extended painting sessions. Water-based formulas provide non-toxic options that dry to a waterproof finish while maintaining excellent adhesion properties.
| Faction | Primary Colors | Difficulty Level |
|---|---|---|
| Space Marines | Blue/Red/Green | Beginner |
| Tyranids | Purple/Bone/Chitin | Intermediate |
| Orks | Green/Brown/Metal | Beginner |
| Tau | White/Blue/Orange | Advanced |
| Death Guard | Green/Brass/Bone | Intermediate |
Army synergy extends beyond rules-consistent model options and paint schemes create visual unity across your force. Each faction has a faction codex that contains relevant painting guides and color scheme inspirations for authentic army appearance.
Priming Your Miniatures for Success
Before you apply a single drop of paint to your Warhammer models, you must prime them properly to guarantee professional results.
Your primer choice directly affects how your colors will appear-black primer creates natural shadows, white primer makes colors pop with vibrancy, and grey primer offers the most versatile neutral base.
You’ll need to master three critical areas: selecting the right primer color for your army’s scheme, applying thin even coats using proper spray techniques, and preparing your miniature surfaces through thorough cleaning and setup.
Choosing Primer Colors
Three primary primer colors dominate miniature painting: black, white, and grey, each fundamentally altering your painting workflow and final results.
Black primer excels at hiding missed spots and creating natural shadows. However, it desaturates colors and requires multiple coats for bright hues.
White primer maximizes color vibrancy and brightness but makes dark colors difficult to cover effectively.
Grey primer offers the ideal compromise-it supports both light and dark paints without extreme drawbacks.
Understanding primer color psychology helps you select the right foundation. Dark armies benefit from black’s shadowing effect, while bright color schemes demand white’s saturation boost.
Grey works universally.
Essential primer application tips include maintaining consistent spray distance and applying thin, even coats.
Test different primers on spare models to understand their impact on your chosen color palette.
Professional acrylic-based primers provide superior adhesion and durability under gaming conditions, making them ideal choices for Warhammer armies that will see regular tabletop use.
Application Techniques
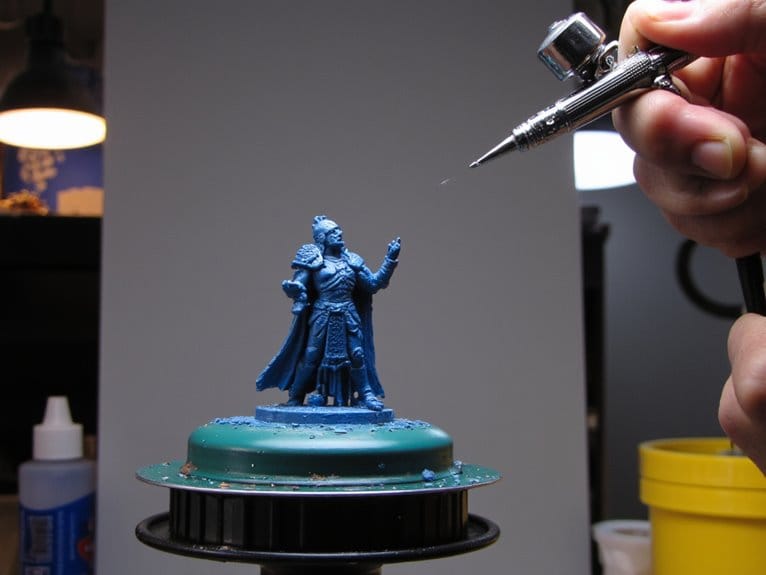
Proper priming application separates amateur paint jobs from professional-quality miniatures. Master these spray techniques to achieve professional results.
Shake your primer can vigorously for one minute minimum. Position yourself 6-12 inches from the miniature. Apply thin, even coats rather than single heavy layers.
For zenithal priming, start with dark primer coverage, then add lighter tones from above. This creates natural color gradients that enhance three-dimensional definition.
Warm old cans in hot water briefly to improve flow consistency.
- Light misting passes building gradually to full coverage
- Rotating miniatures to reach all surface angles
- Primer pooling in deep recesses and crevices
- Smooth gradient transformations from shadow to highlight
- Complete surface adhesion without detail obscuration
Allow 15-30 minutes drying time before handling. Work in well-ventilated areas wearing protective equipment.
For advanced painters seeking precision control, professional dual-action airbrushes like the Iwata Eclipse series offer superior paint flow management and detail work capabilities compared to traditional spray cans.
For Warhammer miniatures specifically, The Army Painter Base Primer provides excellent adhesion on plastic surfaces while preserving fine details essential for tabletop gaming models.
Surface Preparation Tips
Perfect primer application means nothing if your miniature’s surface isn’t properly prepared. Surface cleaning removes mold release agents and oils that prevent primer adhesion. Wash miniatures in warm soapy water with a brush, then dry completely to avoid moisture trapping.
Assembly techniques matter greatly. Complete full assembly or create logical subassemblies before priming. Fill gaps between parts for smooth surfaces. Remove mold lines and flash using files or hobby knives-these imperfections become magnified under primer and paint. Proper surface preparation significantly enhances adhesive performance when you later add basing materials to complete your miniatures.
Handle miniatures by their bases or use holders to avoid contaminating cleaned surfaces with skin oils. Clean surfaces guarantee primer bonds properly, creating the foundation for your entire paint job. Professional-grade primers like Vallejo White Acrylic provide exceptional adhesion to resin and plastic surfaces, ensuring your topcoats perform optimally. Remember that plastic models require flexible acrylic formulations to avoid cracking when you apply protective varnishes later. High-pigment formulations guarantee better covering power when applying subsequent paint layers over your primer.
Skip these steps, and you’ll fight adhesion problems throughout the painting process.
Applying Base Colors With Confidence
Your base color selection determines the foundation of your entire army’s appearance and directly affects how subsequent layers will perform.
You’ll need to master brush control techniques that deliver smooth, even coverage while preserving the miniature’s fine details.
These two fundamental skills work together to create professional-looking results that’ll give you confidence as you paint each model in your army.
Water-based paints with particle sizes under 35μm prevent airbrush clogging and ensure consistent application whether you’re using traditional brushes or airbrush techniques.
For beginners starting their Warhammer painting journey, non-toxic acrylic paints with high pigmentation provide the safest and most reliable foundation for achieving consistent coverage across multiple miniatures.
Ready-to-spray formulas eliminate the need for mixing paint ratios and streamline your workflow, allowing you to focus on technique rather than paint preparation.Quick-drying acrylics become touch-dry within 15-30 minutes, allowing you to apply multiple coats efficiently and maintain momentum throughout your painting session.
Choosing Right Base Colors
Three fundamental principles guide base color selection for your first Warhammer army: foundation strength, visual cohesion, and thematic consistency.
Muted and natural tones create balanced visual foundations that won’t compete with sculptural details. Dark neutrals like Abaddon Black or Corvus Black work best for base rims, maintaining focus on the miniature itself. Your base color selection directly influences subsequent shading and highlighting effectiveness.
Consider these visualization techniques:
- Steel Legion Drab for industrial warfare environments
- Castellan Green for forest deployment schemes
- Rhinox Hide for muddy battlefield conditions
- Mechanicus Standard Grey for urban combat zones
- Wraithbone for desert or bone-themed armies
Color theme consistency requires matching your army’s narrative environment. Bright or vibrant base colors distract from miniature sculpts and disrupt visual harmony across units. Water-based acrylic paints offer non-toxic formulas that make cleanup easier and dry quickly to enhance your painting efficiency.
For enhanced efficiency, contrast paints can deliver base, shade, and highlight effects in a single application when applied over light primers like Wraithbone.
Brush Control Techniques
Mastering brush control transforms chaotic paint application into precise, professional-looking base coats that form the foundation of every successful Warhammer army.
Hold your brush like a pencil with a light grip to reduce fatigue and improve accuracy. Rest your pinky on the painting surface for enhanced brush stability during detailed work.
Load minimal paint on bristles to prevent clumping. Wipe excess paint on palette edges before application. Use downstrokes with varying pressure for effective stroke variation-light pressure for thin coats, increased pressure for wider coverage areas.
Position your elbows on the table to minimize unwanted movement. Move the brush using your wrist and elbow rather than just fingers for steadier lines.
Rotate the miniature frequently to maintain comfortable angles and avoid awkward hand positions throughout your painting session.
Adding Depth With Washes and Shades
Once you’ve established solid basecoats on your miniatures, washes and shades become essential tools for creating realistic depth and shadow without complex brush techniques.
These wash techniques automatically settle into recesses, emphasizing sculptural details while creating natural shading effects. Start with bright basecoats that compensate for the darkening effect.
Dilute washes 1:1 with Lahmian Medium for smooth tonal shifts on large surfaces. Apply multiple thin layers rather than single heavy coats. Control methods include dampening specific areas before application and positioning miniatures strategically during drying.
For beginners, Vallejo Game Color wash sets offer excellent versatility across different miniature themes with their eight-bottle collections that include essential colors like sepia and black. Most quality washes feature water-based formulations that provide excellent adhesion on plastic and resin miniatures while drying completely within 30 minutes to an hour. If your washes appear too thick or dry too quickly during application, consider adding a few drops of flow improver to extend working time and achieve smoother coverage. Professional artists also benefit from non-toxic formulations that provide safe handling while maintaining excellent lightfastness and fade resistance during long-term projects.
- Dark wash pooling naturally in armor panel joints and weapon grooves
- Brown-tinted wash creating weathered, battle-worn cloth textures
- Purple wash over red basecoat producing rich, saturated crimson tones
- Multiple thin coats building gradual shadow depth across curved surfaces
- Clean brush lifting excess wash from raised detail edges
Painting Essential Details and Making Touch-ups
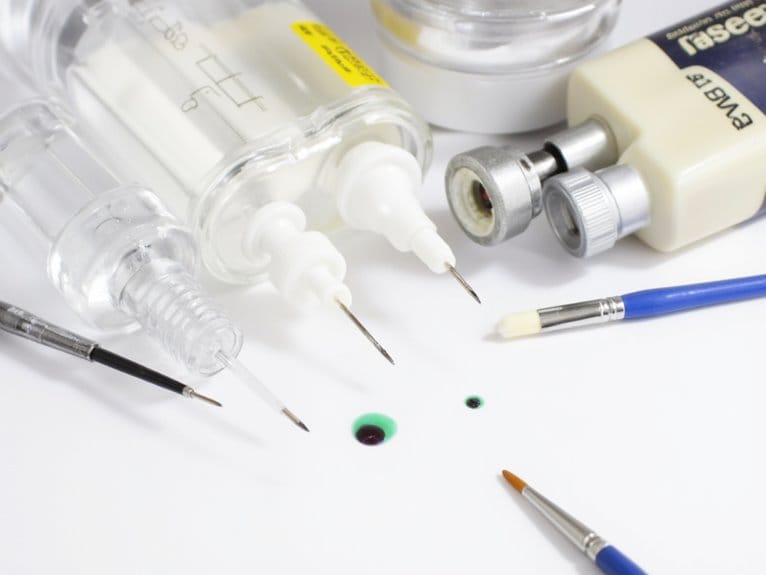
With your shadows and depth now properly established through washes, the time comes to refine your miniatures with precise detail work and careful corrections.
Apply paint in thin, uniform layers using fine detail brushes (size 0 or smaller) to maintain crisp surface details.
Focus on painting highlights along raised edges and armor plates with lighter colors containing high white pigment content.
Address correcting mistakes immediately by repainting errors with base coat colors before proceeding.
Use a magnifier and adequate lighting for accuracy during touch-ups. Allow complete drying time between corrections to prevent paint smearing.
Maintain army-wide consistency by standardizing colors and techniques across all models.
Keep detailed records of paint mixes and layer sequences.
Test your final detail scheme on a single model before applying it army-wide.
Choose brushes with nylon bristles that resist shedding and maintain their shape through multiple cleaning cycles.
Consider brushes with triangular handles for enhanced grip and control during intricate detail work, as the ergonomic design reduces hand fatigue during extended painting sessions.
Clean your brushes thoroughly with brush cleaners designed specifically for miniature painting to maintain their fine tips and extend their lifespan throughout the detailing process.
Look for brushes with rust-proof ferrules that ensure the metal band connecting the bristles to the handle won’t deteriorate over time with repeated cleaning and use.
Protecting Your Work and Creating Finished Bases
After completing your detailed paintwork, protective sealing becomes essential for preserving hours of careful effort during gameplay and transport.
Protect your miniature masterpieces with proper sealing techniques to ensure durability through countless battles and careful handling.
Apply clear varnish or matte sealer in thin, even coats to prevent chipping and wear. Spray sealers provide uniform coverage but require proper ventilation. Consider products like Vallejo Polyurethane Varnish which offers maximum durability with a non-yellowing formula that preserves paint vibrancy while providing scratch resistance.
For textured bases, use natural materials like bark chips or sand secured with PVA glue.
Apply texture paste in thin layers to avoid obscuring details. Basecoat in earth tones, then dry brush progressively lighter shades to highlight raised surfaces.
Storytelling bases unify your army’s visual theme through consistent elements like cobblestones or battlefield debris.
Add grass tufts sparingly for realism.
Essential Base Materials:
- Fine sand and bark chips for rocky terrain texture
- PVA glue for securing loose basing materials
- Texture paste applied with sculpting tools
- Static grass tufts placed strategically
- Matte varnish for natural-looking finishing touches
On a final note
You’ve completed your first Warhammer army using proper techniques and quality materials. Your models now feature consistent base coats, strategic wash applications, and clean detail work. You’ve protected them with appropriate sealers and finished the bases to tabletop standards. These foundational skills will improve with practice. You can now field a painted army with confidence. Continue refining your techniques on future models to achieve increasingly professional results.