We are supported by our audience. When you purchase through links on our site, we may earn an affiliate commission, at no extra cost for you. Learn more. Last update on 12th June 2026 / Images from Amazon Product Advertising API.
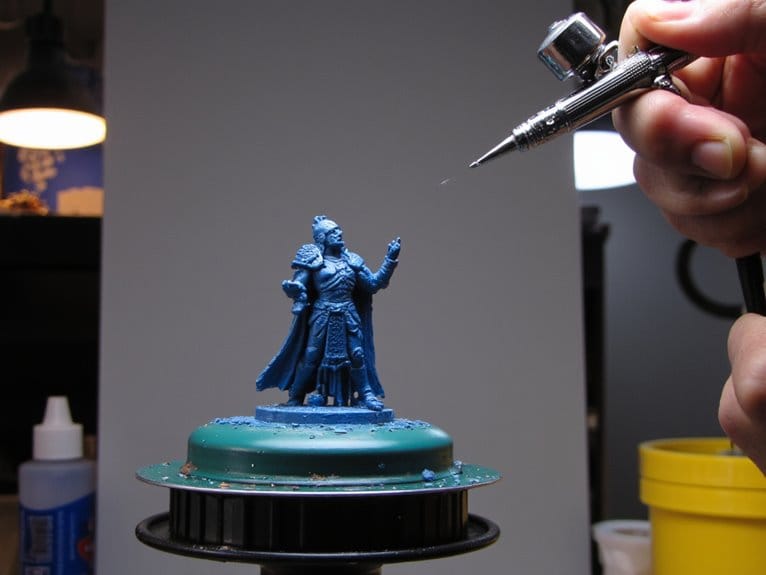
Start with a 1:1 ratio of paint to distilled water for most acrylic paints, keeping water content below 30% to preserve binder strength. You can also use commercial airbrush thinners like Vallejo or Tamiya for superior consistency. Mix in a lidded container and shake for 1-2 minutes, then strain to eliminate clumps. Test on scrap material first, adjusting ratios based on your application needs. Proper preparation guarantees ideal spray patterns and prevents costly equipment damage.
Notable Insights
- Start with a 1:1 paint-to-thinner ratio using distilled water, commercial airbrush medium, or specialty thinners for optimal spray consistency.
- Keep water content below 30% to maintain acrylic binder effectiveness and prevent weakened adhesion on surfaces.
- Use secure containers and mini whisks to blend mixtures for 1-2 minutes, avoiding air bubbles during the mixing process.
- Test thinned paint on scrap surfaces first and adjust air pressure to 15-20 PSI for proper atomization through the airbrush.
- Strain mixtures to eliminate pigment clumps and clean the airbrush frequently to prevent clogging and maintain optimal performance.
Understanding Different Types of Thinners for Acrylic Paints
When choosing the right thinner for your acrylic paint airbrush application, you’ll encounter five primary options that each affect your paint’s performance differently.
Water serves as the most common choice, diluting paint up to 30% while maintaining integrity, though exceeding this ratio weakens adhesion and creates watercolor-like transparency.
Acrylic mediums preserve your paint’s binder strength and gloss while adjusting flow properties for peak airbrushing results. Mixing paint with medium provides enhanced surface coating compared to water-based thinning methods.
Lacquer thinners work only with lacquer-based acrylics and aggressively dissolve standard water-based formulations. These potent chemical solvents are regarded as superior cleaning solutions compared to acetone and mineral spirits.
Specialty thinners are commercially formulated specifically for airbrush use, containing leveling agents that enhance sprayability without compromising film integrity.
Isopropyl alcohol speeds drying but risks adhesion problems when overused.
Each thinner type fundamentally alters your paint’s chemical composition and final appearance.
Essential Materials and Tools for Thinning Acrylic Paint
Success in thinning acrylic paint for airbrushing depends entirely on having the right materials and tools at your disposal. Your essential supplies include distilled water, rubbing alcohol ($0.77 per bottle), and commercial airbrush mediums like Liquitex Airbrush Medium or Valo thinner. These prevent paint breakdown that occurs with excessive water dilution.
For mixing tools, you’ll need containers with secure lids for thorough shaking and blending. Mini whisks guarantee homogeneous mixtures, while dropper bottles provide precise thinner application without waste. Measuring cups with volume marks maintain consistent ratios across batches.
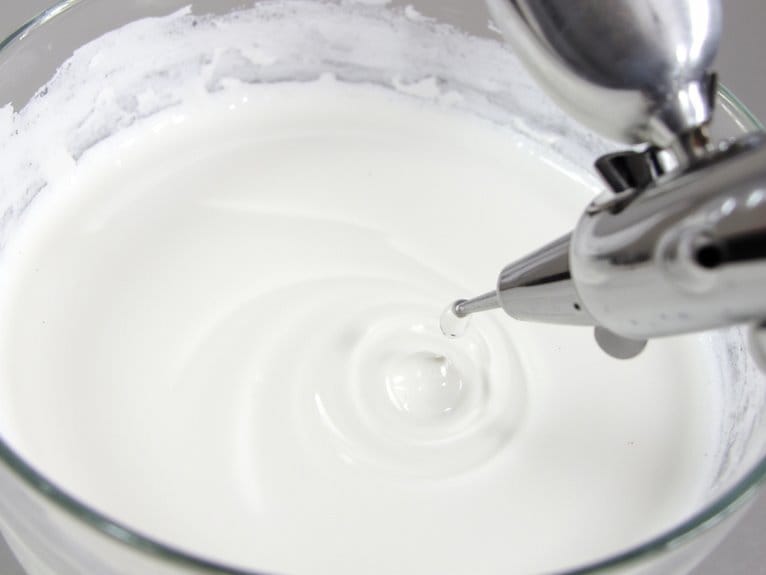
Always use strainers after mixing to remove pigment clumps that cause airbrush clogging. The finished mixture should achieve a milk-like consistency for optimal spray performance. Professional-grade nylon bristles can also be used for additional mixing when needed.
Store pre-mixed paints in airtight containers and transfer large thinner bottles into smaller applicator bottles for better control and precision dispensing. Many ready-to-spray formulas eliminate the need for initial thinning and provide consistent flow characteristics that streamline your painting workflow. After each painting session, use fast-acting cleaners to remove any dried paint residue and maintain your airbrush in optimal condition. Water-based thinners are particularly recommended for indoor painting sessions as they produce minimal fumes and offer excellent safety properties.
Recommended Thinning Ratios and Mixing Techniques
Three fundamental ratios form the foundation of successful acrylic paint thinning for airbrush applications.
Start with a 1:1 ratio of paint to thinner for most standard acrylics. This baseline prevents common thinning mistakes while ensuring proper flow through your airbrush nozzle.
Transfer your paint and thinner into a lidded container, then shake vigorously for 1-2 minutes. This thorough mixing creates uniform spray consistency.
You can also use a mini whisk or stirring rod to blend without introducing air bubbles.
Adjust ratios based on your specific needs. Fine detail work requires higher dilution, while base coats need less thinning for opacity.
Test ratios on scrap surfaces first. Remember that proper paint thinning is typically recommended at 20-30% dilution for optimal airbrush performance. Remember to shake your mixture regularly during use, especially with metallic paints where pigment settling affects performance.
Some manufacturers offer paints with particle sizes below 35μm that are specifically designed to prevent clogging during airbrushing applications.
Working With Distilled Water as a Primary Thinner
Using distilled water as your primary thinner requires precise ratios to maintain paint integrity while achieving ideal flow characteristics.
You’ll need to start with conservative water-to-paint ratios of 1:4 to 1:2, gradually increasing dilution while monitoring for binder breakdown that manifests as color separation or clumping.
Proper mixing techniques become critical since distilled water lacks the stabilizing additives found in commercial thinners, making your paint mixture more susceptible to degradation if handled incorrectly.
Basic Water-to-Paint Ratios
When thinning acrylic paint for airbrush applications, the 1:1 ratio of distilled water to paint serves as the most reliable starting point for achieving ideal spray consistency. This equal-parts mixture provides superior paint consistency while maintaining color mixing integrity across most acrylic formulations.
Essential considerations for water-to-paint ratios include:
- Standard applications: Use 1:1 ratio for base coats and general coverage
- Fine detail work: Increase dilution up to 5ml paint per 3oz water for weathering effects
- Equipment compatibility: Lower air pressure setups require thinner mixtures
- Paint quality variables: Premium airbrush acrylics need minimal thinning compared to craft paints
Always start with less water and adjust gradually. Over-thinning causes paint breakdown and poor adhesion, while insufficient dilution leads to clogging and uneven spray patterns. Proper dilution ensures strong adhesion properties that prevent peeling and maintain the finish quality essential for professional airbrush results.
Preventing Paint Breakdown Issues
While distilled water offers an economical and accessible thinning solution, improper dilution ratios can compromise your paint’s structural integrity and create long-term durability problems.
Keep water content below 30% to maintain acrylic binder effectiveness. Testing consistency on scraps guarantees ideal flow without breakdown.
Adding acrylic mediums to water creates superior thinning solutions that preserve film integrity compared to pure water. Mix only what you’ll use immediately-water-thinned paints develop mold during extended storage.
Surface preparation becomes critical for enhancing adhesion when using water thinners. Consider flow improvers or controlled amounts of isopropyl alcohol to accelerate drying and reduce contamination risks.
Brand compatibility varies greatly; some manufacturers require proprietary thinners for ideal performance while others accept water dilution effectively.
After thinning, maintain your airbrush equipment with non-toxic cleaners that effectively remove acrylic residues without damaging sensitive components.
Mixing Water Properly
Three fundamental principles govern successful distilled water mixing: precise ratios, controlled techniques, and systematic testing.
Start with a 1:1 paint-to-water ratio and adjust based on your airbrush’s requirements. Your choice of mixing containers directly impacts results-sealed jars enable vigorous shaking for uniform consistency, while open containers invite contamination.
Essential stirring techniques include:
- Use small whisks or stirrers to break down pigment clumps thoroughly
- Shake metallic paints vigorously before adding water to maintain suspension
- Mix gradually in small increments to prevent over-thinning
- Avoid prolonged stirring that introduces air bubbles
Test spray patterns after each adjustment. Properly mixed paint flows smoothly without separating, maintaining consistent atomization at 18 psi.
Remember that different manufacturers require varying dilution ratios for peak performance.
Using Commercial Airbrush Thinners and Flow Improvers
Commercial airbrush thinners offer a superior alternative to water for achieving ideal paint consistency in airbrush applications. These specialized formulations contain leveling agents and flow improvers that prevent clogging while maintaining prime viscosity.
Major thinner brands like Vallejo and Tamiya work effectively with most water-based acrylics, including Humbrol, Revell, and Gunze H series paints.
Start with a 1:1 ratio of thinner to paint, then adjust based on your specific requirements. The additives in commercial thinners prevent pigment separation and guarantee consistent spray patterns.
They dry slower than water, reducing airbrush maintenance issues in warm conditions. You can also combine 50% distilled water with 50% commercial thinner to control drying time while retaining flow improvement benefits.
When using cordless airbrush models, ensure your paint mixture maintains proper viscosity since these systems typically operate within 18-30 PSI ranges for optimal performance.
Alternative Thinning Options With Rubbing Alcohol
Rubbing alcohol offers an affordable alternative to commercial thinners when you’re working with specific acrylic paint formulations.
You’ll typically mix isopropyl alcohol with distilled water at ratios of 25-30% alcohol to 70-75% water, creating an effective thinning solution that costs considerably less than branded products.
This approach works particularly well with hobby-grade acrylics like Tamiya, though you’ll need to test compatibility since craft paints often don’t respond favorably to alcohol-based thinners.
Alcohol-to-Paint Ratios
When you’re thinning acrylic paint with rubbing alcohol for airbrush use, the most effective starting ratio is 1:1 – equal parts paint and alcohol. This ratio provides ideal fluidity and sprayability without compromising the paint’s binder structure.
The 1:1 ratio offers several advantages over water-based thinning methods:
- Fast alcohol evaporation reduces pooling and runs during application
- Improved paint consistency maintains pigment suspension better than water
- Lower airbrush pressure requirements compared to water-thinned paint
- Reduced clogging in airbrush nozzles due to smoother flow characteristics
You’ll want to test this ratio with your specific paint brand first. Some formulations may require slight adjustments around the 50% mark.
Mix thoroughly and spray test patterns on scrap material before committing to your final project.
Cost and Availability
Beyond achieving the right consistency with a 1:1 alcohol ratio, you’ll find that rubbing alcohol offers considerable cost advantages over other thinning alternatives. Isopropyl alcohol typically costs under $1 per bottle at pharmacies, supermarkets, and craft stores. This makes it one of the most affordable options for regular airbrushing work.
| Thinner Type | Cost Range | Availability | Concentration |
|---|---|---|---|
| Rubbing Alcohol | Under $1 | Widely Available | 70-91% |
| Commercial Thinners | $8-15 | Specialty Stores | Varies |
| Windex | $3-5 | Moderate | Low Alcohol |
| Denatured Alcohol | $2-4 | Limited | 95%+ |
| Water | Free | Universal | N/A |
Bulk purchases reduce per-unit costs considerably for frequent users. Choose 91% concentration for faster evaporation and minimal residue formation.
Brand-Specific Considerations for Different Acrylic Paints
Different acrylic paint manufacturers formulate their products with distinct viscosities, pigment concentrations, and chemical compositions that directly affect your thinning requirements and airbrush performance.
Tamiya paints work best with 1:1 thinning ratios using dedicated acrylic thinners. They’re formulated for smooth flow but require careful handling to prevent skin formation.
Gunze offers thinner initial consistency, making paint layering techniques more effective with multiple thin coats. Their extensive color range provides exact shade matching for specific projects.
Consider these brand-specific factors:
- Vallejo Model Air comes pre-thinned for 0.2mm nozzles
- Vallejo Model Color requires thinning to milky consistency
- Tamiya and Gunze both form surface skin during storage
- Budget brands like XDOVET need testing for ideal ratios
Controlling viscosity varies considerably between manufacturers. Environmental conditions and nozzle size influence your final thinning requirements regardless of brand.
Vallejo paints offer exceptional adherence to multiple surfaces while maintaining their high pigmentation standards, making them particularly reliable for airbrush applications across different miniature materials.
Quality acrylics feature high pigmentation characteristics that resist fading while providing excellent coverage for various painting techniques.
Vallejo’s water-based acrylic formulation provides superior self-leveling properties that enhance airbrush performance when properly thinned. Many professional modelers achieve optimal results when they work directly from the bottle with common airbrush nozzles for specific paint formulations.
Special Techniques for Metallic and Primer Paints
Metallic and primer paints require specialized thinning approaches that differ considerably from standard acrylic applications.
You’ll need to adjust your mixing ratios, air pressure settings, and application techniques to handle the unique properties of metallic particles and primer formulations.
These paint types present specific challenges including clogging risks, pigment settling, and adhesion requirements that demand precise technical modifications to your standard airbrushing process.
Metallic Paint Considerations
When working with metallic paints in your airbrush, you’ll need to adjust both your thinning ratios and techniques to preserve the reflective properties that make these paints distinctive.
Metallic paint characteristics require specific attention to pigment settling and adhesion. Thin acrylic metallics with water or artist-grade mediums like Liquitex Satin Medium. Avoid acetone, alcohol, or surfactants that disrupt pigment distribution.
Key considerations for ideal metallic paint application:
- Target skim milk consistency for 20-30 PSI spraying pressure
- Use precise measuring tools rather than estimating ratios
- Apply over dark or black primer bases for enhanced depth
- Build coverage through thin, layered coats
Maintain 40-50% thinning ratios while stirring thoroughly to guarantee uniform pigment dispersion. Over-thinning separates particles and reduces metallic luster considerably. Professional metallic paints often contain aluminum flake and specialized micra blends that enhance shimmer but require gentle handling to maintain their reflective properties during the thinning process.
Primer Thinning Adjustments
Primer paints present unique thinning challenges that differ substantially from standard acrylics due to their higher pigment density and adhesion-promoting additives.
You’ll need a 3:1 or 4:1 primer-to-thinner ratio to maintain proper primer adhesion while preventing airbrush clogs. Target a skimmed milk consistency for ideal atomization.
Always add thinner before primer in your airbrush cup. This prevents thick paint from immediately clogging your nozzle. Use manufacturer-specific primer thinners rather than water, which can compromise surface tension and flow properties.
A small amount of 90%+ isopropyl alcohol improves flow and reduces buildup.
Apply multiple thin coats instead of single thick layers. Use a larger 0.4mm nozzle for easier primer flow.
Clean your airbrush frequently during use, as primers dry faster and create more residue than standard acrylics.
Benefits of Proper Thinning for Airbrush Performance
Precision in paint thinning transforms your airbrush from a temperamental tool into a reliable instrument that delivers professional results.
Proper viscosity control enables superior atomization consistency, producing fine spray patterns essential for detailed color blending. Your airbrush techniques improve dramatically when paint flows smoothly through the nozzle without clogging or sputtering.
Key performance benefits include:
- Enhanced atomization – Reduces graininess and creates uniform coverage
- Improved paint adhesion – Properly thinned paint bonds better to prepared surfaces
- Extended equipment life – Less buildup means fewer deep cleanings and component replacements
- Consistent finish quality – Maintains intended gloss levels and color saturation
Surface preparation becomes more effective when thinned paint levels evenly without pooling. Regular cleaning with properly thinned paint prevents clogs and maintains overall airbrush performance.
You’ll achieve professional-grade results while reducing paint waste and maintenance time. Most dual-action airbrushes operate optimally between 20 to 35 PSI, ensuring proper paint atomization for both detailed work and broader coverage applications.
Troubleshooting Common Thinning Problems and Solutions
Even experienced airbrush artists encounter thinning problems that can derail an otherwise perfect project.
Paint sputtering indicates poor thinner compatibility with your specific acrylic brand. Switch to distilled water or manufacturer-recommended thinners immediately. Clumping occurs when tap water minerals contaminate your mixture. You’ll notice uneven spray patterns and premature tip dry.
Test thinning consistency using the “tip test” method. Pour paint down your container’s side-it should flow like milk, not honey. Adjust ratios incrementally, starting at 1:1 paint-to-thinner.
Monitor air pressure settings; thick paint requires 15-20 PSI minimum for proper atomization.
Clean your airbrush between color changes to prevent residue buildup. If paint fails to eject, increase pressure gradually while checking nozzle alignment.
Document successful ratios for future reference.
On a final note
You’ve now mastered the essential techniques for thinning acrylic paint effectively. Proper ratios between 10:1 and 4:1 paint-to-thinner will deliver consistent results. Remember that distilled water works for basic applications, but commercial thinners provide superior flow characteristics. Test your mixture’s viscosity before spraying-it should flow smoothly off your stirring tool. With these fundamentals, you’ll achieve professional-quality finishes while preventing clogs and maintaining peak airbrush performance.