We are supported by our audience. When you purchase through links on our site, we may earn an affiliate commission, at no extra cost for you. Learn more. Last update on 20th June 2026 / Images from Amazon Product Advertising API.
Start with a 1:3 ratio of water to paint for basecoats, adjusting to 1:1 for layering techniques. Your properly thinned paint should resemble skimmed milk consistency and flow smoothly without clumping. Use a wet palette to maintain moisture and load only 15-25% of your brush tip for detail work. Test mixtures on separate patches before main application, ensuring each layer dries completely to prevent lifting. Master these fundamentals to access advanced glazing and blending techniques.
Notable Insights
- Start with a 1:3 water-to-paint ratio for basecoats and 4:1 for layering, aiming for skimmed milk consistency.
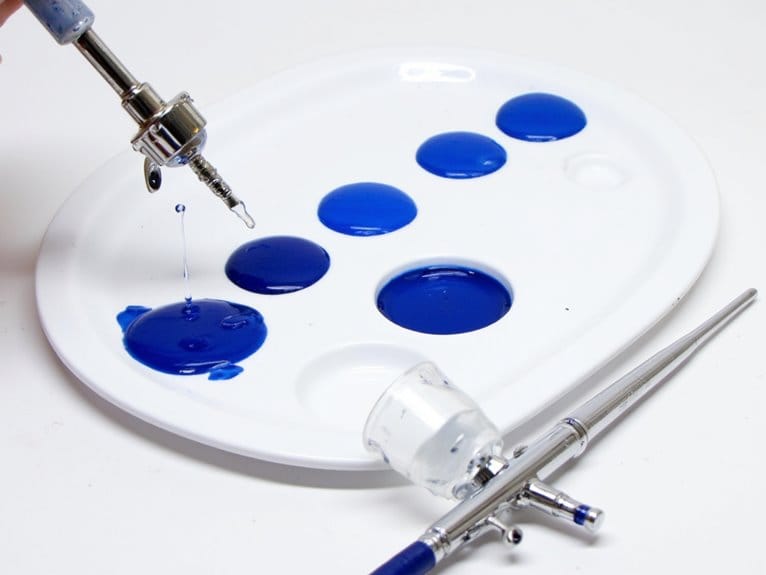
- Use droppers for precise measurement and test mixtures on palettes before applying to miniatures.
- Load only 15-25% of brush tip and dab excess on palette to prevent pooling during application.
- Allow each thinned layer to dry completely before applying the next to avoid lifting previous coats.
- Avoid overthinning which destroys pigment coverage and excessive water which weakens paint adhesion to surfaces.
Understanding Paint Thinning Ratios and Consistency
When you’re starting miniature painting, understanding paint thinning ratios becomes crucial for achieving professional-quality results.
Begin with 1 part water to 3 parts paint for basecoats. This ratio improves consistency and reduces brush marks efficiently.
Start your basecoats with a 1:3 water-to-paint ratio for smoother application and fewer visible brush strokes.
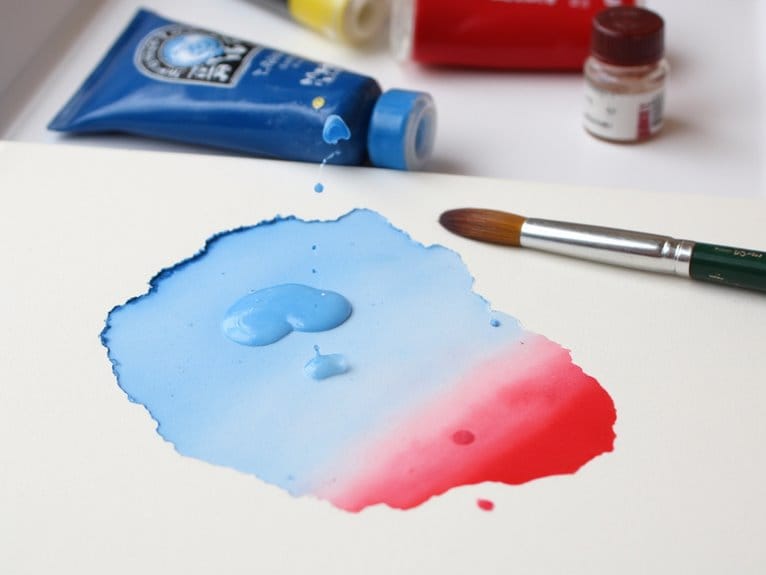
Different colors require different approaches. White paints are naturally thicker and need more thinning than reds or yellows. Paint viscosity varies notably between manufacturers, so you’ll need to adjust ratios accordingly.
For layering techniques, shift to 4 parts thinning solutions to 1 part paint. This creates transparency and smoothness for gradual color building.
Properly thinned paint resembles skimmed milk consistency. It should flow smoothly without pooling or leaving brush marks.
Test mixtures on palettes before application to detect impurities and guarantee peak performance. Many pre-thinned paints are specifically formulated for airbrush use but can also work well for traditional brush painting when you need consistent flow properties. Wet palettes enhance workability and extend drying time, keeping your thinned paints fresh between painting sessions. Using quality wet palettes can reduce paint waste by 60-80% compared to traditional mixing surfaces. High-quality acrylic paints provide better pigmentation and coverage when properly thinned, making them essential for achieving professional results. Apply multiple thin layers to preserve fine details and textures on your miniatures rather than attempting coverage with a single thick coat. Professional flow improvers can extend your working time by 30-50% while maintaining color intensity throughout your painting session.
Essential Tools and Mediums for Effective Thinning
The right tools and mediums transform paint thinning from guesswork into precise control. A wet palette stands as your primary weapon, maintaining moisture and consistency while preventing paint from drying mid-session.
You’ll need droppers or pipettes for precise measurement-maintaining consistent ratios prevents over-thinning disasters.
Paint medium offers superior performance compared to water alone. Flow improver enhances paint movement without breaking down pigments. Wash medium creates controlled transparency for shading work. Matte medium reduces density while preserving finish quality.
These specialized mediums maintain pigment suspension and color vibrancy that water thinning often compromises. For precision work requiring fine details, airbrush systems can deliver consistently thinned paints with optimal viscosity control.
Fine detail brushes work effectively with properly thinned paints. Stainless steel mixing balls help redistribute settled pigments in your paint bottles before thinning begins. Measuring tools enable repeatable ratios during batch painting sessions. Thinner medium serves as the ideal choice for diluting paint while preserving the integrity of the acrylic binder properties.
Your mixing palette provides the testing ground-always verify consistency before applying to miniatures.
Proper Application Techniques for Thinned Paints
Once you’ve achieved the right paint consistency, your brush technique becomes critical for successful application on miniatures.
Loading your brush properly means picking up just enough thinned paint to flow smoothly without pooling in recessed areas or flooding fine details.
Building color through multiple thin layers requires patience with drying times, but this approach prevents the chalky buildup and obscured details that result from applying thick coats. Understanding drying time effects helps you plan your painting sessions more effectively, as slower-drying thinners can extend your working time for blending techniques.
For airbrush applications, ready-to-spray formulas eliminate the guesswork in paint ratios and provide consistent flow characteristics that reduce clogging issues during detailed work.
Using specialized brushes like liners, rounds, and angled spot brushes can significantly improve your control when applying thinned paints to different areas of your miniatures.
After completing your paint work, applying protective varnishes preserves your detailed work against wear, scratches, and environmental damage while maintaining the visual quality of your finished miniature.
Brush Loading and Control
Mastering brush control with thinned paints requires precise loading techniques that differ markedly from standard paint application methods. Load only 15%-25% of your brush tip for detail work to maintain precision without overloading. For larger areas, use up to 50% of the brush belly but never beyond halfway to prevent paint seeping into the ferrule.
Your brush technique with thinned paints demands careful paint management. Always unload your brush after dipping by dabbing it on a palette to avoid puddling. Keep synthetic bristles moist before loading paint to enhance flow control. Synthetic nylon bristles offer superior performance with thinned paints as they resist shedding and maintain their shape through multiple cleaning cycles.
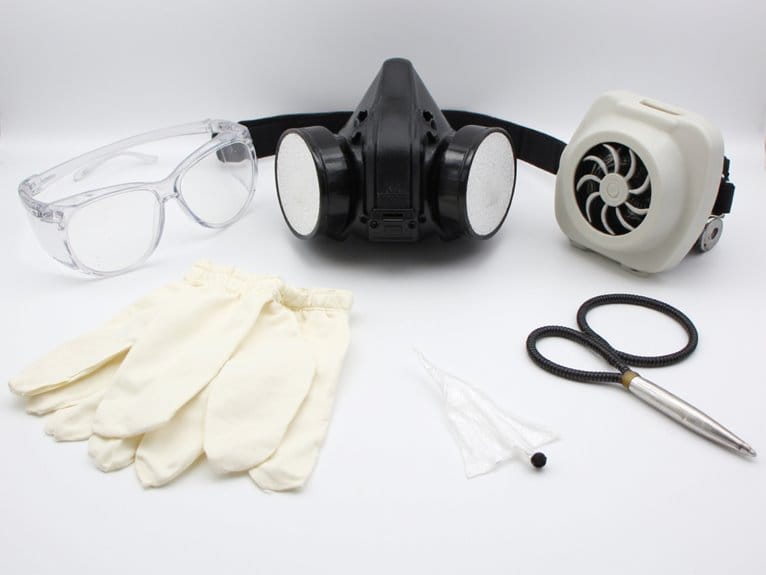
Thinned paints increase capillary action, so avoid deep dipping into paint pots. Use light pressure and adjust stroke direction according to miniature texture for ideal results. Ergonomic handles reduce hand fatigue during prolonged painting sessions, which becomes especially important when working with thinned paints that require steady brush control. The triangular handle design of precision brushes provides enhanced grip and control during intricate detail work, reducing hand fatigue when working with thinned paints for extended periods. Always maintain proper ventilation when painting to ensure optimal drying conditions and prevent moisture buildup that can affect paint flow.
Layering and Drying Times
Successful layering with thinned paints depends on achieving the ideal consistency ratio of 1:1 to 1:3 paint-to-thinner, creating semi-transparent coats that build depth without obscuring surface details.
Each layer must completely dry before applying the next to prevent lifting or unintentional blending. You’ll notice thinned paints dry faster than thick applications, allowing multiple layers per session.
Proper layering techniques require working from larger to smaller areas with each successive coat. Apply progressively lighter shades, covering slightly less area than the previous layer. This creates natural light simulation and realistic depth.
Drying considerations vary greatly based on ambient temperature, humidity, and paint brand. Tacky paint causes streaking when overcoated. Transparent pigments allow light to pass through layers, creating the soft, graduated effects essential for realistic miniature painting.
Use controlled brush strokes with moderate pressure to prevent pooling. Multiple thin coats produce smoother transitions than single thick applications. Fast-drying formulas improve workflow efficiency and minimize waiting time between successive applications.
For those seeking even smoother application with extremely thin paint, airbrush compressors can provide precise pressure control ranging from 15-86 PSI for professional-quality miniature painting results.
When securing painted miniatures to bases, higher viscosity adhesives maintain structural integrity on textured surfaces and provide superior bonding for your finished models.
How Thinning Improves Your Miniature Painting Quality
When you thin your paints properly, you’ll achieve dramatically smoother coverage that preserves every sculpted detail on your miniatures.
Thick, unthinned paint fills in recesses and obscures fine textures, while thinned paint flows into areas evenly without building up in unwanted spots.
This improved paint flow also enables advanced techniques like glazing and wet blending that require precise transparency control and extended working time.
Superior paints with higher pigment concentration maintain excellent coverage even when thinned, often requiring only 1-2 thin coats to achieve professional results.
Smooth Coverage and Detail
Although many painters rush to apply paint straight from the bottle, thinning your acrylics transforms mediocre miniature work into professional-quality results.
Proper coverage techniques require paint consistency similar to skimmed milk. This fluidity eliminates brush marks and prevents clumping across miniature surfaces. Thick paint obscures fine surface details by filling recesses and covering sculpted features. Thinning allows paint to sit lightly on your model, maintaining crisp textures and visible engravings.
Detail preservation becomes critical when working with intricate miniatures. High-concentration pigments in quality acrylic paints deliver rich, vibrant colors even when thinned to proper consistency. Base paints with high pigment density maintain excellent coverage even when properly diluted for smooth application.
Thin layers preserve original sculpting while enabling smooth color application. You’ll achieve gradual build-up through multiple translucent coats rather than single opaque layers. This approach maintains surface definition essential for subsequent highlighting and shading techniques. Properly thinned paint flows into recesses without pooling, ensuring even coverage while preserving every sculpted element. For optimal results, consider using specialized Airbrush Thinner designed specifically for acrylic paints to maintain paint quality while achieving the perfect consistency. While contrast paints can achieve base, shade, and highlight in single applications, they still benefit from proper thinning techniques over light primers.
Advanced Effects and Blending
Thinned paint opens up advanced techniques that separate professional-quality miniatures from basic tabletop work. When you dilute paint to milk-like consistency, you enable glazing techniques that build rich, complex colors with proper color temperature changes. This creates realistic light reflections across miniature surfaces.
Thin paint extends drying time for wet blending, allowing seamless color merging without harsh breaks. You’ll achieve gradual tonal shifts essential for natural-looking skin and fabric. Multiple translucent layers prevent texture buildup while maintaining sculpted detail visibility.
Key advantages of properly thinned paint include:
- Stipple glazing combines stippling and glazing for streak-free highlights
- Feathering techniques create smooth gradient changes
- Controlled layering builds depth without obscuring details
- Enhanced brush responsiveness enables precise edge manipulation
This controlled approach produces three-dimensional depth that mimics natural lighting conditions. Mixing with thinner medium can improve paint flow without losing vibrancy for enhanced blending results. For detailed work, you can use isopropyl alcohol to improve the flow and application of thinned paints for even more precise results. Water-based varnish offers easy cleanup and maintains color integrity after your painting session is complete. Once your advanced painting techniques are complete, apply a clear coat to preserve the intricate details and color work you’ve achieved through proper paint thinning.
Key Factors That Influence Your Thinning Requirements
Several interconnected factors determine how much you’ll need to thin your paints, and understanding these variables will help you achieve consistent results across different painting sessions.
Paint viscosity varies greatly between brands-Citadel paints typically require more thinning than Vallejo or Army Painter formulations.
Color inherently affects thickness; whites and creams contain heavier pigment loads than reds or yellows.
Your chosen technique dictates requirements: basecoats need thicker consistency for coverage, while glazing demands extensive thinning. Base paints offer thick, opaque coverage that typically needs more thinning than layer paints designed for smooth blending.
Different thinner types produce varying results-water reduces viscosity but can compromise binders, while dedicated mediums preserve paint integrity. Professional oil paints feature high-purity pigments and superior covering power that may require different thinning approaches compared to standard hobby paints.
Environmental conditions like temperature and humidity affect drying rates and flow.
The consistency impact extends beyond application to final appearance quality.
Proper brush maintenance between colors also influences your thinning needs, as residual paint and improper cleaning can affect how your freshly thinned paints flow and adhere.
Creating Custom Washes and Glazes Through Thinning
You can create custom washes and glazes by thinning your paints with specific ratios and techniques that dramatically expand your painting capabilities.
Wash mixing ratios typically start at 1:1 paint to medium, while glazes require even thinner consistency to build translucent layers that enhance color depth without obscuring detail.
Understanding these fundamental mixing principles and layering techniques will let you achieve professional weathering effects, smooth tonal shifts, and precise color control across your miniatures.
Wash Mixing Ratios
Three fundamental mixing ratios form the backbone of effective wash creation for miniature painting.
Oil-based washes start with 5:1 mineral spirits to paint, while acrylic washes use 1:1 paint to medium ratios. Water-based systems require 20:1 water to flow aid as your wash bases.
Wash transparency increases with higher dilution ratios, allowing basecoats to show through. Lower ratios boost wash opacity but risk color pooling in recesses.
You’ll achieve peak wash consistency through incremental thinning rather than attempting corrections afterward.
Key wash techniques include:
- Recording exact ratios for wash layering reproducibility
- Using wash additives like flow aid for improved adhesion
- Testing small areas before full application
- Applying multiple thin coats to control drying times
Properly mixed washes enhance wash removability while wet, giving you correction opportunities.
Glaze Layering Techniques
Glazing transforms miniature painting through controlled transparency that builds sophisticated color shifts layer by layer. You’ll thin paints to near-transparent consistency using glazing mediums rather than water alone. This preserves pigment saturation while preventing pooling that characterizes washes.
Your glaze application requires multiple thin coats with complete drying between layers. Load minimal paint on your brush to avoid streaking. Each pass deposits subtle color that gradually intensifies without obscuring details. Unlike washes that settle in recesses, glazes create even translucent films across surfaces.
Custom glazes enable precise color modulation through controlled dilution ratios. You can warm shadow areas or cool highlights using targeted applications. This technique achieves exceptional color harmony by acting as a filter that unifies disparate tones across your miniature’s surface, creating seamless alterations impossible with standard layering methods.
Maintaining Optimal Paint Consistency During Sessions
While paint consistency remains essential throughout your miniature painting session, maintaining that ideal flow becomes increasingly challenging as time progresses.
Paint hydration decreases through evaporation, requiring constant monitoring and adjustment. Effective palette management prevents consistency failures that compromise detail work.
Proper palette management and consistent paint monitoring prevent the consistency failures that destroy precision in detailed miniature work.
Your paint’s viscosity increases as water evaporates from exposed surfaces. This natural process demands periodic re-thinning with half brush-loads of water or medium.
Test consistency regularly by painting thin lines on your palette edge-skipping indicates thickness, while pooling shows over-thinning.
Essential consistency maintenance techniques include:
- Using wet palettes to slow evaporation and preserve working time
- Covering paint mixtures between applications to reduce moisture loss
- Mixing paints frequently during sessions to rehydrate partially dried portions
- Creating separate consistency zones for different techniques like basecoats versus glazes
Testing and Adjusting Your Paint Mixture
Properly thinned paint requires systematic testing before you commit to applying it on your miniature.
Start by placing a small drop on your test surface-a spare model or smooth plastic works best. Draw a thin line to evaluate paint opacity and color saturation. Properly thinned paint should show translucency without complete transparency.
Monitor brush flow as you apply the mixture. The paint should move smoothly without pooling or streaking. If you notice consistency variations between different brands, adjust your thinning agents accordingly.
Test drying quality by allowing the sample to cure completely, then assess whether detail preservation meets your standards.
Conduct thorough application assessment on multiple test patches before proceeding with your actual miniature work.
Common Thinning Mistakes and How to Avoid Them
Several critical errors can derail your miniature painting project, with overthinning being the most destructive mistake you’ll encounter.
Excess dilution destroys pigment coverage and causes paint to run off your miniature, creating pooling and uneven application. Water weakens paint adhesion, leading to chips and faded colors.
Common misconceptions about brush preparation compound these issues. Don’t dip saturated brushes into paint-this creates unintentional dilution. Always remove excess water before loading paint to maintain control.
Practical troubleshooting requires understanding paint brand variations:
- Citadel paints need more thinning than Vallejo or Army Painter
- Test each brand’s ideal consistency separately
- Adjust ratios based on environmental conditions
- Use proper mediums instead of water alone
Practice consistency testing on spare plastic before painting your miniature.
Advanced Techniques for Different Painting Styles
Mastering proper thinning ratios becomes even more important when you’re applying specialized painting techniques that demand precise paint consistency.
Glazing requires extreme dilution-often 5:1 water to paint-to achieve translucency while maintaining color theory principles. Darker paint types glaze more effectively due to finer pigment particles, while lighter colors need pre-mixed base layers.
Recess washing demands a 3:1 water-to-paint ratio for maximal flow into crevices without pooling on flat surfaces.
Oil-based paint types offer superior blending time but require thinner instead of water.
Layering needs moderate thinning at 1:1 or 2:1 ratios to build semi-transparent coats gradually.
Wet blending requires fluid consistency without over-dilution, enabling real-time color mixing on the miniature’s surface before the paint dries completely.
On a final note
You’ve mastered the fundamentals of paint thinning for miniature painting. Apply these ratios consistently: start with 2:1 paint-to-thinner for base coats, adjust based on your brush’s response. Test each mixture on practice surfaces before committing to your miniature. Monitor consistency throughout your session-add medium dropwise as needed. Avoid over-thinning, which compromises coverage and color intensity. These techniques will elevate your painting quality considerably. Practice these methods regularly to develop muscle memory and achieve professional results.