We are supported by our audience. When you purchase through links on our site, we may earn an affiliate commission, at no extra cost for you. Learn more. Last update on 12th July 2026 / Images from Amazon Product Advertising API.
You can airbrush miniatures indoors with proper ventilation and safety precautions. Install a spray booth with 110 CFM fans and maintain 100 linear feet per minute air exchange rates to remove paint particulates and VOCs. Use water-based acrylics instead of solvent-based paints to minimize toxic emissions. Wear respiratory protection, maintain workspace temperatures between 64-77°F, and keep humidity below 70% for best results. These fundamental setup requirements guarantee safe indoor airbrushing while maximizing paint performance and workspace efficiency.
Notable Insights
- Use water-based acrylic paints indoors as they produce fewer toxic fumes compared to solvent-based alternatives.
- Maintain workspace temperature between 18-25°C and humidity below 70% for optimal paint flow and drying.
- Wear respiratory protection, safety goggles, and nitrile gloves while using dedicated zones for mixing and spraying.
- Position compressors on floors to reduce noise and use adjustable LED lighting for accurate color work.
Essential Ventilation and Safety Requirements
When airbrushing miniatures indoors, proper ventilation isn’t just recommended-it’s essential for your health and safety.
You’ll need adequate fume extraction to remove paint particulates and volatile organic compounds from your breathing zone. A spray booth with integrated fans rated at 110 CFM provides effective airflow for indoor safety.
You should maintain air exchange rates of approximately 100 linear feet per minute during painting sessions.
Install venting ducts connected to windows when possible, or use recirculating filtration systems with HEPA filters in non-ventilated spaces. Even water-based acrylics generate airborne particulates requiring filtration. For thorough maintenance of your airbrush equipment, consider using an ultrasonic cleaner which utilizes high-frequency sound waves to remove paint residue from hard-to-reach components. The optimal frequency range for removing paint residue from airbrush components is between 40-48kHz, which effectively breaks down stubborn acrylic buildup.
Combine your ventilation system with appropriate respiratory protection. Basic dust masks offer limited protection-respirators designed for particulates and organic vapors provide prime safety during extended sessions. Half face respirators with dual filtration systems can effectively block 90% of organic vapors, dust, and harmful particles during airbrushing projects. Consider MERV 12 filters for your air filtration system as they effectively capture dust and dirt particulates. Keep children and pets out of the airbrushing area since non-PPE-wearing individuals are at risk of inhaling harmful particulates. Look for cleaning solutions that meet ASTM D-4236 safety standards when selecting products for maintaining your airbrush equipment.
Setting Up Your Indoor Airbrush Station σε
Creating an efficient indoor airbrush station requires careful attention to workspace layout, equipment placement, and workflow organization. Position your compressor on the floor away from your immediate work area to minimize noise and vibrations that affect precision.
Proper compressor placement away from your work surface reduces noise interference and vibration-related precision issues during detailed airbrushing sessions.
Use adjustable LED lighting with multiple angles to eliminate shadows and guarantee accurate color perception.
Establish dedicated zones for paint mixing, spraying, and drying to maximize workspace efficiency. Place silicone mats or disposable sheets on work surfaces to protect against overspray.
Keep your airbrush holder within arm’s reach but stable enough to prevent falls.
Implement organizational tips like using airtight containers for paint storage and small parts organizers for needles and nozzles. Select paints with chemical compatibility to ensure proper adhesion on plastic miniatures and prevent peeling during handling. Maintain consistent air pressure settings throughout your painting session to achieve uniform coverage and prevent paint flow inconsistencies. Choose ready-to-spray formulas that eliminate the need for mixing paint ratios and streamline your workflow for extended painting sessions.
Install a turntable for miniature rotation without direct hand contact, and maintain adequate hose length without excessive slack. Consider dual-action triggers for superior paint flow control when working on intricate miniature details. For extended indoor painting sessions, prioritize quiet operation compressors that operate under 47 dB to enable comfortable extended work without disturbing household members.
Choosing the Right Paints and Preparation Methods
Your paint selection will determine both the success of your miniature project and the safety of your indoor workspace.
Acrylic paints offer water-based formulations with low VOC emissions, while enamel paints require extensive ventilation due to toxic fumes that make them unsuitable for indoor use.
You’ll need to master proper thinning ratios ranging from 1:1 to 1:3 paint-to-thinner and establish reliable testing methods to guarantee consistent spray patterns before applying paint to your miniatures. For optimal airbrush applications, thinning your acrylics provides the best results while maintaining maximum control over detailed work.
When selecting paint thinners, prioritize non-toxic formulations that reduce harmful fumes and eliminate fire hazards during your indoor painting sessions. Many quality paint sets include pre-mixed thinners with particle sizes below 35μm that prevent clogging and ensure smooth application through your airbrush system.
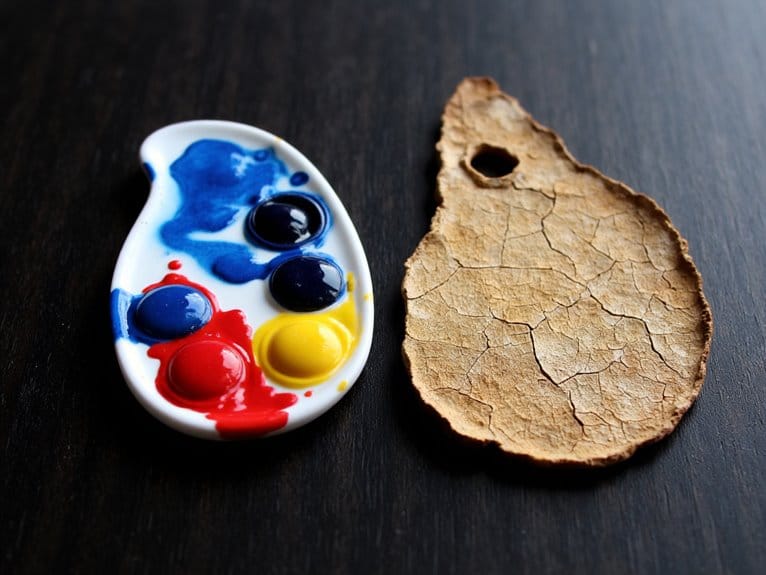
Consider using a wet palette during your preparation phase to maintain paint workability and reduce waste, as these moisture retention systems can keep your acrylics fresh for extended periods between airbrushing sessions.
Acrylic vs. Enamel Paints
Selecting the right paint type fundamentally determines your airbrushing success, safety requirements, and final results when painting miniatures indoors.
Acrylic advantages include water-based cleanup, minimal toxic fumes, and rapid surface drying within minutes. You’ll achieve safer indoor airbrushing with acrylics since they require only water for thinning and cleaning. Modern contrast paints offer an excellent acrylic option that delivers base, shade, and highlight effects in a single application for efficient miniature painting. Water-based acrylic formulations are recommended for non-toxic, easy cleanup and possess consistent pigment density for predictable mixing.
Enamel disadvantages center on oil-based solvents requiring mineral spirits or turpentine for cleanup. These emit strong fumes demanding well-ventilated spaces or respirators during application. Enamels cure slowly, taking 6-24 hours to fully harden through chemical air reactions. Professional oil paints feature high-purity pigments and superior covering power but require proper ventilation due to their solvent-based nature.
While enamels provide superior durability and glossy finishes with fewer coats, acrylics offer broader color selections and easier correction capabilities. Choose acrylics for indoor safety and convenience, or enamels when maximum durability justifies ventilation requirements.
After completing your miniature painting project, consider investing in proper storage solutions like magnetic metal trays to protect your finished work during transport and display.
Proper Thinning Ratios
Achieving ideal paint consistency requires precise thinning ratios that balance coverage with detail preservation when airbrushing miniatures indoors. You’ll need proper thinning techniques to prevent clogging and guarantee smooth application.
A standard 1:1 ratio works effectively for most acrylic paints. Mix equal parts paint and thinner-water, rubbing alcohol, or airbrush reducer. Tamiya paints perform best at 50/50 ratios with compatible thinners like X-20A.
| Needle Size | Air Pressure | Paint Ratio |
|---|---|---|
| 0.3mm | 18 PSI | 1:1 |
| 0.5mm | 30-40 PSI | 1:1 |
| 0.2mm | 15 PSI | 2:1 |
Test your paint consistency on disposable surfaces before applying to miniatures. Properly thinned paint creates multiple translucent layers rather than thick, detail-obscuring coats. Shake metallic paints regularly to maintain pigment suspension. For improved paint fluidity, use flow improvers at a recommended ratio of 1-2 drops per 10 drops of paint to prevent tip dry and extend working time. Using a stay wet palette during preparation helps maintain paint consistency throughout extended airbrushing sessions. After completing your airbrushing session, proper brush cleaners will effectively remove any paint residue from detail brushes used for touch-up work. For touch-ups and detail work between airbrushing sessions, consider having quality brush sets with synthetic bristles that resist shedding and maintain their shape through multiple cleanings.
Paint Testing Methods
Before you spray your first miniature, testing paints and preparation methods prevents costly mistakes and guarantees professional results.
Start with paint compatibility testing using sample plastic cards. Test different brands like Vallejo and Citadel with your chosen airbrush to check flow characteristics and clogging tendencies. Observe spray patterns and coverage quality before applying paint to actual models.
Evaluate airbrush-specific primers diluted with approximately 20% thinner. Test primer coverage on sample miniatures to verify uniformity and crevice penetration. Check drying times under your working conditions to prevent dust contamination.
Practice spray pattern control by adjusting air pressure and paint flow. Use non-painted air bursts initially to avoid splatter damage.
Test different nozzle distances for detail work versus base coating applications, ensuring smooth paint mist without spider webbing effects. Most airbrushes perform optimally within a pressure range of 20 to 55 PSI, with lower pressures enabling fine detail applications. For optimal paint consistency, use stainless steel mixing balls to redistribute settled pigments before diluting paints for your airbrush system. Consider using Vallejo’s Airbrush Thinner specifically designed to maintain paint quality while achieving the proper consistency for spray applications.
When testing primers specifically formulated for plastic surfaces, verify that adhesion quality meets minimum standards of 400-600 PSI pull-off strength for optimal topcoat durability.
Creating the Optimal Indoor Environment
Your indoor airbrushing environment requires three critical elements to guarantee both safety and quality results.
Proper ventilation systems with exhaust fans prevent toxic paint particles from accumulating in your workspace, while controlled temperature and humidity levels maintain paint consistency and drying times.
Strategic space arrangement with adequate lighting and protective barriers creates an efficient workflow that minimizes contamination and maximizes your painting precision.
For optimal results, maintain your compressor at 20-30 PSI specifically for detailed miniature work to ensure consistent spray patterns and paint flow control.
Ventilation and Air Quality
When airbrushing miniatures indoors, proper ventilation isn’t just recommended-it’s essential for maintaining safe air quality and protecting your health. Effective ventilation systems remove paint particulates and vapors before they accumulate in your workspace.
Install a dedicated spray booth with integrated exhaust fan to capture overspray directly at the source. Connect an exhaust hose to a window or external vent for ideal results.
If external ventilation isn’t possible, create a DIY baffle box with filters to trap particles within the room.
Water-based acrylics generate primarily particulate matter, while solvent-based paints release hazardous VOCs requiring more aggressive extraction.
Supplement your primary ventilation with air purifiers running during and after painting sessions. Proper ventilation systems also benefit workspace safety when using cleaning chemicals, as low odor formulations still require adequate airflow to prevent fume accumulation.
Replace spray booth filters regularly to maintain efficiency and prevent particle buildup that compromises air quality.
Like epoxy resin pigments that require UV protection for durability, proper ventilation shields you from prolonged exposure to airborne particles that can affect respiratory health over time.
Temperature and Humidity Control
Maintaining ideal temperature and humidity levels in your indoor workspace directly impacts paint performance, equipment function, and finish quality.
Temperature regulation requires keeping your space between 18-25°C (64-77°F) for peak acrylic paint flow. Below 15°C (59°F), paint consistency thickens and reduces spray performance. Above 28°C (82°F), excessive drying speed creates uneven textures and frosting effects.
Humidity management involves maintaining 40-60% relative humidity levels to prevent paint defects. High humidity above 70% causes lacquer frosting and uneven acrylic drying.
Essential climate control strategies include:
- Using thermometers and hygrometers to monitor conditions consistently
- Installing heaters, dehumidifiers, or air conditioning units as needed
- Isolating your painting area from household temperature fluctuations
Stable environmental conditions prevent equipment clogs and promote consistent paint adhesion.
Space Setup Guidelines
Creating an effective indoor airbrushing workspace requires systematic planning that addresses ventilation, equipment positioning, and safety protocols.
Select a dedicated area with a sturdy worktable to support your compressor and miniatures securely. Position your spray booth near an open window or external vent for ideal fume extraction.
Workspace organization starts with installing bright, daylight-balanced LED lighting above your painting area. Use multiple adjustable gooseneck lamps to eliminate shadows and reduce eye strain. For detailed miniature work, ensure your lighting provides a minimum of 1200 lumens to achieve the precision required for intricate painting tasks.
Place disposable mats under your workspace to protect surfaces from overspray.
Efficient tool storage keeps cleaning supplies, brushes, and solvent containers within arm’s reach. Store paints and thinners in sealed containers away from heat sources. Keep precision cutters nearby for removing miniature parts from sprues and preparing models before painting sessions.
Install moisture traps and pressure regulators on your compressor line to maintain consistent airflow quality throughout painting sessions. For artists working in smaller spaces or those who prioritize mobility, consider cordless airbrush kits that eliminate the need for bulky compressor setups while maintaining professional results.
Protective Equipment and Health Precautions
Airbrushing miniatures indoors transforms paint into microscopic particles that become airborne hazards requiring immediate protective measures.
Airbrushing indoors creates dangerous airborne particles that demand immediate safety precautions to protect your health.
You need specific equipment to protect your respiratory system, skin, and eyes from chemical exposure.
Essential protective equipment includes:
- Respiratory protection – dust masks for acrylics, chemical respirators for solvents
- Eye and skin barriers – safety goggles, nitrile gloves, and protective clothing
- Ventilation systems – exhaust fans or spray booths with particle filtration
Your preventive measures must match paint toxicity levels. Water-based paints require minimum protection, while solvent-based formulations demand chemical-rated respirators with proper sealing.
Chemical awareness becomes critical when handling volatile organic compounds that penetrate skin and lungs. Replace respirator filters regularly to maintain effectiveness.
Wash hands thoroughly after each session to eliminate residual contaminants.
Alternative Approaches and Best Practices
Beyond protective equipment, your indoor airbrushing success depends on implementing smart ventilation solutions and selecting appropriate paint formulations for enclosed spaces.
Portable spray booths with integrated filtration systems contain overspray effectively without requiring window access. Position high-CFM fans to direct airflow toward your booth for enhanced particle removal.
Water-based acrylic paints offer superior indoor safety compared to solvent-based alternatives. Mix paint at 50% paint to 50% thinner ratios for peak flow and reduced misting.
Gravity-feed airbrushes provide better control and minimize waste.
Alternative techniques include short burst spraying rather than continuous application. Use low-pressure settings with slow, deliberate passes for precision work.
Proper airflow management combines booth filtration with strategic fan placement. HEPA air purifiers supplement booth systems for extensive particle control in enclosed workshops.
On a final note
You can successfully airbrush miniatures indoors with proper preparation. Install adequate ventilation systems, use appropriate safety equipment, and select suitable paints for enclosed spaces. Your spray booth must contain overspray effectively while maintaining consistent airflow. Don’t compromise on respirator protection or workspace organization. These essential safety measures let you achieve professional results year-round, regardless of weather conditions. Indoor airbrushing offers consistent temperature control and eliminates environmental variables that affect paint application.