We are supported by our audience. When you purchase through links on our site, we may earn an affiliate commission, at no extra cost for you. Learn more. Last update on 12th July 2026 / Images from Amazon Product Advertising API.
Hey there fellow airbrush artist! I totally get your frustration when your airbrush suddenly decides to take a paint buildup break right in the middle of your project. It's like your creativity gets put on hold, and that's not cool at all. But fear not, my friend! I've got some valuable insights to share with you on how to prevent airbrush clogging and keep your creative flow going strong.
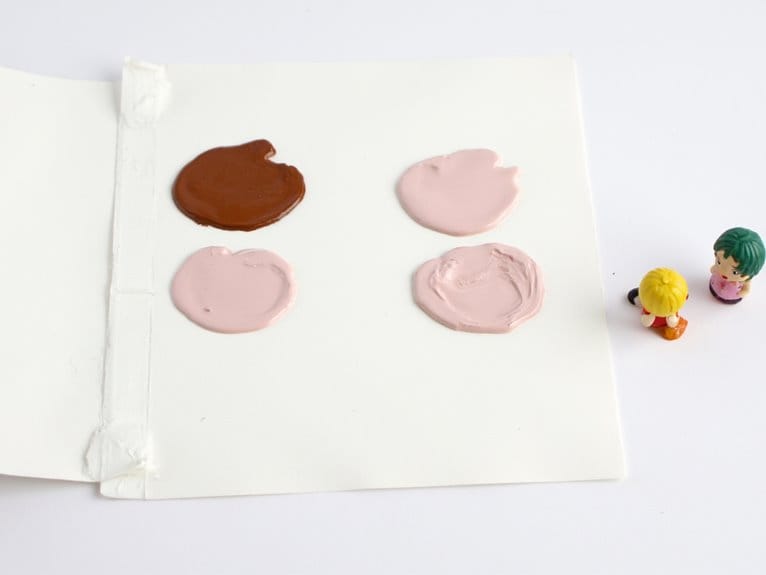
First things first, let's talk about the importance of finding the right balance when it comes to the amount of paint you use. Too much paint can lead to clogging, while too little can result in a weak and inconsistent spray. It's all about finding that sweet spot where your airbrush can work its magic without any hiccups.
Now, cleaning is another crucial aspect of preventing clogging. Just like how you clean your paintbrushes after each use, your airbrush deserves some TLC too. Using the recommended cleaner for your airbrush is key to effectively removing any paint residue and keeping those pesky clogs at bay.
So, my friend, here are some guidelines to follow for a hassle-free airbrushing experience. Make sure you find that perfect paint balance, neither too much nor too little. And don't forget to clean your airbrush properly with the right cleaner.
By following these simple tips, you'll be able to unleash your creativity without the frustration of airbrush clogging. So go ahead, dive into your projects with confidence, and let your imagination soar! Happy airbrushing!
Key Takeaways
- Proper paint amount and cleaning are important to prevent airbrush clogging.
- Using the recommended cleaner and following the cleaning routine will help maintain a clean airbrush.
- Applying back pressure and squirting water through the airbrush helps to clean it thoroughly.
- Disassembling the airbrush and cleaning its parts, including the needle, is necessary for effective cleaning.
Importance of Proper Paint Amount
One of the key factors in preventing airbrush clogging is ensuring the proper amount of paint is used. Using too much paint can lead to difficulties in removing excess paint and can result in wastage. It's better to start with less paint and add more if needed, as it allows for better control and avoids clogs.
Adding a few drops at a time when running low ensures continuous work without the risk of clogging. To maintain a clean airbrush, it's important to use the recommended airbrush cleaner or cleaning solutions like windex, isopropyl alcohol, or water. Proper cleaning techniques, such as applying back pressure and rinsing with water, should be followed.
Cleaning Techniques and Tools
To effectively maintain a clean airbrush and prevent clogging, it's essential to employ proper cleaning techniques and utilize the appropriate tools.
Cleaning solutions, such as windex, isopropyl alcohol, and water, can be used to effectively clean the airbrush. It's recommended to use the cleaner recommended by the airbrush brand for better results. Squirt the cleaner into the cup and let it sit for a while, then apply back pressure by placing a finger on the front of the airbrush and firing air through it to clean the airbrush.
After using the cleaner, rinse the airbrush with water by squirting it into the cup while applying back pressure. Repeat this process until the water runs clear.
Alternative cleaning methods include using an ultrasonic cleaner, which can effectively break up paint residues.
Preparing for Airbrushing
To prepare for airbrushing, I open the container and reassemble my airbrush, ensuring that any water inside is disposed of properly. This step is crucial in preventing clogs during the airbrushing process.
Once the airbrush is reassembled, I connect it to the hose and make sure there are no clogging issues. Proper cleaning techniques and tools, as discussed in the previous subtopic, play a vital role in maintaining a clean airbrush and preventing clogs.
By consistently following the recommended cleaning routine, using the appropriate cleaning solutions, and applying back pressure to clean the airbrush, I can ensure a hassle-free airbrushing experience.
It's essential to maintain a clean airbrush to avoid any interruptions or frustrations while creating innovative and artistic designs.
Maintaining a Clean Airbrush
Maintaining a clean airbrush is crucial in preventing paint residue buildup and ensuring smooth operation. Effective cleaning techniques, such as using recommended cleaners and applying back pressure, help remove any clogs or blockages.
Preventing Paint Residue Buildup
My preferred method for preventing paint residue buildup and maintaining a clean airbrush is by regularly cleaning and properly storing it.
Here are three techniques I use to ensure a pristine airbrush:
- Thoroughly clean the airbrush after each use: I disassemble the airbrush, remove the needle, and soak all parts in a cleaning solution recommended by the airbrush brand. I then use back pressure and water to flush out any remaining paint residue.
- Store the airbrush in a clean and dry environment: I keep my airbrush in a dedicated case or container to protect it from dust and moisture. This prevents any potential buildup of paint residue and ensures its longevity.
- Use a moisture trap in the air supply line: By installing a moisture trap, I can prevent any water or condensation from entering the airbrush. This helps maintain a clean airbrush and avoids potential clogs.
Effective Cleaning Techniques
After thoroughly cleaning the airbrush and preventing paint residue buildup, it's important to understand effective cleaning techniques to maintain a clean airbrush.
To achieve this, using the right cleaning solutions and recommended cleaning products is crucial. Airbrush cleaner is highly recommended for its effectiveness in cleaning the airbrush. Other options such as windex, isopropyl alcohol, and water can also be used as cleaning solutions.
It's important to squirt the cleaner into the cup and let it sit for a while before applying back pressure by placing a finger on the front of the airbrush and firing air through it to clean the airbrush.
After using the cleaner, rinse the airbrush with water by using a wash bottle or squeeze bottle to squirt water into the airbrush cup. Apply back pressure while squirting water to clean the airbrush thoroughly. Repeat this process until the water runs clear.
Finally, remove any remaining paint in the cup by wiping it with a paper towel.
General Tips and Recommendations
To maintain a clean airbrush and prevent clogging, it's essential to follow some general tips and recommendations.
- Use the right paint amount: Properly measure and control the amount of paint you put in the airbrush. Avoid overfilling the cup to prevent difficulties in removing excess paint. Start with less paint and add more if needed to maintain better control and prevent wastage.
- Clean with recommended solutions: Use airbrush cleaner or recommended cleaning solutions like windex, isopropyl alcohol, or water. Squirt the cleaner into the cup, let it sit, and then apply back pressure to clean the airbrush. Rinse with water and repeat until the water runs clear.
- Disassemble for thorough cleaning: Turn off the compressor and detach the hose before disassembling the airbrush. Unscrew parts and clean them in tap water or an ultrasonic cleaner. Dip the needle in water and clean it with a paper towel. Regularly follow this cleaning routine to prevent airbrush issues.
Following these tips will ensure a clean airbrush and a smooth airbrushing experience.
Disassembly Process and Needle Cleaning
Now let's delve into the disassembly process and needle cleaning techniques to ensure a properly functioning airbrush.
The disassembly process involves carefully removing the necessary parts, such as the handle and cover, before accessing the needle.
It's crucial to handle the needle with care and clean it thoroughly to remove any paint residue.
Needle Cleaning Techniques
During the disassembly process, I carefully remove the nut at the back of the airbrush to access the needle.
- Gently hold the needle with a firm grip, ensuring not to bend or damage it.
- Dip the needle in water and use a paper towel to clean off any paint residue.
- Set the needle aside in a safe place for later reassembly.
When it comes to cleaning the needle, there are various needle cleaning products available in the market. These products are specifically designed to effectively remove paint buildup and troubleshoot needle clogs.
Proper Disassembly Process
As I continue the discussion on proper airbrush maintenance, an essential step is the disassembly process, which includes removing additional parts and cleaning the needle.
When it comes to disassembly, it's important to follow a few tips to ensure a smooth process. First, turn off the compressor before starting the disassembly. This will prevent any accidental air pressure and potential injury.
Next, remove any additional parts like the handle or cover, if applicable, to access the needle. Carefully unscrew the nut at the back of the airbrush to remove the needle without bending or damaging it. Once the needle is removed, dip it in water and clean it with a paper towel to remove any paint residue. Set the needle aside in a safe place.
Frequently Asked Questions
How Often Should I Clean My Airbrush to Prevent Clogging?
I clean my airbrush regularly to prevent clogging. It's important to maintain a clean airbrush by following the recommended cleaning routine. This helps prevent issues and ensures a hassle-free airbrushing experience.
Can I Use Any Type of Cleaner to Clean My Airbrush, or Is It Necessary to Use the Recommended Cleaner From the Airbrush Brand?
Yes, you can use alternative airbrush cleaners, but it is recommended to use the cleaner from the airbrush brand for better results. Homemade cleaners may vary in effectiveness and could potentially damage your airbrush.
What Is the Best Way to Prevent Clogs When Not Using the Airbrush?
To prevent clogs and maintain proper airbrush maintenance, it's important to keep the airbrush wet when not in use. This can be achieved by submerging it in water or using a small container.
Are There Any Specific Techniques for Properly Reassembling the Airbrush After Cleaning?
To properly reassemble the airbrush after cleaning, it is important to follow the manufacturer's instructions. Make sure all parts fit together snugly and securely. Additionally, avoid overtightening screws or damaging delicate components. This will help prevent airbrush clogging and ensure optimal performance.
What Should I Do if I Accidentally Bend or Damage the Needle When Removing It for Cleaning?
If I accidentally bend or damage the needle when removing it for cleaning, I should handle it carefully to prevent further damage. I can try dipping it in water and cleaning it with a paper towel to remove any paint residue.
Conclusion
In conclusion, maintaining the proper paint amount and using effective cleaning techniques are essential in preventing airbrush clogging.
By finding the right balance in paint quantity and using the recommended cleaner, you can ensure a hassle-free airbrushing experience.
Remember to prepare your airbrush properly, maintain its cleanliness, and follow general tips and recommendations for optimal performance.
With a clean airbrush and these guidelines in mind, you can unleash your artistic creativity without the frustration of clogging issues.