We are supported by our audience. When you purchase through links on our site, we may earn an affiliate commission, at no extra cost for you. Learn more. Last update on 19th June 2026 / Images from Amazon Product Advertising API.
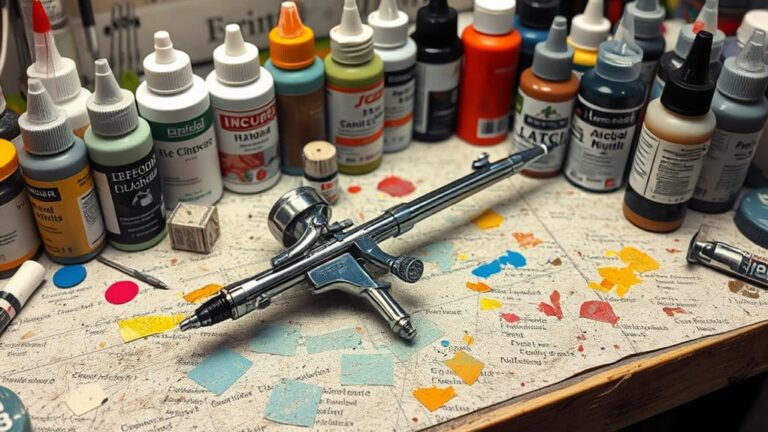
You’ve invested time and money into your airbrush equipment, and the last thing you want is for it to fail when you need it most. To prevent overspray and guarantee smooth operation, it’s essential to perform regular maintenance and troubleshooting. Check your airbrush calibration, inspect the nozzle, and evaluate paint consistency to certify a smooth, consistent flow. Practicing good techniques, such as holding the airbrush at the correct angle and using the right amount of pressure, will also help. By staying on top of these tasks, you’ll avoid common issues like clogged nozzles, uneven patterns, and wasted paint – and you’ll be well on your way to achieving professional-looking results.
Troubleshooting Airbrush Issues: How to Prevent Overspray and Ensure Smooth Operation
When you’re working with an airbrush, you’ll occasionally encounter issues that can hinder your progress and affect the quality of your work. One common problem is overspray, which can lead to uneven coverage, wastage of paint, and a messy workspace. To prevent overspray, make sure you’re using the right airbrush accessories, such as the correct nozzle size and type, and that they’re properly attached.
Regular brush maintenance is also vital in ensuring smooth operation. Clean your airbrush regularly, and check for any blockages or worn-out parts that need replacement. Proper spray techniques can also go a long way in preventing issues. Practice holding the airbrush at the correct angle, using the right amount of pressure, and moving it in smooth, consistent strokes. By following these tips, you’ll be able to minimize issues and achieve professional-looking results.
Regular brush maintenance is also key in ensuring smooth operation. Clean your airbrush regularly, and check for any blockages or worn-out parts that need replacement.
I. Introduction
You’re likely no stranger to the versatility of airbrushes, which are used in various applications such as art, modeling, and cosmetics. Whether you’re a seasoned pro or a beginner, you know how vital it is to troubleshoot and maintain your airbrush to guarantee peak performance. By understanding common issues and how to prevent them, you can achieve smooth, professional results in your work.
What Are The Various Applications Of Airbrushes (Art, Modeling, Cosmetics)?
Mastering the art of airbrushing reveals a world of creative possibilities, allowing artists, modelers, and makeup enthusiasts to achieve stunning results with precision and control. You’ll find airbrushes in various applications, from fine art to cosmetics. In the art world, airbrushes are used in techniques such as stenciling, layering, and blending to create intricate designs and realistic textures. You can achieve subtle gradations of color and delicate patterns that would be difficult to replicate with traditional brushes.
In modeling, airbrushes are essential tools for creating realistic finishes on miniature figures, cars, and other scale models. You use them to apply subtle washes, intricate designs, and realistic weathering effects. In the world of cosmetics, airbrushes have become a staple for makeup artists, allowing for flawless, high-definition finishes and precise application of foundation, blush, and other products. You can achieve smooth, even coverage and subtle blending that accentuates the natural features of the face. Whatever your creative pursuit, mastering airbrush techniques can take your skills to the next level.
Why Is Troubleshooting And Maintenance Crucial For Optimal Airbrush Performance?
One key aspect of airbrushing that’s often overlooked is proper maintenance and troubleshooting. You might be thinking, “Why bother with maintenance when I’m already getting decent results?” But trust us, neglecting regular inspections and tune-ups can lead to subpar airbrush performance, wasted time, and even damaged equipment.
Proper maintenance is essential to guarantee your airbrush operates smoothly and efficiently. By dedicating a few minutes each week to inspect and clean your airbrush, you’ll prevent clogs, corrosion, and other issues that can hinder your workflow. Regular inspection also helps you identify potential problems early on, saving you from costly repairs or replacement.
Here’s a quick rundown of the benefits you can expect from proper maintenance and troubleshooting:
| Benefit | Description |
|---|---|
| Improved Airbrush Performance | Achieve smoother, more consistent results with proper maintenance |
| Reduced Downtime | Fix issues quickly with regular inspections, minimizing project delays |
| Extended Equipment Life | Prolong the lifespan of your airbrush with regular cleaning and maintenance |
| Cost Savings | Avoid costly repairs or replacement by catching problems early |
| Enhanced Creativity | Focus on your art with confidence, knowing your airbrush is in top condition |
II. Understanding Airbrush Mechanics
You’re about to learn how an airbrush works, and it’s essential to start with the basics. An airbrush consists of a few key components, including a nozzle, needle, and air compressor, which work together to create a fine spray of paint. By understanding how these parts function and interact, you’ll be better equipped to tackle common airbrush issues and achieve smooth, even results.
How Does An Airbrush Work (Basic Components And Their Functions)?
At the heart of an airbrush lies a delicate balance of air and liquid, which, when harmoniously combined, produce a smooth, consistent spray pattern. You’re likely familiar with the basic components of an airbrush, but let’s break them down to guarantee a solid understanding.
The airbrush anatomy consists of a few key parts: the air source, nozzle, and paint reservoir. The air source provides the necessary pressure to atomize the paint, while the nozzle focuses the air flow to create a precise spray pattern. The paint reservoir holds the liquid paint, which is drawn into the air stream through a small opening.
| Component | Function |
|---|---|
| Air source | Provides pressure to atomize paint |
| Nozzle | Focuses air flow to create precise spray pattern |
| Paint reservoir | Holds liquid paint, drawn into air stream |
| Needle/Nozzle combination | Regulates air and paint flow |
| Trigger/Control | Regulates air flow, allowing for varying brush strokes |
Understanding how these components interact is vital for achieving smooth operation and preventing overspray. By grasping airbrush anatomy and air flow dynamics, you’ll be better equipped to troubleshoot issues and achieve professional-looking results, which will verify a seamless performance.
What Are The Common Terms And Concepts Associated With Airbrushing (E.G., Atomization, Pressure Regulation)?
Your airbrush’s performance relies on a deep understanding of key terms and concepts that govern its operation. To master the art of airbrushing, you need to grasp the fundamental principles that drive its functionality.
- Atomization: The process of breaking down liquid paint into tiny droplets, creating a fine mist that can be evenly distributed onto the surface.
- Pressure regulation: The ability to control air pressure, which affects the spray pattern, spray quality, and overall performance of the airbrush.
- Airflow dynamics: The study of how air flows through the airbrush, influencing the spray’s velocity, direction, and pattern.
- Nozzle design: The shape and size of the nozzle, which determines the spray’s focal point, spray quality, and overall performance.
Understanding these concepts will help you troubleshoot issues and optimize your airbrush’s performance. For instance, if you’re experiencing poor spray quality, you may need to adjust the airflow dynamics or nozzle design. By grasping these fundamental concepts, you’ll be better equipped to tackle common airbrush issues and achieve smooth, professional-looking results.
III. Common Airbrush Issues
You’re not alone if you’ve experienced airbrush malfunctions that ruin your work. Spray inconsistencies, uneven patterns, and poor atomization can be frustrating and affect the quality of your projects. These issues often stem from poor brush maintenance, which can lead to clogged nozzles, worn-out tips, and damaged seals.
When you notice spray inconsistencies, check your brush for blockages or worn-out parts. Make sure to clean your airbrush regularly to prevent dirt and dried paint from accumulating. If you’re still experiencing issues, inspect your nozzle and tip for damage or corrosion. Worn-out or damaged parts can cause uneven spray patterns and poor atomization.
A. Overspray
When you’re airbrushing, you’re likely to encounter overspray, which occurs when excess paint particles settle outside the intended area. This unwanted dispersion of paint can ruin your project’s finish and waste valuable materials. You’ll want to understand what causes overspray and learn techniques to minimize it to achieve the best results.
What Is Overspray And What Causes It?
Overspray is a frustrating issue that can occur when airbrushing, resulting in a mist of paint particles settling on surrounding surfaces beyond the intended target area. This can lead to wasted paint, time, and effort, as well as a less-than-desirable finish.
When you’re experiencing overspray, it’s essential to identify the root cause to correct the issue. Here are some common causes of overspray:
- Incorrect airbrush calibration: If your airbrush is not properly calibrated, it can lead to uneven spray patterns and overspray.
- Improper spray patterns: Using the wrong spray pattern or angle can cause paint particles to spread beyond the intended area.
- Insufficient air pressure: If the air pressure is too low, it can result in a wider spray pattern, leading to overspray.
- Clogged airbrush nozzle: A clogged nozzle can disrupt the spray pattern, causing paint particles to spread unevenly and result in overspray.
How Does Overspray Impact Projects And What Are The Solutions To Minimize It?
During the airbrushing process, overspray can have a significant impact on your projects, consuming valuable time and resources. It can cause delays in project timelines, leading to missed deadlines and increased pressure on you and your team. Furthermore, the additional time spent on cleaning up overspray can lead to budget constraints, as you’ll need to allocate more resources to fix the issue.
To minimize the impact of overspray on your projects, it’s essential to take proactive measures. Initially, verify you’re using the correct airbrush nozzle size and type for your specific project. This will help reduce the amount of overspray generated. Next, work in a well-ventilated area, away from sensitive surfaces, to prevent damage. Finally, practice good team collaboration by communicating with your team members about the risks of overspray and working together to find solutions. By taking these steps, you can reduce the impact of overspray on your projects, saving time, resources, and reducing stress.
B. Inconsistent Spray Patterns
When you’re struggling with inconsistent spray patterns, you’re likely noticing uneven coverage, spotty areas, or unpredictable line widths. These frustrating issues can be caused by a clogged nozzle or improper paint viscosity, among other factors. To get your airbrush working smoothly, you’ll need to identify and address the root cause, then make adjustments to achieve a consistent spray.
What Are The Symptoms Of Inconsistent Spray Patterns And What Could Be The Causes (E.G., Clogged Nozzle, Improper Paint Viscosity)?
Inconsistent spray patterns can be frustrating and wasteful, leaving you with uneven coatings and a mess to clean up. When your airbrush isn’t performing as expected, it’s essential to identify the root cause of the issue.
Here are some common symptoms and potential causes of inconsistent spray patterns:
- Clogged nozzles: dried paint or debris can block the nozzle, causing uneven spray patterns.
- Paint buildup: excessive paint accumulation on the nozzle or airbrush can disrupt the flow of paint, leading to inconsistent patterns.
- Air leaks: loose connections or worn-out O-rings can cause air leaks, which affect the air pressure and result in uneven spray patterns.
- Improper paint viscosity: using paint that’s too thick or too thin can cause inconsistent spray patterns, as the airbrush may struggle to atomize the paint correctly.
What Solutions And Adjustments Can Help Achieve A Consistent Spray?
To get back on track with a consistent spray, you’ll need to troubleshoot and adjust your airbrush setup. Start by checking the airbrush calibration, ensuring the needle and nozzle are properly aligned. Misalignment can cause uneven spray patterns, so make sure they’re seated correctly.
Next, inspect the nozzle for any blockages or debris. Clean or replace it if necessary, as a clogged nozzle will disrupt spray consistency. Verify that the paint viscosity is suitable for your airbrush, as thick or thin paint can affect the spray pattern.
Adjust the air pressure to optimize spray performance. Too little pressure can result in a weak spray, while too much can cause overspray. You may need to experiment with different pressure settings to find the sweet spot.
C. Paint Spitting and Sputtering
When you’re experiencing paint spitting and sputtering with your airbrush, you’ll typically notice a rough, uneven spray pattern and droplets of paint accumulating on your work surface. This frustrating issue can be caused by a range of factors, including air pressure issues and paint that’s too thick. To get your airbrush running smoothly again, let’s walk through a step-by-step troubleshooting guide to identify the root cause and fix the problem.
How Can You Identify Symptoms Of Paint Spitting And Sputtering?
Many airbrushers have experienced the frustration of paint spitting and sputtering from their airbrush. You’re not alone if you’ve struggled with this issue, wasting time and paint in the process. Identifying the symptoms is the first step in troubleshooting and resolving the problem.
When you notice paint spitting and sputtering, pay attention to the following signs:
- Irregular spray patterns: Instead of a smooth, even coat, you’re getting uneven, spotty, or speckled areas.
- Inconsistent paint flow: The paint flow is unpredictable, sometimes too much, sometimes too little, making it difficult to achieve the desired effect.
- Clogged airbrush nozzle: You notice paint building up around the nozzle, causing blockages and affecting the airbrush’s performance.
- Unwanted texture: Your painting techniques are compromised due to the airbrush’s inability to produce a smooth, even finish, resulting in unwanted texture or bumps.
Recognizing these symptoms will help you determine the root cause of the issue and take the necessary steps to correct it. By understanding what’s going on with your airbrush, you can adjust your techniques and get back to smooth, professional-looking results.
What Are The Common Causes Of Paint Spitting (E.G., Air Pressure Issues, Paint Thickness)?
Now that you’ve identified the symptoms of paint spitting and sputtering, it’s time to examine the common causes behind this frustrating issue. One of the primary causes is air pressure issues, which can affect air flow control. If the air pressure is too high or too low, it can disrupt the smooth flow of paint, leading to spitting and sputtering. Another common cause is paint thickness, which can clog the spray nozzle and impede paint flow regulation. When the paint is too thick, it can’t flow smoothly through the nozzle, resulting in uneven spray patterns and spitting.
Improper spray nozzle design can also contribute to paint spitting and sputtering. A poorly designed nozzle can create turbulence in the air flow, causing the paint to splatter and spit. Additionally, inadequate paint flow regulation can lead to inconsistent paint flow, resulting in spitting and sputtering. By understanding these common causes, you can take steps to prevent paint spitting and sputtering, ensuring a smooth and even application of paint.
What Is The Step-By-Step Troubleshooting Guide For Paint Spitting And Sputtering?
Having identified the symptoms of paint spitting and sputtering, you’re ready to tackle the problem head-on with a step-by-step troubleshooting guide.
- Check air pressure: Verify it’s within the recommended range for your airbrush. Adjust as needed to achieve a smooth, consistent flow.
- Inspect the nozzle: Clean or replace it if clogged. A clean nozzle is essential for proper airbrush calibration and spray refinement.
- Evaluate paint consistency: If too thick, thin it out. If too thin, add more paint or adjust your airbrush’s fluid flow. Proper paint consistency is vital for smooth operation.
- Perform routine brush maintenance: Regularly clean and lubricate your airbrush to prevent corrosion and wear. This will help maintain peak performance and extend its lifespan.
D. Airbrush Not Spraying
When your airbrush isn’t spraying, it’s frustrating and confusing. You’ll need to go through a detailed checklist to diagnose the issue, making sure you’re not overlooking a simple problem. Start by checking your air supply and paint flow, as these are often the culprits behind an airbrush that won’t spray.
What Is The Detailed Checklist For Diagnosing An Airbrush That Is Not Spraying?
You’re faced with an airbrush that refuses to spray, and it’s crucial to identify the root cause of the problem. To get your airbrush up and running again, you need a systematic approach to diagnose the issue.
- Check airbrush calibration: Verify that your airbrush is properly calibrated. Misaligned or loose parts can prevent the airbrush from spraying correctly.
- Inspect the nozzle and needle: Look for any blockages, corrosion, or damage to the nozzle and needle. Clean or replace them if necessary.
- Analyze the spray pattern: Perform a spray pattern analysis to identify any inconsistencies or abnormalities in the spray pattern.
- Review your troubleshooting checklist: Go through your troubleshooting checklist to confirm you haven’t missed any obvious causes of the problem.
Why Is It Important To Check The Air Supply And Paint Flow?
If your airbrush isn’t spraying, it’s essential to rule out issues with air supply and paint flow, as these are often the most vital components affecting performance.
When checking air supply, perform air flow checks to confirm the compressor is producing the required pressure. Verify your pressure settings are within the recommended range for your airbrush model. If the pressure is too low, increase it gradually until you achieve the desired spray consistency. Conversely, if the pressure is too high, it can cause the airbrush to splatter or produce uneven patterns, so decrease it accordingly.
Additionally, inspect the paint flow by checking the nozzle and needle for any blockages or dried paint. Clean or replace these parts as needed to guarantee a smooth, consistent flow. It’s also vital to confirm the correct paint viscosity for your airbrush, as thick paint can clog the nozzle, while thin paint may not provide adequate coverage. By ruling out these common issues, you’ll be well on your way to identifying and resolving the root cause of your airbrush problem.
IV. Preventative Measures
Tackle airbrush issues before they arise by adopting a few simple habits. By being proactive, you’ll save yourself the frustration and wasted time that comes with dealing with preventable problems.
- Daily Inspection: Take a few minutes each day to visually inspect your airbrush for any signs of wear or damage. Check for clogged nozzles, worn-out seals, and loose screws.
- Airbrush Storage: Store your airbrush in a cool, dry place, away from direct sunlight. Use a protective case or cover to prevent accidental damage.
- Tool Organization: Keep your workspace organized by designating a specific area for your airbrush and its accessories. This will help you quickly locate what you need and prevent misplacement.
- Regularly Check Compressor and Hose: Verify your compressor is properly maintained and your hose is free from kinks or blockages. Guarantee your compressor is properly serviced and your hose is free from kinks or blockages.
A. Proper Cleaning and Maintenance
You’re likely aware that proper cleaning and maintenance are vital to extending the life of your airbrush and preventing issues. To guarantee your airbrush stays in top condition, you’ll want to follow a step-by-step cleaning process after each use, and you’ll need the right cleaning solutions and tools to get the job done. By doing so, you’ll be able to prevent clogs, corrosion, and other problems that can hinder your work.
What Is The Step-By-Step Cleaning Process Post-Use?
Your airbrush is a delicate tool that requires meticulous care to maintain its performance and extend its lifespan. A regular cleaning routine is essential to prevent clogs, corrosion, and poor performance.
To guarantee your airbrush remains in top condition, follow this step-by-step cleaning process post-use:
- Disassemble the airbrush: Take apart the airbrush, including the nozzle, needle, and cup, to clean each component thoroughly.
- Wipe down the exterior: Use a soft cloth to wipe away any paint, dirt, or grime that may have accumulated on the airbrush’s exterior.
- Soak the parts: Soak the disassembled parts in warm water to loosen any dried paint or debris.
- Dry and reassemble: Dry each part thoroughly and reassemble the airbrush, making sure all components are securely tightened.
To certify your airbrush continues to function optimally, make it a habit to clean it regularly.
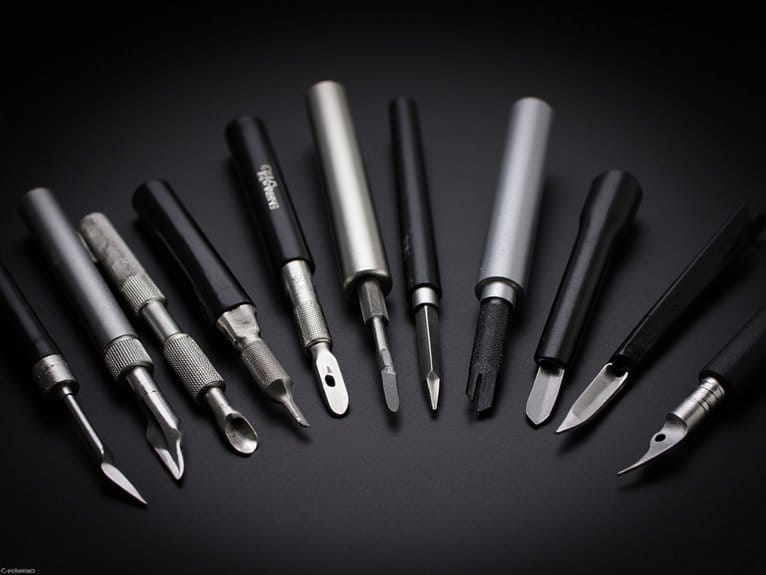
Which Cleaning Solutions And Tools Are Recommended?
Now that you’ve mastered the step-by-step cleaning process, it’s time to examine the right cleaning solutions and tools to get the job done efficiently. In terms of Cleaning Essentials, you’ll need a few key items. Invest in a good quality airbrush cleaning solution, which is specifically designed to dissolve and remove paint residue. You’ll also need lint-free wipes or cloths, a small bowl of warm water, and a soft-bristled brush for gentle scrubbing.
For Brush Care, a cleaning pick or brush cleaning needle is a must-have. This tool allows you to gently remove dried paint from the airbrush’s tiny crevices. Additionally, consider a airbrush cleaning mat or silicone pad to protect your work surface and prevent damage.
Tool Organization is vital to maintaining your airbrush. Store your cleaning solutions and tools in a designated area, such as a toolbox or storage container. This will guarantee everything is within easy reach and prevent lost or misplaced items. By having the right cleaning solutions and tools, you’ll be able to tackle even the toughest airbrush cleaning tasks with ease.
B. Paint Preparation
When you’re preparing to use your airbrush, it’s vital that you thin your paint properly to guarantee a smooth, even application. You’ll need to follow some guidelines to avoid over- or under-thinning, which can lead to clogs or unevenness. Additionally, you should only use paints that are compatible with your airbrush to prevent damage or poor performance.
What Are The Guidelines For Thinning Paint Properly?
How much thinner do you add to your paint to achieve the perfect consistency? Getting it right is vital for smooth airbrush operation and preventing overspray. The key is to find the ideal paint-to-thinner ratio. A general rule of thumb is to start with a 1:1 ratio and adjust from there. However, this can vary depending on the type of paint and the specific project you’re working on.
- Start with a small amount of thinner: Add a few drops at a time and mix well to avoid over-thinning.
- Use the right thinner: Choose a thinner specifically designed for your type of paint to guarantee compatibility.
- Test the mix consistency: Use a stir stick or mixing stick to check the consistency. It should be smooth and flow easily off the stick.
- Adjust as needed: Don’t be afraid to experiment and adjust the ratio until you achieve the perfect consistency.
Why Is It Important To Use Compatible Paints With The Airbrush?
Your airbrush is a precision tool, and it demands precision from the paints you use with it. In the realm of airbrushing, using compatible paints is vital to achieving smooth operation and preventing issues like clogs, overspray, and uneven finishes. Paint compatibility refers to the ability of a paint to flow smoothly through the airbrush, atomize correctly, and adhere well to the surface.
Different brands of paints can have varying levels of compatibility with your airbrush. Brand variation can affect the paint’s viscosity, flow rate, and drying time, all of which impact performance. Additionally, the material suitability of the paint is also important. For example, some paints are designed for use on specific surfaces like metal, plastic, or fabric, and using them on the wrong surface can lead to poor results.
To guarantee compatibility, always check the manufacturer’s recommendations for the type of paint to use with your airbrush. If you’re unsure, start with a small test batch to verify the paint’s performance before committing to a larger project. Remember, using compatible paints is essential to achieving professional-looking results and extending the life of your airbrush.
C. Equipment Checks
You’ll want to regularly inspect your airbrush components, such as needles, nozzles, and seals, for signs of wear and tear. Using high-quality equipment and accessories is vital, as they’re less likely to malfunction or break down. By doing so, you’ll minimize the risk of airbrush issues and guarantee a smoother, more consistent workflow.
How Often Should You Check For Wear And Tear On Components (Needles, Nozzles, Seals)?
Regularly inspecting your airbrush for signs of wear and tear on crucial components like needles, nozzles, and seals is essential to maintaining peak performance and preventing unexpected breakdowns. Neglecting these checks can lead to poor performance, overspray, and even damage to your artwork.
- Worn Nozzles: Inspect your nozzles for signs of wear, such as scratches, corrosion, or blockages. Clean or replace them as needed to guarantee a smooth, consistent spray pattern.
- Needle Inspection: Regularly inspect your airbrush needle for signs of wear, such as bent or corroded tips. Replace the needle if you notice any damage to prevent clogging and poor performance.
- Seal Replacement: Check the seals around your airbrush for signs of wear or damage. Replace them as needed to prevent air leaks and guarantee a smooth, consistent spray.
- Regular Cleaning: Regularly clean your airbrush to prevent clogging and corrosion. This includes cleaning the nozzle, needle, and seals, as well as flushing out any debris or dried paint.
Why Is It Important To Use Quality Equipment And Accessories?
Using subpar equipment and accessories can be a recipe for disaster, as it can lead to inconsistent results, wasted time, and frustration. You’ve invested time and effort into perfecting your airbrush technique, so don’t let inferior tools hold you back. Invest in high-quality brushes, nozzles, and needles to guarantee peak spray performance.
When it comes to airbrush upgrades, it’s essential to choose reputable brands that offer superior brush quality. A well-made airbrush will provide a smooth, consistent flow of paint, reducing the likelihood of overspray and uneven coverage. Additionally, quality accessories like hoses, adapters, and regulators will help maintain a consistent air pressure, further enhancing your spray performance. When looking for the best airbrush compressor options, be sure to consider factors such as noise level, tank size, and maximum air pressure. A quiet compressor is essential for minimizing distractions during use, while a larger tank can provide a more continuous flow of air. Additionally, be sure to choose a compressor with a sufficient maximum air pressure to meet the needs of your airbrush and projects.
V. Advanced Troubleshooting Techniques
V. Advanced Troubleshooting Techniques
You’ve mastered the basics, and it’s time to take your airbrush troubleshooting skills to the next level. With these advanced techniques, you’ll be able to pinpoint and fix even the most elusive issues.
Here are 4 expert-level techniques to add to your toolkit:
- Pressure Analysis: Use a pressure gauge to monitor your airbrush’s pressure output and identify inconsistencies that might be causing overspray or uneven coverage.
- Spray Optimization: Experiment with different spray patterns and angles to optimize your airbrush’s performance for specific applications and surfaces.
- Flow Rate Adjustment: Fine-tune your airbrush’s flow rate to achieve the perfect balance between coverage and detail.
- Component Inspection: Disassemble your airbrush and inspect individual components for wear, corrosion, or damage that might be affecting performance.
A. Diagnosing Complex Issues
When you’re faced with complex airbrush issues, you’ll need to pinpoint the problem areas to fix them effectively. You’ll likely encounter two common culprits: air leaks and sticky triggers or air valves. By learning how to identify and fix these issues, you’ll be able to troubleshoot even the most stubborn problems.
How Can You Identify And Fix Air Leaks?
Many airbrush issues can be traced back to a single, often-overlooked problem: air leaks. These tiny gaps in your airbrush system can cause big problems, from uneven paint flow to reduced air pressure.
To identify and fix air leaks, you’ll need to follow these steps:
- Conduct a thorough air hose inspection: Check your air hose for any signs of damage, kinking, or wear. Verify all connections are secure and not loose.
- Use leak detection methods: Listen for hissing sounds, feel for air escaping, or use a soap solution to detect bubbles forming around connections.
- Replace worn-out seals: Inspect O-rings, gaskets, and other seals for signs of wear. Replace them with new ones to guarantee a tight seal.
- Test your airbrush under pressure: Before you start painting, test your airbrush with the compressor turned on to guarantee there are no leaks.
What Are The Troubleshooting Steps For Sticky Triggers And Air Valves?
How often do you find yourself struggling with a sticky trigger or air valve, wondering what’s causing the problem and how to fix it? You’re not alone. Sticky triggers and air valves can be frustrating and disrupt your workflow.
When diagnosing the issue, start by checking the air valve for any blockages or debris. Jet clogging can cause the air valve to stick, so make sure to clean it regularly. You can use a soft brush or a cotton swab to remove any dirt or grime that might be accumulated. If the problem persists, inspect the trigger mechanism for any signs of wear or corrosion.
For sticky triggers, try lubricating the moving parts with a few drops of airbrush lubricant. This should help the trigger move smoothly again. If the problem still isn’t resolved, it might be time to replace the trigger or air valve altogether. Remember to always follow the manufacturer’s instructions for maintenance and repair to prevent sticky triggers and air valves from becoming a recurring issue. By being proactive and staying on top of maintenance, you can guarantee your airbrush runs smoothly and efficiently, and confirm that it continues to do so over time.
B. User Experiences and Tips
When you’re struggling with airbrush issues, it’s helpful to learn from others who’ve been in your shoes. You’ll find that many users have encountered similar problems and have developed strategies to overcome them. By considering their experiences and tips, you can avoid common mistakes and troubleshoot more effectively.
What Are Some Real-World Examples And Tips From Airbrush Users?
Several airbrush enthusiasts have shared their experiences, providing valuable insights into the common issues they’ve faced and the workarounds they’ve developed. You’re not alone in your airbrush nightmares, and hearing from others who’ve been in your shoes can be incredibly helpful.
- Clogged nozzles: One user discovered that regularly cleaning their nozzle with a soft brush and gentle soap prevented frustrating clogs that ruined their spray pattern.
- Inconsistent pressure: Another airbrusher learned to always check their compressor’s pressure gauge to guarantee it was set correctly, eliminating pesky inconsistencies in their paint flow.
- Drippy tips: A miniature painter found that swapping to a finer tip and adjusting their air pressure solved the issue of drips and blobs ruining their intricate designs.
- Mysterious overspray: A model maker realized that their spray gun woes were caused by holding the airbrush too close to the model; simply increasing the distance confirmed the problem.
What Common Mistakes Should Be Avoided?
Many an airbrusher has fallen prey to common mistakes that can turn a smooth workflow into a frustrating nightmare. You’re not immune to these mistakes, but being aware of them can help you avoid them. One common mistake is neglecting Airbrush Essentials, such as proper cleaning and maintenance. Failing to clean your airbrush regularly can lead to clogs, which can cause overspray and uneven coverage.
Another mistake is lacking Brush Control. You might be holding the airbrush too far from the surface or at the wrong angle, resulting in poor spray patterns. To achieve Spray Mastery, practice holding the airbrush at different distances and angles to get a feel for how it responds. Also, make sure you’re using the right air pressure for your specific project.
Additionally, you might be using the wrong type of paint or thinner, which can affect the flow and consistency of your spray. Make sure you’re using the recommended materials for your airbrush, and always follow the manufacturer’s instructions. By being mindful of these common mistakes, you can guarantee a smooth and successful airbrushing experience, and confirm that it will be free of errors.
VI. Visual Aids
When you’re trying to troubleshoot airbrush issues, it can be really helpful to have some visual references. You’ll find diagrams of airbrush components and common problems to be especially useful in identifying what’s going wrong. Before-and-after images showing the effects of proper maintenance will also give you a clear idea of what you’re aiming for.
What Diagrams Of Airbrush Components And Common Problems Are Helpful?
You’ll likely find it helpful to understand the inner workings of your airbrush by visualizing its components and how they interact. This is especially important when troubleshooting issues, as a clear understanding of airbrush anatomy can help you identify the root cause of the problem.
Here are some key components to focus on:
- Nozzle and needle assembly: This is where the paint and air mix, creating the spray pattern. Issues here can cause uneven spray patterns or clogs.
- Air valve and regulator: These control the air pressure and flow, affecting the overall performance of the airbrush. Problems here can lead to inconsistent spray patterns or overspray.
- Paint reservoir and feed system: This is where the paint is stored and fed into the nozzle. Issues here can cause paint to leak or not flow properly.
- Trigger and handle mechanism: This is what you use to control the airbrush. Problems here can cause the trigger to stick or the handle to become loose.
How Do Before-And-After Images Illustrate The Effects Of Proper Maintenance?
Six well-maintained airbrushes can make all the difference in achieving professional-looking results. When you see before-and-after images, it’s clear how proper maintenance can transform your airbrushing experience. Visual demonstrations of airbrushes with clogged nozzles, dry tips, and worn-out O-rings next to their well-maintained counterparts show the dramatic transformations that can be achieved.
The before-after comparisons are striking, with the poorly maintained airbrushes producing uneven, rough finishes and the well-maintained ones delivering smooth, consistent results. You’ll notice how the properly cleaned and lubricated airbrushes produce finer lines, crisper details, and more vibrant colors. The contrast is especially striking when you see the same airbrush model producing vastly different results due to maintenance.
These visual aids drive home the importance of regular cleaning, lubrication, and inspection. By following the maintenance tips outlined in this article, you can guarantee your airbrushes perform at their best, delivering professional-looking results that will enhance your work. Take a close look at these before-and-after images and see the difference proper maintenance can make for yourself.
VII. Conclusion
You’ve made it to the end of this airbrush issues guide, and by now, you should have a solid understanding of the importance of troubleshooting and maintenance to get the best results. It’s vital to recall that practice and experimentation are key to mastering your airbrush skills, so don’t be afraid to try new things. By putting in the time and effort, you’ll be well on your way to achieving professional-looking finishes.
What Is The Importance Of Troubleshooting And Maintenance Recap?
As airbrush enthusiasts, it’s essential that we recognize the significance of regularly troubleshooting and maintaining our equipment to prevent issues from arising in the first place. By doing so, you’ll save yourself the frustration and wasted time that comes with dealing with unexpected problems.
To guarantee your airbrush continues to operate smoothly, remember to:
- Create Maintenance Schedules: Set reminders to clean and inspect your airbrush regularly.
- Organize Your Tools: Keep your workshop tidy and organized to avoid misplacing essential parts.
- Stock Up on Workshop Essentials: Certify you have the necessary supplies, such as cleaning solutions and replacement parts.
- Stay Proactive: Anticipate potential issues and take preventative measures to avoid them.
How Can Practicing And Experimenting Lead To Better Airbrushing Results?
While mastering the art of airbrushing requires a certain level of technical skill, it’s just as vital to recall that practice and experimentation are key to achieving truly exceptional results. You won’t become an expert overnight, but with patient persistence, you’ll get there. Experiment freely with different techniques, paints, and surfaces to discover what works best for you. Don’t be afraid to try new things and take risks – it’s all part of the learning process.
Practice consistently, even if it’s just for a few minutes each day. The more you airbrush, the more comfortable you’ll become with the tool and the techniques. You’ll start to develop your own style and voice, which is essential for producing unique and engrossing artwork. Remember, the most skilled airbrush artists didn’t get there by chance – they put in the time and effort to hone their craft. By following their example and committing to regular practice and experimentation, you’ll be well on your way to achieving airbrush mastery.