We are supported by our audience. When you purchase through links on our site, we may earn an affiliate commission, at no extra cost for you. Learn more. Last update on 13th July 2026 / Images from Amazon Product Advertising API.
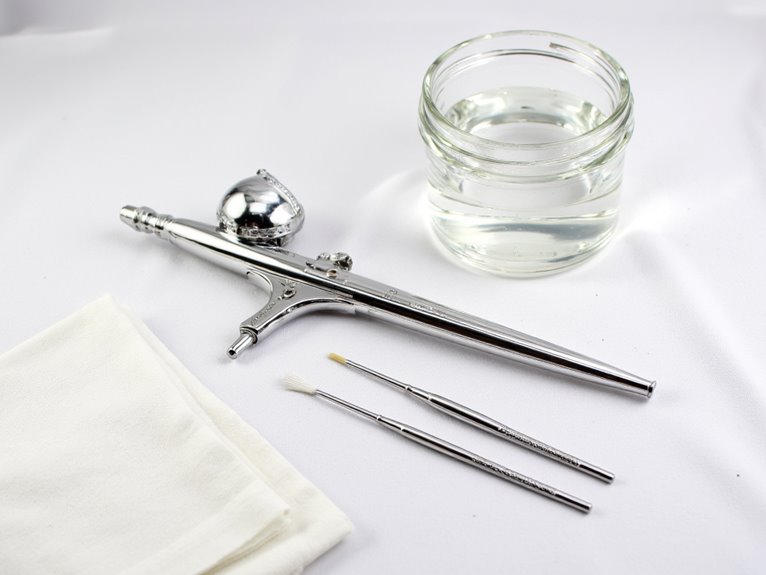
You’ll maintain peak airbrush performance by flushing distilled water through your tool immediately after each use, then performing deep cleaning every 10-15 sessions or weekly for professional work. Disassemble removable components, soak them in specialized airbrush cleaner for 10-15 minutes, and use precision nylon brushes to clear internal passages. Inspect your needle for burrs or bends, clean the nozzle with wooden skewers dipped in thinner, and replace worn O-rings to prevent air leaks. Proper maintenance techniques guarantee consistent spray patterns and extend component lifespan greatly.
Notable Insights
- Clean your airbrush immediately after each use by flushing with distilled water or appropriate cleaning solution.
- Perform deep cleaning every 7 days for professional use or monthly for casual use to prevent buildup.
- Inspect and carefully clean the needle regularly, storing it in protective sleeves to prevent damage.
- Use specialized cleaning supplies like nylon brushes, cleaning solutions, and pipe cleaners for thorough maintenance.
- Check O-rings, air pressure settings, and paint viscosity regularly to troubleshoot performance issues before they worsen.
Understanding the Importance of Regular Airbrush Maintenance
While many artists focus exclusively on technique and creativity, the foundation of professional airbrushing lies in consistent maintenance practices. Regular cleaning directly impacts your tool’s performance and longevity.
Paint residue accumulation causes clogs that disrupt spray patterns and create uneven application. These buildups compromise your artwork quality and can permanently damage internal components when neglected.
Neglected paint buildup destroys spray consistency and artwork precision while causing irreversible damage to your airbrush’s delicate internal mechanisms.
The airbrush benefits from routine care extend beyond basic functionality. Clean equipment delivers finer details and more controlled finishes essential for precision work.
Maintenance importance becomes evident when considering cost-effectiveness-proper upkeep prevents expensive repairs and part replacements. Your airbrush maintains peak performance when you establish consistent cleaning schedules.
Immediate flushing after use prevents stubborn deposits that resist standard cleaning methods. This systematic approach preserves the tool’s precision mechanisms and extends its operational lifespan considerably. For particularly stubborn paint residue and oil buildup, ultrasonic cleaners operating at frequencies between 40-48kHz provide thorough cleaning without harsh chemicals that could damage delicate components. A proactive approach saves both time and money over the long term by preventing major issues before they develop. Premium paints reduce clogging incidents and minimize the frequency of intensive cleaning sessions required for optimal airbrush function.
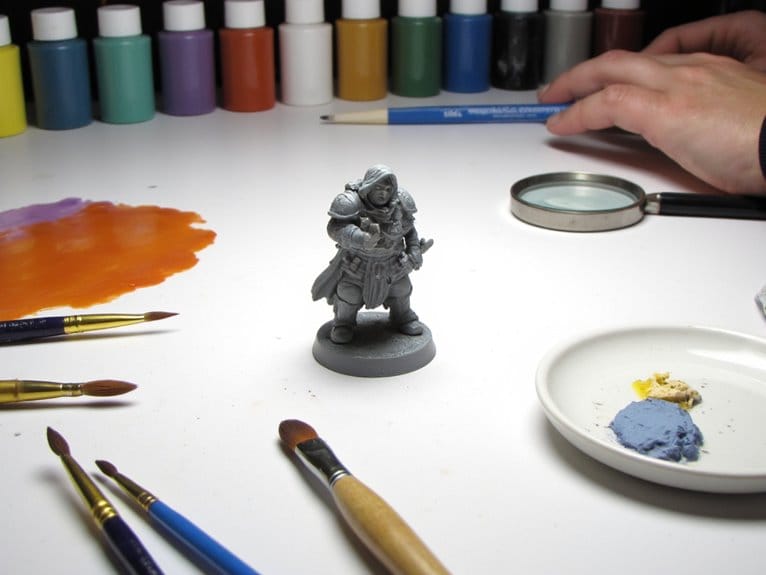
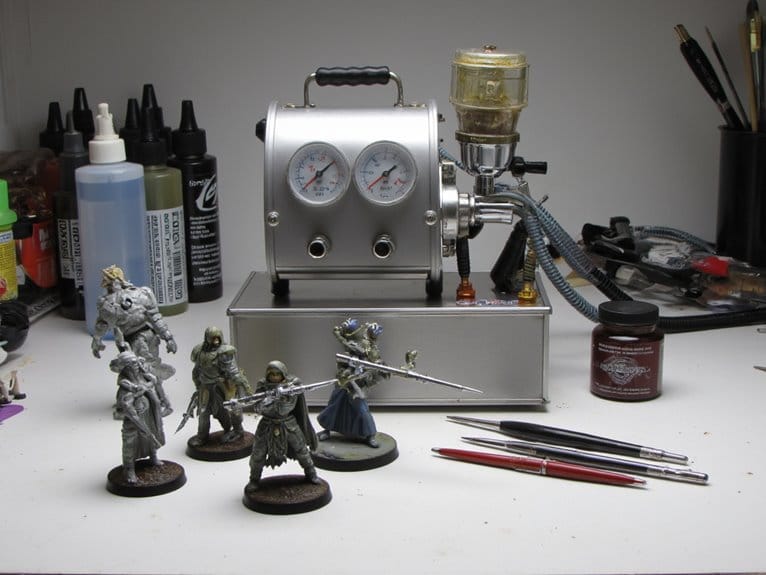
Essential Cleaning Supplies and Tools You’ll Need
Understanding maintenance importance naturally leads to assembling the right tools for the job.
You’ll need specialized cleaning solutions designed for airbrush equipment. Airbrush cleansers dissolve paint buildup without damaging delicate parts. Water works effectively for water-based paints, while silicone-based cleaning solutions handle both silicone and water-based products.
Essential cleaning tools include precision nylon brushes in multiple diameters for nozzle cleaning. Mini needle cleaning sets contain wire needles and poker tools for clearing clogs. Cotton swabs reach sensitive crevices safely.
Disassembly requires specific tools: needle removal tools, small wrenches, and magnifying equipment with LED lights.
Maintenance kits often include cleaning stations, bottle adapters, and storage containers. Professional cleaning kits typically feature cleaning needles and brushes for thorough maintenance. You’ll also need lint-free cloths, protective gloves, and airbrush-specific lubricants for post-cleaning care.
An airbrush cleaning pot effectively sprays cleaner through the system to remove stubborn paint residue from internal channels. Glass constructions are particularly favored for their superior durability and chemical resistance compared to plastic alternatives.
Determining the Right Cleaning Frequency for Your Usage
How often should you clean your airbrush? Your usage patterns directly determine ideal cleaning frequency.
Your airbrush maintenance schedule depends entirely on how frequently and intensively you use your equipment.
Professional users operating 5-6 days weekly require deep cleaning every seven days. Casual hobbyists can extend intervals to monthly with proper daily flushing.
Your cleaning techniques must adapt to paint types. Water-based paints allow standard cleaner use between sessions. Solvent-based formulations demand immediate flushing after each color change due to faster drying properties.
Monitor these performance indicators requiring immediate attention:
- Irregular spray patterns that destroy your artistic vision
- Trigger stiffness that kills creative flow
- Visible nozzle residue threatening project quality
- Color contamination ruining precise work
Usage guidelines recommend thorough cleaning every 10-15 uses minimum. Heavy metallic paint users need increased frequency.
Environmental factors like humidity affect drying times, influencing your maintenance schedule. Fast-acting cleaners effectively target dried acrylics without requiring scrubbing for severely clogged components. Regular cleaning prevents paint build-up and clogs, thus enhancing airbrush performance. Proper maintenance procedures lead to reduced costs and improved user satisfaction over time.
Step-by-Step Basic Cleaning Process
Five essential steps will transform your dirty airbrush into a precision instrument ready for flawless performance.
Begin by gathering cotton pads, distilled water, alcohol, and cleaning brushes on a light-colored workspace. Remove excess paint from the cup using cotton pads, then flush distilled water through until spray clears. Perform a backflush by covering the nozzle and spraying to dislodge hardened paint particles.
Disassemble removable parts including the cup, needle cap, and nozzle cap. Soak components in airbrush cleaner while scrubbing threads with soft brushes. Clean the needle with gentle wiping motions using cleaner-soaked cloth.
These maintenance tips prevent costly damage and guarantee consistent spray patterns. Neglecting this routine can lead to bacterial growth in the moist environment, creating potential health risks. Complete your airbrush cleaning routine by testing with distilled water to confirm smooth airflow before proper storage.
Deep Cleaning and Disassembly Techniques
When basic cleaning isn’t sufficient to remove stubborn paint buildup, you’ll need to perform a thorough disassembly and deep cleaning of your airbrush components.
This process requires specific tools like nozzle wrenches, pipe cleaners, and specialized airbrush cleaners to safely access and clean internal passages without damaging precision parts.
Proper preparation and the right disassembly techniques will restore your airbrush to peak performance while extending its operational lifespan.
Disassembly Tools and Preparation
Proper disassembly of your airbrush requires specific tools and careful preparation to prevent damage to precision components.
Tool selection directly impacts your success with disassembly techniques. You’ll need a small airbrush-specific wrench for nozzles, needle-nose pliers for valve casings, and precision screwdrivers for tiny components.
Essential preparation steps guarantee ideal results:
- Create an organized workspace with proper lighting and a parts tray to prevent losing critical components
- Depressurize your airbrush completely and disconnect from air supply before beginning any work
- Prepare glass bowls with distilled water for holding delicate parts during cleaning processes
- Gather microfiber cloths and small tweezers for handling fragile needles without causing scratches or bending
Always work methodically, removing components in logical order starting with caps and progressing to internal mechanisms.
Step-by-Step Deep Cleaning
Once you’ve completed the initial disassembly, deep cleaning your airbrush requires a systematic approach that targets both visible paint residue and hidden buildup within internal channels. Start by soaking removable parts in airbrush cleaner for 10-15 minutes to loosen dried materials.
Modern airbrush technology demands precision cleaning to handle varying paint viscosity levels effectively. Use pipe cleaners to scrub internal passages that flushing can’t reach.
| Component | Cleaning Method | Duration |
|---|---|---|
| Nozzle/Cap | Soak in cleaner | 10-15 min |
| Needle | Alcohol wipe | 2-3 passes |
| Air Passages | Brush scrubbing | 5 min |
Push the needle through carefully, wiping with alcohol-soaked cloth. Flush cleaning solution through the system multiple times. Never immerse the entire airbrush body, as this removes essential lubricants and damages precision components.
Proper Needle Care and Restoration Methods
Although many airbrush enthusiasts focus on external maintenance, the needle represents your tool’s most critical component and demands meticulous care to secure consistent performance.
Proper needle inspection involves checking for burrs, bends, or nicks using visual and tactile methods after every few uses. When you discover bent needles, you can attempt needle restoration by rolling them gently against a smooth curved surface like a coin, then applying controlled pressure on a soft healing mat.
Essential needle care practices include:
- Immediate cleaning – Flush paint residue instantly to prevent devastating buildup
- Gentle polishing – Use fine abrasive tools to eliminate performance-destroying scratches
- Protected storage – Shield your investment in protective sleeves
- Strategic replacement – Don’t risk project failure with severely damaged needles
Needle polishing and needle lubrication of surrounding components guarantees ideal functionality and extends service life considerably. When selecting needles for your airbrush, carefully consider that common needle sizes like 0.35mm and 0.5mm impact both paint flow and the level of detail achievable in your work.
Maintaining Nozzles, Caps, and Small Components
Three critical components beyond the needle require systematic maintenance to confirm peak airbrush performance: the nozzle, nozzle cap, and nozzle cover.
You’ll need to monitor nozzle replacement indicators closely. Paint flow inconsistencies and protruding needles signal worn soft brass nozzles. Clean using sharpened wooden skewers dipped in thinner, then apply nozzle sealant during reassembly.
Cap clogging poses significant performance threats. Use sharpened skewers or reamers with thinner to dissolve paint blockages. Exercise precision to prevent damage during cleaning.
Cap blockages threaten airbrush performance-use precision cleaning with sharpened tools and thinner to prevent component damage.
Nozzle covers accumulate paint residue requiring cotton swabs soaked in thinner. Avoid harsh chemicals that compromise component integrity. Regular inspection prevents blockages and wear.
Small components demand dedicated cleaning kits for stubborn clogs. Pipe cleaners handle larger openings effectively.
Professional airbrush kits typically include multiple nozzle sizes ranging from 0.2mm to 0.5mm to accommodate different application requirements.
Always verify proper function after reassembly to confirm ideal airbrush operation.
Cleaning and Caring for Bottle Adapters
Proper bottle adapter maintenance requires specific cleaning supplies and systematic procedures to prevent paint buildup and guarantee consistent airbrush performance.
You’ll need essential tools like soft toothbrushes, pipe cleaners, and old needles to effectively clean threads, siphon tubes, and small openings without causing damage.
Following a structured cleaning process while using the right techniques protects these delicate components from cracks, stripped threads, and seal deterioration that can compromise your airbrush system.
Essential Adapter Cleaning Supplies
Six essential categories of cleaning supplies will keep your bottle adapters functioning at peak performance and extend their operational lifespan considerably.
Your maintenance routines require specific tools and solutions tailored to different contamination types and adapter materials.
Essential cleaning supplies for ideal adapter performance:
- Pipe cleaners – Navigate narrow siphon tubes with flexible precision that rigid brushes can’t match.
- Windex or ammonia-based cleaners – Provide non-fuming, water-based paint removal without damaging seals.
- Terry cloth towels – Deliver lint-free drying that prevents surface scratching and moisture retention.
- Airbrush cleaning kits – Include specialized brushes and needles for thorough residue removal.
Lacquer thinner handles heavy-duty paint contamination beyond water-based acrylics.
Alcohol evaporates quickly while disinfecting components. Your cleaning techniques must match the specific paint type and contamination level for maximum effectiveness.
Step-by-Step Cleaning Process
When cleaning bottle adapters thoroughly, you’ll need to follow a systematic disassembly process that protects delicate components while ensuring complete contamination removal.
Start by fully separating all components: cap, siphon tube, and gaskets. Use small screwdrivers or tweezers to avoid damage while handling parts carefully.
Clean threads and external surfaces with a soft toothbrush, removing dried paint without using harsh abrasives.
Clear internal passages by running pipe cleaners through siphon tubes and carefully reaming hardened deposits with old airbrush needles. Rinse all components with warm, soapy water.
During reassembly, inspect seals for wear and apply airbrush-compatible lubricant to threads.
Proper adapter maintenance includes establishing cleaning schedules: quick cleaning after each use and deep cleaning every several sessions when paint flow declines.
Preventing Adapter Damage
Beyond thorough cleaning procedures, protecting your bottle adapters from damage requires understanding what causes premature wear and implementing preventive measures during daily use.
Proper handling prevents costly replacements and maintains consistent performance. Follow these essential protective measures:
- Never overtighten caps – Hand-tighten only to prevent thread stripping and cracking
- Store adapters disassembled – Prevents paint buildup and corrosion in humid conditions
- Use protective cases – Padded storage prevents physical damage during transport
- Apply light thread lubrication – Manufacturer-recommended oils reduce wear and ease assembly
Regular adapter inspection identifies problems early. Check for cracks, deformations, and worn threads monthly.
Threading issues often signal internal damage that cleaning can’t resolve. Replace adapters showing visible wear immediately – damaged components compromise airbrush performance and create inconsistent paint delivery.
Troubleshooting Common Performance Issues
Even the most well-maintained airbrush can develop performance problems that disrupt your workflow and compromise paint application quality.
Effective bubbles troubleshooting starts with identifying backflow issues in your paint cup. Tighten loose connections and replace worn O-rings to prevent air leakage.
Poor spray consistency often results from clogged nozzles or incorrect paint viscosity. Clean your airbrush thoroughly after each session, including complete disassembly when necessary.
Check air pressure settings and verify paint is properly thinned for smooth atomization. Spattering indicates dried paint buildup on the nozzle tip or damaged needle alignment.
Complete spray failure typically points to blocked air passages or faulty seals. Regular cleaning prevents most blockages, while proper paint thinning eliminates viscosity-related problems.
Preventative Measures for Long-Term Airbrush Health
Consistent preventative care serves as your airbrush’s foundation for reliable, long-term performance.
Regular maintenance protocols establish the groundwork for consistent airbrush operation and minimize costly repairs over time.
Effective preventative techniques require systematic implementation rather than reactive repairs. Many maintenance myths suggest daily deep cleaning, but this actually increases wear on delicate components.
Essential preventative measures include:
- Immediate post-use flushing – eliminates 95% of potential clogs before they form
- Weekly seal inspection – prevents catastrophic air leaks that destroy spray patterns
- Proper storage protocols – protects internal components from corrosion and contamination
- Scheduled lubrication cycles – maintains smooth trigger action and extends needle life
Store your airbrush completely dry in controlled environments.
Follow manufacturer specifications for disassembly procedures.
Develop consistent cleaning schedules balancing daily maintenance with thorough weekly care.
Avoid prolonged chemical exposure that degrades seals and O-rings.
Storage Best Practices and Environmental Considerations
Where you store your airbrush directly impacts its performance and lifespan, making location selection as critical as regular cleaning.
You’ll need to choose storage areas that maintain stable temperatures between 65-75°F with humidity levels below 50% to prevent corrosion and seal deterioration.
Environmental protection methods include using hard cases with foam inserts, airtight containers with desiccant packs, and controlled indoor spaces away from temperature fluctuations that can damage precision components.
Proper Storage Locations
Three critical environmental factors determine whether your airbrush storage location will preserve or damage your equipment: temperature stability, humidity control, and contamination protection.
Indoor environments provide optimal airbrush conditions through controlled temperature and minimal humidity fluctuations. Choose drawers, cupboards, or dedicated toolkits within your workspace rather than garages or sheds where conditions vary dramatically.
Your ideal storage location must meet these requirements:
- Temperature stability – Prevents metal expansion that destroys precision components
- Low humidity levels – Eliminates rust formation on critical metal parts
- Dust-free environment – Protects delicate mechanisms from contamination
- Protection from sunlight – Prevents seal degradation and heat damage
Storage containers work best when placed in well-ventilated areas without direct exposure to drafts. Accessibility should balance convenience with protection from accidental impacts.
Environmental Protection Methods
Beyond securing proper storage conditions, protecting both your airbrush and the environment requires strategic material selection and waste management practices.
Choose paints with low volatile organic compounds (VOCs) and hazardous air pollutants to minimize emissions. Water-based, UV-curable, and powder coatings reduce environmental impact by up to 90% compared to solvent-based alternatives.
Implement eco-friendly practices during equipment maintenance by using low-toxicity cleaning agents and containment strategies to capture harmful residues. Sustainable materials include alkaline or microbial cleaners that prevent microplastics and PFAS contamination.
Properly dispose of paint residues and solvents to prevent soil and water pollution.
Capture overspray when possible to reduce waste and atmospheric emissions. These environmental protection methods guarantee regulatory compliance while maintaining your airbrush’s performance and longevity.
On a final note
Regular maintenance will extend your airbrush’s lifespan considerably. You’ll achieve consistent performance when you clean after each session and perform deep cleaning weekly. Store your equipment in a controlled environment between 60-75°F with low humidity. Replace worn o-rings and seals immediately when you notice air leaks or paint seepage. Follow manufacturer specifications for needle tension and fluid adjustment. Proper care prevents costly repairs and guarantees professional results every time you paint.