We are supported by our audience. When you purchase through links on our site, we may earn an affiliate commission, at no extra cost for you. Learn more. Last update on 1st July 2025 / Images from Amazon Product Advertising API.
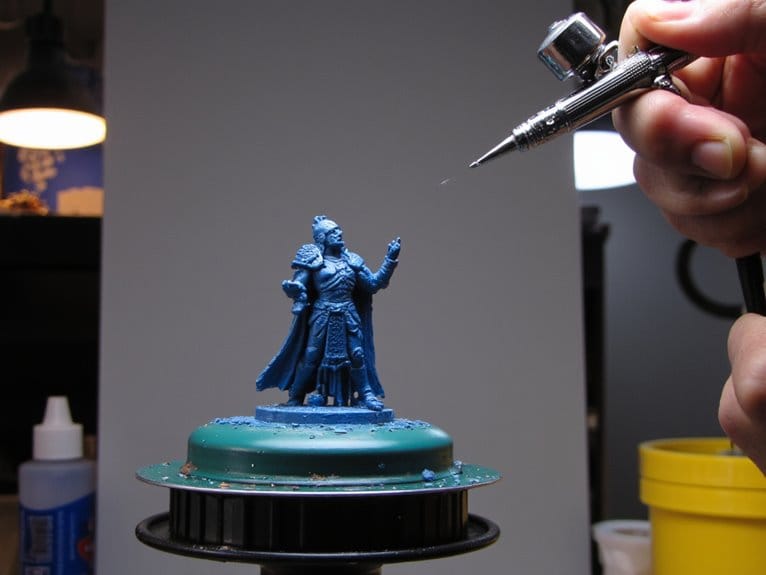
Start with a 1:1 paint-to-thinner ratio and adjust based on your nozzle size—smaller 0.2-0.3mm nozzles need thinner mixtures around 1:4. You’ll want consistency similar to skimmed milk for ideal flow. Match your thinner to the paint’s chemical base: water or acrylic reducers for acrylics, turpentine for oil-based paints, and specialized reducers for urethanes. Add thinner to your airbrush cup first, then paint to prevent clogging. Proper technique and ratio documentation facilitate consistent professional results.
Notable Insights
- Start with a 1:1 paint-to-thinner ratio and adjust based on nozzle size and desired coverage.
- Match thinner type to paint base: water for acrylics, mineral spirits for oils, specialized reducers for urethanes.
- Aim for milk-like consistency and add thinner to airbrush cup before paint to prevent clogging.
- Test spray on small patches first to verify proper flow before full application.
- Avoid over-thinning as it causes transparent coverage, color loss, and excessive runoff requiring more coats.
Understanding Different Types of Airbrush Thinners
When choosing an airbrush thinner, you’ll encounter five main categories that each serve specific paint systems and applications.
Water-based thinners offer waterborne advantages like safety and easy cleanup, using tap water for beginners or deionized water for superior results with metallics.
Water-based thinners provide the safest option with simple cleanup, while deionized water delivers premium results for metallic paints.
Lacquer thinners, including Mr. Color leveling thinner and Tamiya retarding types, provide smooth finishes across multiple paint systems.
Solvent-based thinners require specific compatibility matching to avoid solvent risks and safety hazards.
Alcohol-based options like 91% isopropyl alcohol work with certain acrylics but affect finish texture.
Commercial airbrush mediums deliver consistent flow enhancement while maintaining color intensity. These mediums also help prevent tip dry issues that commonly occur during extended airbrushing sessions.
Each category demands proper ventilation and compatibility testing for peak performance. Opaque colors typically require more thinner due to their naturally thicker consistency compared to transparent paints.
Finding the Right Paint-to-Thinner Ratios
You’ll want to start with a 1:1 paint-to-thinner ratio as your baseline for most airbrushing projects.
This ratio provides balanced coverage and smooth flow while maintaining good control without clogging your nozzle or creating excessive overspray. Set your pressure to 30 psi for optimal performance when using this one-to-one mixture.
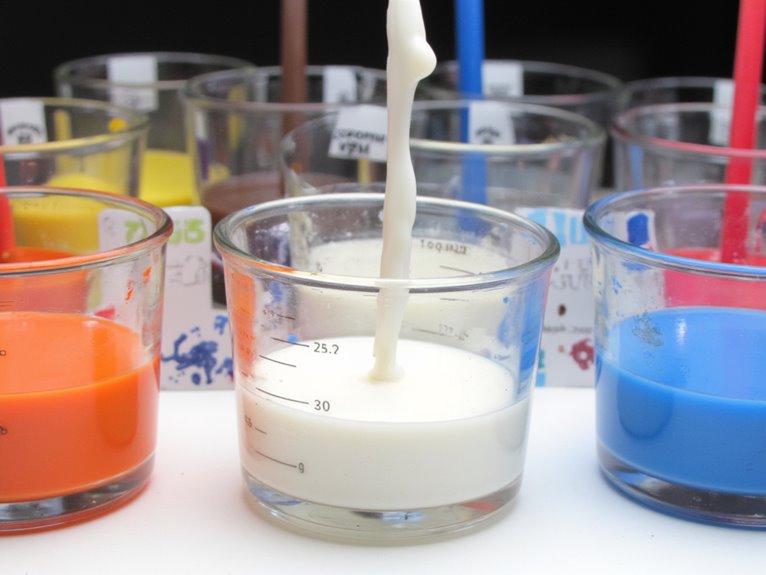
From this starting point, you can adjust the mixture based on your airbrush’s performance and the specific results you’re seeing on your test surface. Aim for a skimmed milk consistency when thinning your paints to achieve the best airbrushing results.
Keep quality airbrush cleaners readily available to maintain optimal paint flow and prevent clogging between color changes or when switching between different paint consistencies.
Starting Ratio Guidelines
Most successful airbrushing starts with finding the ideal paint-to-thinner ratio for your specific combination of paint brand, airbrush equipment, and project requirements.
A standard 1:3 paint-to-thinner ratio serves as an excellent baseline for most hobby acrylics like Army Painter and Citadel. This mixture achieves a milk-like paint viscosity that flows smoothly through standard nozzles.
Different thinner types affect your starting ratios. Water works effectively at 1:1 ratios for basic applications, while dedicated acrylic thinners maintain paint binder integrity better. Using soft water is recommended to avoid mineral reactions that can cause deposits and affect paint performance.
Tamiya paints typically require 2:1 ratios with additional flow enhancer.
Your airbrush’s nozzle size directly influences preferred ratios. Smaller 0.2-0.3mm nozzles demand thinner mixtures approaching 1:4 ratios, while larger 0.3-0.5mm nozzles handle thicker 1:1 or 2:1 mixtures effectively. Consider mixing paints outside the airbrush for better control and consistency rather than attempting to blend components within the airbrush itself.
Adjusting Based on Performance
Finding your perfect ratio requires real-time adjustments based on how your airbrush performs with each specific paint mixture. Testing techniques should begin with dripping samples from your brush to assess flow consistency.
Paint viscosity affects atomization quality—watch for spattering or pooling during test sprays. Make incremental adjustments by adding small amounts of thinner until you achieve smooth coverage without clogging.
Air pressure effects interact directly with paint thickness. Higher pressure can push thicker mixtures through larger nozzles but may compromise detail work.
Monitor your brush’s performance continuously during application. If paint begins pooling or creating uneven coverage, add more thinner gradually. Environmental conditions like humidity and temperature can also affect paint thickness, requiring additional ratio adjustments to maintain optimal flow.
Document successful ratios for future reference, noting specific paint brands, nozzle sizes, and pressure settings to streamline your setup process.
Proper Mixing and Application Techniques
Achieving the right paint consistency forms the foundation of successful airbrushing, and there’s no universal thinning ratio that works for every paint brand or project. Target a consistency similar to skimmed milk for ideal flow characteristics.
Essential mixing techniques start with adding thinner to your airbrush cup before paint to prevent early nozzle clogging.
Shake paint bottles thoroughly before thinning, especially metallics where pigment flakes settle. Mix gently without stirring sticks to avoid bubbles and inconsistent mixture. Use lidded containers for vigorous shaking when achieving uniformity.
Key application tips include maintaining 30 psi air pressure and applying multiple thin coats rather than single heavy layers.
Test spray small patches before full application to verify consistency. Clean your airbrush frequently during sessions to prevent buildup, particularly with metallic or dense paints. Professional-grade airbrush systems with adjustable PSI settings allow you to fine-tune pressure between 2-55 PSI for optimal paint atomization and control.
Paint Type Considerations and Requirements
Different paint formulations require specific thinning approaches to achieve ideal airbrush performance.
Paint compatibility determines which thinners you’ll use and how your finish will perform. Matching the wrong thinner to your paint type can compromise adhesion, clog your airbrush, or create safety hazards.
Here are four critical paint type considerations:
- Acrylic paints need water or acrylic reducers to reach milk-like consistency.
- Oil-based paints require turpentine or mineral spirits with proper ventilation.
- Watercolors thin easily with water but lack durability for heavy-use applications.
- Urethane paints demand specialized reducers and rigorous safety protocols.
Thinning safety requires consulting Safety Data Sheets for solvent-based paints.
Never mix incompatible chemicals.
Water-based paints use water-based thinners, while solvent-based paints need compatible solvents.
Quality acrylic formulations with high-concentration pigments deliver vibrant, intense colors that maintain their richness even after proper thinning for airbrush applications.
Common Thinning Mistakes and How to Avoid Them
Even experienced airbrush users make critical thinning errors that compromise their paint results and equipment performance.
You’ll encounter three primary problem areas: over-thinning that destroys pigment density and coverage, selecting incompatible thinners that cause chemical reactions, and improper mixing techniques that create inconsistent paint flow.
These mistakes account for most airbrushing failures, but they’re completely preventable once you understand the underlying causes.
Over-Thinning Paint Problems
Several critical errors can derail your airbrushing project when paint isn’t properly thinned, with over-thinning being one of the most problematic mistakes you’ll encounter.
Over thinning effects create immediate visual impact issues that compromise your project’s quality and appearance.
When you dilute paint beyond suitable ratios, four significant problems emerge:
- Transparent, washy finish – Paint loses covering power and appears see-through rather than delivering solid color.
- Rapid surface runoff – Over-diluted paint flows off surfaces quickly, creating uneven application patterns.
- Multiple coat requirements – Thin layers demand repeated passes, increasing painting time and pooling risks.
- Color saturation loss – Insufficient pigment density reduces vibrancy and creates wash-like appearance instead of rich, saturated coverage.
Proper thinning ratios maintain paint body while ensuring smooth flow.
Wrong Thinner Selection
While over-thinning paint creates obvious visual problems, selecting the wrong thinner type causes equally damaging but often more subtle issues that can destroy your project before you realize what’s happening.
Wrong thinner selection represents one of the most common mistakes airbrushing beginners make. You must match your thinner to your paint’s chemical base—acrylic, enamel, or lacquer paints each require specific formulations.
Using lacquer thinner with acrylic paint breaks down paint molecules, while water-based thinners with solvent paints cause separation and curdling.
Manufacturer-specific thinners contain precise additives that maintain paint integrity during spraying. Generic craft store thinners lack these compounds, causing premature tip drying and nozzle clogging.
Fast-evaporating thinners like isopropyl alcohol create immediate tip dry problems, forcing constant cleaning cycles that disrupt your workflow.
Poor Mixing Techniques
Four critical mixing errors destroy more airbrushing projects than equipment failures or paint defects combined.
Your technique determines whether you’ll achieve smooth paint textures or face costly rework.
- Adding thinner too rapidly – Pour thinning agent in 10% increments maximum. Rapid addition breaks down acrylic binders, causing flocculation and dull finishes.
- Insufficient agitation after thinning – Use proper mixing tools like palette knives or mechanical stirrers. Shake containers for minimum 30 seconds to achieve homogeneous suspension.
- Using contaminated water sources – Tap water’s chlorine and minerals create clumps and nozzle blockages. Distilled water prevents chemistry disruption.
- Ignoring viscosity adjustments – Fine detail nozzles (0.2mm) require thinner consistency than base coat applications (0.5mm).
Test spray patterns before committing to projects.
Professional Tips for Optimal Results
Achieving professional-quality results with an airbrush requires precise control over paint viscosity and consistency. Master these advanced airbrush techniques by measuring paint-to-thinner ratios with droppers or pipettes for repeatability. Start with 1:1 ratios, then adjust based on your specific application needs.
| Application Type | Recommended Ratio | Nozzle Size |
|---|---|---|
| Fine Detail Work | 2:1 (thinner:paint) | 0.2-0.3mm |
| Base Coating | 1:1 | 0.4-0.5mm |
| Transparency Effects | 3:1 | 0.3-0.4mm |
Incorporate specialized additives like airbrush medium to slow drying and improve flow. Test your mixture by letting it drip from a brush—it should flow like light cream. Document successful ratios for consistent reproduction. Always strain mixtures before spraying to prevent clogs and guarantee smooth application. For thorough maintenance of your airbrush equipment between paint changes, consider using ultrasonic cleaners operating at optimal frequencies of 40-48kHz to remove paint residue effectively without damaging delicate components.
On a final note
You’ve learned the fundamentals of paint thinning for airbrushing success. Start with a 2:1 paint-to-thinner ratio and adjust based on your specific paint type. Test consistency on practice surfaces before committing to your final project. Remember that proper airbrush maintenance and consistent mixing techniques will deliver professional results. Don’t rush the process—patience with thinning ratios and application speed separates amateur work from expert-quality finishes every time.