We are supported by our audience. When you purchase through links on our site, we may earn an affiliate commission, at no extra cost for you. Learn more. Last update on 1st July 2025 / Images from Amazon Product Advertising API.
A pin vise is a precision hand-drilling tool featuring an adjustable collet system that grips drill bits from 0.7mm to 3mm for miniature painting projects. You’ll use it to create realistic gun barrel openings, drill pilot holes for component pinning with metal wire, and prepare magnetization points without damaging delicate resin or plastic models. The ergonomic pen-shaped design provides controlled manual operation, while the knurled twist cap guarantees secure bit retention during drilling operations. Master these fundamental techniques to release advanced miniature modification possibilities.
Notable Insights
- A pin vise is a precision hand tool with adjustable collets that grip drill bits from 0.7mm to 3mm for miniature modeling work.
- Use pin vises to drill pilot holes for pinning components, preparing magnetization points, and adding detail textures like bullet holes or rivets.
- Maintain perpendicular drilling angles with steady pressure and slow rotation speeds to prevent misalignment and structural damage to miniatures.
- Clean drilled areas with soft brushes and compressed air to remove debris before painting, ensuring proper paint adhesion and finish quality.
- Choose quality pin vises with all-metal construction and precision-machined chucks from brands like Tamiya, Citadel, or The Army Painter for reliability.
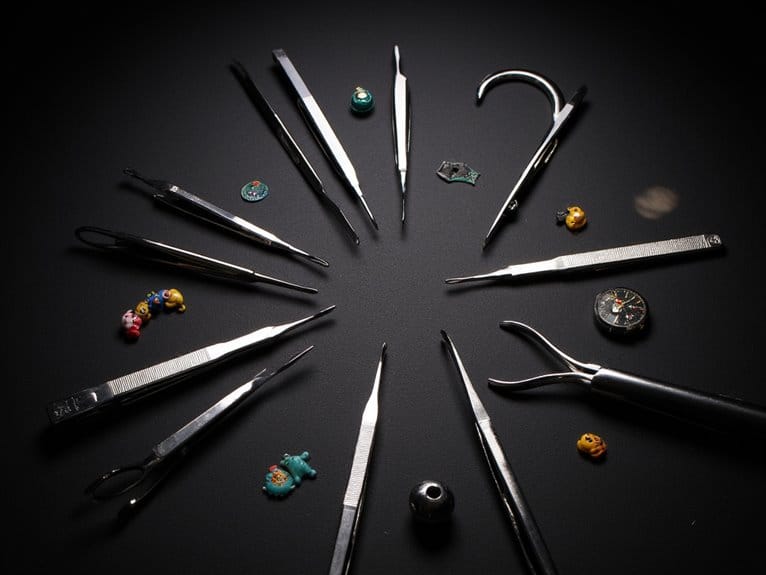
Understanding the Pin Vise Tool
While power tools dominate most workshop tasks, the pin vise remains an indispensable hand tool for precision drilling in miniature painting and modeling.
You’ll recognize this pen-shaped device by its ergonomic design and adjustable collet system that securely grips drill bits ranging from 1/64″ to 3/32″ diameter.
The pin vise history traces back to traditional machinist workshops where precision manual drilling was essential.
Modern variants include ball-shaped rotating handles and dual-ended collets for enhanced versatility. You can hold various cylindrical tools including drill bits, burs, files, and awls with complete stability.
Tool maintenance requires minimal effort—simply clean the collet threads and lubricate moving parts occasionally.
The tactile feedback you receive during operation prevents over-drilling and material damage that power tools often cause in delicate miniature work. A comfortable grip on the pin vise is essential for effective drilling and precise control during extended modeling sessions. Some pin vises feature internal storage for drill bits, providing convenient organization and preventing loss of these tiny components.
Key Features and Components
The pin vise‘s effectiveness stems from its carefully engineered components that work together to deliver precise drilling control.
Pin vise construction centers around a durable metal body featuring a pen-shaped design for optimal manual handling. You’ll find an adjustable chuck mechanism that securely grips drill bits ranging from 0.7mm to 3mm (#50 to #80). The knurled twist cap tightens to hold bits firmly in place.
Most models include a swiveling ball or flared top that rotates smoothly during operation.
The ergonomic benefits become apparent during extended use, particularly with mushroom-shaped handles that reduce hand fatigue. Many pin vises feature internal storage compartments for drill bits, accessed through the twist cap. These tools excel at drilling holes in metal, resin, and plastic miniatures with exceptional precision.
Double-ended versions provide additional versatility for different bit sizes and applications. Pin vises allow for controlled drilling without applying excessive force that could damage delicate miniature components. High-quality models often feature nickel-plated brass construction that enhances both durability and corrosion resistance for long-term use.
Pin Vise Applications in Miniature Hobbyist Work
Five primary applications define how miniature hobbyists integrate pin vises into their workflow, each addressing specific technical challenges in model preparation and enhancement.
You’ll drill pilot holes for pinning miniature components together using metal wire reinforcement. This technique prevents joint failure in heavy multipart models.
Pin vises accommodate drill bits ranging from 0.5mm to 3mm diameter for precise hole placement.
Magnetization preparation requires drilling exact-diameter holes for embedding small neodymium magnets. You’ll create modular weapon systems and interchangeable parts without permanent adhesives.
Detail enhancement involves drilling realistic textures like rivets or bullet holes. Pin vises deliver controlled punctures that electric tools can’t match in delicate areas.
Customization work includes drilling attachment points for conversion components and repair operations. The hand-powered design provides superior control compared to electric alternatives when working on intricate details.
Regular miniature maintenance and proper tool care guarantee consistent performance across all applications. Tungsten Carbide drill bits offer superior durability when working with plastic and pewter materials.
Drilling Realistic Gun Barrels and Weapon Details
Among detail enhancement applications, drilling gun barrels represents the most transformative modification you can make to miniature weapons.
You’ll achieve dramatically improved realism by creating hollow muzzle openings that catch light naturally. Select drill bits between 0.7mm and 1.8mm based on your barrel’s scale.
The manual precision of pin vises prevents over-drilling that destroys delicate parts. Apply gentle, steady pressure while rotating clockwise to maintain control.
Always drill before painting to preserve clean edges and prevent paint buildup.
Beyond barrels, you can enhance triggers, suppressors, and mounting points for miniature detailing work. You can also drill out weapon scopes to add another layer of realistic detail to your miniatures.
Insert piano wire through drilled holes to simulate gun sights or attachment points.
Practice on spare miniatures first to develop proper technique and build confidence with this precision tool.
Creating Anchor Points for Modeling Putty and Conversions
Successful conversions depend on creating proper anchor points that lock modeling putty into your miniature’s surface. Your pin vise drills precise holes ranging from 0.1mm to 1mm diameter, providing mechanical grip that prevents putty from peeling during handling or painting. These anchor points enable putty adhesion through keying rather than surface contact alone.
Drill shallow holes in flat areas where you’ll apply putty. Clean debris from holes and roughen adjacent surfaces slightly. Space holes evenly for consistent anchoring. Press putty firmly into drilled holes so it locks mechanically into your miniature’s surface.
This anchoring method improves sculpting techniques by providing stable foundations for complex work. Your putty resists chipping and separation during curing, sanding, and painting.
Anchor points create seamless blends between original components and added sculpted elements. After completing your conversion work, use dry brushing techniques to highlight the textured surfaces and create realistic weathering effects on your modified miniature.
Pinning Techniques for Stronger Miniature Joints
When you’re pinning miniature joints, precise drill alignment and proper pin material selection determine whether your joint will last through years of gaming or fail after the first drop.
Your drill holes must be perfectly straight and positioned to maximize structural integrity—even a slight angle can create weak points that compromise the entire assembly.
Start by choosing the right pin material for your specific miniature type, as paper clips work well for lightweight plastic figures while piano wire provides superior strength for heavy metal components.
Drill Alignment Best Practices
Achieving precise drill alignment forms the foundation of successful pinning operations for miniature assembly and repair work. You’ll need accurate hole marking using contrasting colors or pencil dots to establish drilling guides on miniature parts. A quality drill guide or pin vise with swiveling heads provides essential angle control during operations.
Mark drill spots precisely before securing parts with clamps or modeling grips. Drill paired holes simultaneously when possible, or use one part as a template for its mate. Maintain perpendicular angles relative to joint surfaces throughout the process. Check alignment visually with squares or angle guides before proceeding.
Apply steady, controlled pressure with slow rotations. Let the pin vise perform the work rather than forcing penetration.
Double-check angles frequently to prevent misalignment that compromises joint integrity and miniature structural stability.
Pin Material Selection Guide
Material choice directly determines joint strength, durability, and compatibility with your miniature’s composition.
Brass pins offer excellent corrosion resistance with moderate stiffness, making them ideal for plastic and resin models. Steel pins provide superior strength for metal miniatures requiring heavy-duty joints. Piano wire delivers maximum rigidity when pinning techniques demand exceptional structural support.
Material properties vary considerably across pin types. Stainless steel resists rust while maintaining strength, perfect for humid environments. Copper pins bend easily but lack structural integrity. Aluminum works for alignment but can’t handle stress loads.
Select pin diameter between 0.3mm to 1.0mm based on your model’s scale. Match material hardness to your miniature’s composition—soft pins for delicate resin, hardened steel for metal assemblies.
Test compatibility on scrap material first.
Using a pin vise effectively requires careful preparation and systematic execution to achieve professional results on your miniatures.
Start by securing your miniature on a stable surface in a well-lit workspace. Select an ergonomic pin vise with clean, sharp drill bits appropriate for your project size. For enhanced precision when working on intricate details, consider using a magnifying lamp with 10X-12X magnification and adjustable LED lighting to reduce eye strain during extended sessions.
Follow these essential steps:
- Insert the drill bit – Loosen the chuck completely, insert the bit fully, then tighten firmly until secure.
- Execute controlled drilling – Hold steadily with your dominant hand, rotate manually using fingers and wrist.
- Clean and finish – Remove debris with a hobby knife, optionally apply dark paint for depth effect.
Advanced techniques include pre-drilling before priming and strategic pinning at stress points.
Common mistakes involve rushing the rotation speed or insufficient bit securing, which causes wobbling and imprecise holes.
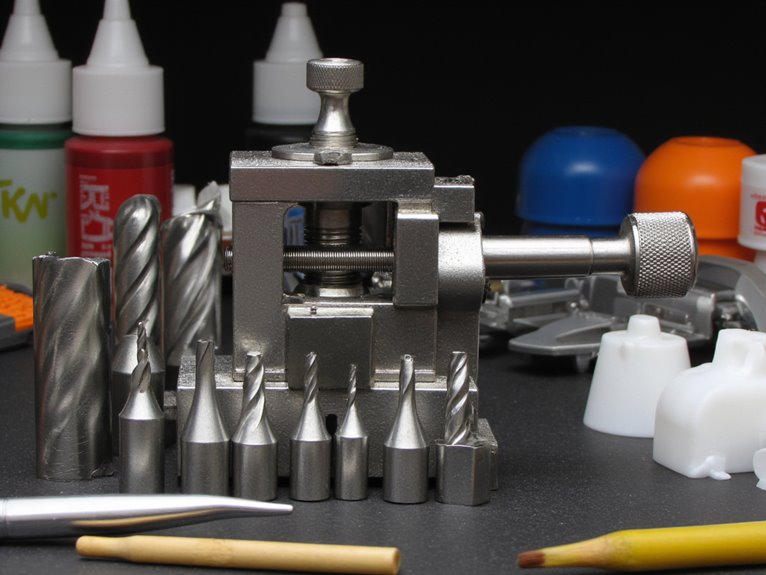
Selecting the Right Drill Bit Size
Selecting the correct drill bit size requires you to match the bit diameter to both your miniature’s scale and the specific components you’ll install.
Your choice must account for the material properties of your miniature – whether it’s resin, plastic, or metal – since each responds differently to drilling forces and requires specific clearance tolerances.
You’ll need to take into account both the pin or magnet diameter and the structural integrity of the miniature part to prevent stress fractures while ensuring a secure fit.
Scale Matching Considerations
Consider these critical sizing factors:
- Material compatibility – Plastic, resin, and metal require different drilling approaches but identical scale considerations.
- Pin vise chuck capacity – Standard 3.2mm shanks fit most miniature drill bits and pin vises.
- Detail preservation – Bits smaller than 0.011 inches demand careful handling to prevent breakage.
Proper scale matching eliminates rework, preserves your paint job, and guarantees secure pinning without compromising the miniature’s proportional accuracy.
Material Compatibility Factors
When drilling different miniature materials, your drill bit selection directly determines project success or failure. Each material requires specific drilling techniques and bit sizes to prevent damage.
| Material | Recommended Size | Special Considerations |
|---|---|---|
| Plastic | 0.5mm – 1.8mm | Prevents cracking |
| Resin | 1.0mm – 1.8mm | Use cautiously, brittle |
| Metal | Up to 3mm | Requires steady control |
Plastic miniatures demand smaller bits to avoid structural damage. Resin’s brittleness necessitates careful pressure control during drilling. Metal components tolerate larger drill sizes but require steady hands to prevent deformation.
Tungsten carbide PCB drill bits offer superior durability across all miniature materials. They maintain sharpness longer than standard steel bits, especially when working with harder substances. Always match your bit size to slightly exceed pin or magnet diameters for proper fitment.
On a final note
You’ll find that mastering pin vise techniques transforms your miniature work from amateur to professional quality. The precise holes you create enable realistic weapon details and secure conversion anchoring that won’t fail during handling. Your drilling accuracy improves with practice, so start with simple projects before attempting complex modifications. Quality pin vises last decades with proper maintenance, making them essential investments for serious hobbyists who demand precision results.