
We are supported by our audience. When you purchase through links on our site, we may earn an affiliate commission, at no extra cost for you. Learn more. Last update on 30th June 2025 / Images from Amazon Product Advertising API.
Common miniature painting problems stem from five key issues you can easily fix. Paint separation occurs when you thin beyond 30% with water—use specialized mediums instead and stir thoroughly before each use. Poor adhesion results from inadequate surface prep; clean with isopropyl alcohol and apply thin primer coats. Maintain paint consistency like skimmed milk, allow proper drying between layers, and guarantee 1000-1500 lux lighting with 90+ CRI ratings. These foundational solutions open advanced troubleshooting techniques.
Notable Insights
- Clean miniature surfaces with isopropyl alcohol and apply thin primer coats to ensure proper paint adhesion.
- Thin paints to milk-like consistency and apply multiple thin layers rather than thick coats to preserve detail.
- Allow each paint layer to fully dry before applying the next to prevent patchy coverage and bleeding.
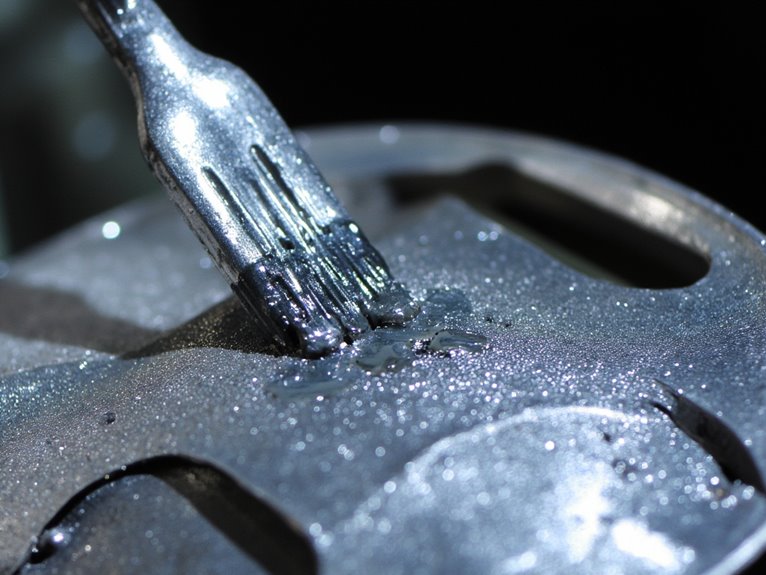
- Stir paints thoroughly before use and add glass bead agitators to prevent pigment separation and settling.
- Use proper lighting (1000-1500 lux, 90+ CRI) and maintain clean brushes for accurate color application and detail work.
Paint Separation and Mixing Problems
When pigments and binders in miniature paints split apart, you’re dealing with paint separation—one of the most frustrating obstacles to achieving smooth, professional finishes. This occurs when poor-quality paints lack proper milling or when you’ve thinned beyond 30% water content, diluting binder concentration below effective levels.
You’ll notice inconsistent coverage, patchy color distribution, and compromised adhesion. Lower-grade paints separate more readily due to inadequate binder distribution during manufacturing.
Temperature fluctuations and contamination accelerate this process during storage. Immediate cleaning with warm soapy water after each painting session prevents paint buildup that can contaminate fresh applications and worsen separation issues.
Vigorous paint re binding through thorough mixing restores pigment uniformity before application. Test consistency by observing brush wake fill-time—quick closure indicates proper ratios.
Use specialized mediums instead of excessive water to maintain film integrity while achieving desired flow characteristics. Focus on progressive layers rather than perfect smoothness, as multiple thin applications can overcome separation issues while building proper volume and opacity. Allow each layer to cure completely before applying subsequent coats to ensure proper adhesion and prevent paint film weakness.
Poor Surface Preparation and Priming Issues
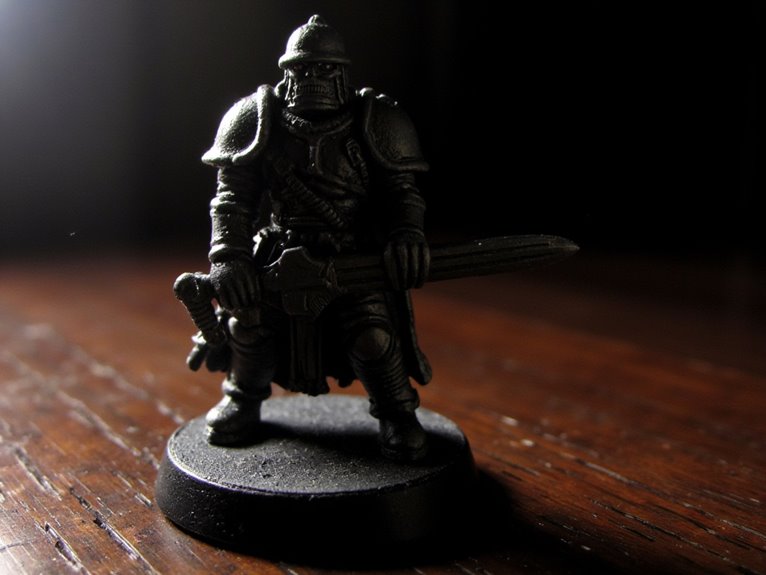
The foundation of any successful miniature paint job depends entirely on proper surface preparation and priming—skip these critical steps, and you’ll face adhesion failures, chipping, and uneven coverage that no amount of skillful brushwork can salvage.
Surface preparation and proper priming form the absolute foundation of professional miniature painting—neglect them at your own peril.
Start with proper cleaning techniques using isopropyl alcohol or dish soap with a toothbrush to remove mold release agents. These contaminants prevent paint adhesion completely.
Next, employ sanding methods to remove mold lines and smooth rough surfaces before assembly. File gaps flush and fill them appropriately. For deeper cracks and gaps, apply Mr. Dissolved Putty with an old brush to achieve effective filling due to its liquid consistency.
Primer selection matters greatly. Apply thin, even coats from multiple angles to maintain surface detail. Allow 24 hours minimum curing time regardless of touch-dry appearance. Insufficient curing causes paint flaking during handling.
Use plastic-specific primers when required, and avoid heavy buildup that obscures miniature details. For resin miniatures, specialized primers like Vallejo Grey Acrylic offer exceptional adhesion to diverse materials while preserving fine surface details. Choose primers that provide a colour match for easy corrections during subsequent painting stages.
Paint Thickness and Thinning Mistakes
Even with perfect surface preparation and priming, your miniature painting efforts will fail if you can’t master paint consistency and application thickness. Paint consistency should resemble skimmed milk, though this varies between brands and colors. Citadel paints typically require more thinning than Vallejo or Army Painter.
| Paint Issue | Cause | Solution |
|---|---|---|
| Detail Loss | Too thick application | Multiple thin coats |
| Blotchy Coverage | Single thick coat | Proper thinning techniques |
| Poor Opacity | Over-thinning | Test coverage first |
| Paint Cracking | Excessive thickness | Gradual water addition |
| Uneven Finish | Improper consistency | Practice brush control |
Thick layers obscure details and create longer drying times. Use small water drops to thin gradually. Test paint consistency on plastic surfaces before applying to miniatures. Undiluted paints often produce an undesirable glossy finish that detracts from the realistic appearance of your miniatures. A wet palette provides the most effective environment for achieving proper paint mixing and maintaining optimal consistency throughout your painting session. Using proper moisture retention systems can reduce paint waste by 60-80% while maintaining workable paint for extended periods.
Brush Maintenance and Cleaning Failures
While perfect paint application techniques won’t save miniatures painted with poorly maintained brushes, most hobbyists overlook this critical aspect of the craft.
Poor brush cleaning destroys bristle integrity and reduces tip precision essential for detailed work.
Common maintenance techniques that prevent brush failures include:
- Rinse frequently during sessions – Prevents paint buildup and maintains sharp tips for edge highlighting
- Use separate water containers – One for metallics, another for standard paints to avoid cross-contamination
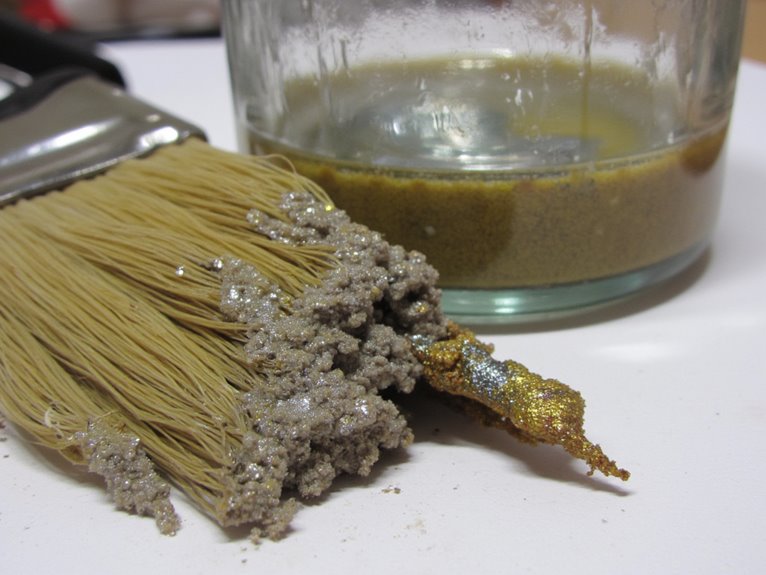
- Clean ferrules thoroughly – Remove paint residue near the metal band using warm water and gentle motions
- Shape bristles properly – Twist brushes in rinsing water to maintain fine points and prevent splaying
For brushes with hardened paint residue that water cannot remove, specialized cleaners like The Masters Brush Cleaner can dissolve dried acrylics while conditioning the bristles.
Proper brush cleaning extends tool lifespan greatly while maintaining consistent paint application quality. Never store brushes vertically when wet, as water accumulation in the ferrule will damage the bristles permanently.
Inadequate Lighting and Color Accuracy Problems
Your workspace lighting directly impacts how you perceive paint colors on miniatures, often causing subtle hues to appear completely different under poor illumination.
Standard room lighting typically produces color temperatures between 2700K and 3000K, which creates a warm yellow cast that distorts cool blues, purples, and greens while making warm colors appear oversaturated.
You’ll need proper brightness levels of at least 1000-1500 lux at your work surface to distinguish fine details and color variations that become invisible under dim conditions.
Look for desk lamps with CRI ratings above 90 to ensure accurate color representation when painting miniatures, as this prevents color perception errors that can ruin your detailed work.
Poor Light Spectrum Effects
Since your workshop’s lighting directly determines how accurately you’ll perceive paint colors, using inadequate light spectrum becomes one of the most critical yet overlooked factors affecting miniature painting quality.
Poor spectrum lighting creates color distortion that undermines your color perception and compromises art intensity.
Here’s how inadequate light spectrum affects your painting:
- Color Temperature Issues – Light sources outside 5000-6000K range distort colors, making accurate paint selection impossible.
- CRI Deficiencies – Lighting below 90 CRI causes colors to appear washed out or completely different than intended.
- Spectral Gaps – Incomplete wavelength coverage from 400-700nm creates blind spots in color recognition.
- Eye Strain Effects – Poor spectrum forces visual compensation, reducing precision and causing fatigue during extended sessions.
These spectrum problems lead to paint jobs that look dramatically different under natural light or in photographs.
Workspace Brightness Requirements
How much light do you actually need for accurate miniature painting? You’ll need 800-1200 lumens for ideal detail work. This range prevents eye strain while maintaining color accuracy. Too little light causes squinting and accelerates fatigue. Excessive brightness creates glare that distorts color perception.
Your workspace organization should include multiple light sources positioned 50 cm apart. This eliminates directional shadows that obscure fine details. Even, diffuse lighting reveals subtle texture variations you’d miss otherwise.
Effective lighting solutions require daylight-range bulbs (5000-6500K) combined with proper brightness levels. This guarantees true color rendition for accurate paint mixing and application. Adjustable brightness lamps accommodate changing ambient conditions throughout the day.
Cool-running LED lamps operating at 30-50°C prevent premature paint drying while maintaining consistent illumination for extended painting sessions.
Paint Coverage and Opacity Issues

When paint fails to provide adequate coverage on your miniatures, the root cause typically stems from insufficient paint thickness, poor pigment quality, or improper dilution ratios. Coverage consistency depends on maintaining proper micron thickness as specified in manufacturers’ technical data sheets.
Here’s how to achieve opacity improvement:
- Apply multiple thin coats instead of one thick layer to preserve surface details while building color density.
- Test paint viscosity on spare surfaces before application, ensuring ideal flow without over-dilution.
- Use high-opacity pigment formulations like premium paint systems that require fewer coats for solid coverage.
- Maintain uniform intermediate coats, particularly primers and fillers, which directly impact finish paint performance.
Different paint brands vary in base thickness.
Citadel paints require more thinning than Vallejo acrylics. Always follow manufacturer-recommended thinner ratios for your specific environmental conditions.
Surface Adhesion and Flaking Problems
Three critical factors determine whether paint will bond permanently to your miniature’s surface: cleanliness, primer compatibility, and environmental conditions during application.
Poor surface compatibility occurs when you skip proper preparation steps. Grease, oils, and mold release residue create barriers that prevent adhesion. Cast resin miniatures require thorough cleaning with degreasing agents before priming.
Skipping preparation steps allows grease, oils, and mold release residue to create adhesion barriers on miniature surfaces.
Surface contamination from bare hands transfers oils that cause flaking. Always wear gloves during handling.
Light sanding increases surface area for mechanical bonding. Choose primers specifically formulated for your miniature’s material—metal, resin, or plastic each demands different formulations.
Effective adhesion techniques include using appropriate cleaning solvents, applying thin primer coats, and maintaining 65-75°F temperatures with humidity below 50%.
Rushing surface preparation under deadlines compromises long-term durability.
Brush Marks and Texture Problems
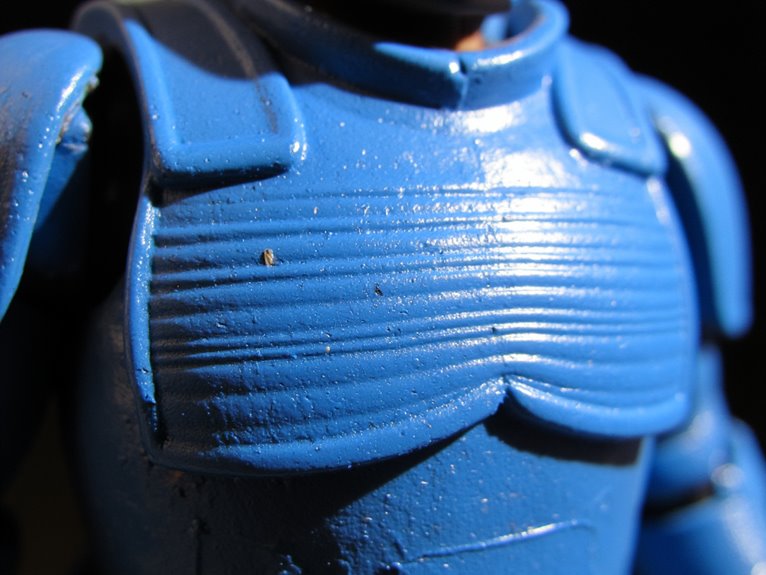
Since paint flows like liquid across your miniature’s surface, visible brush marks indicate disrupted film formation during application. Thick paint viscosity creates the most common brush texture problems.
You’ll need to thin paint approximately 5% to improve flow characteristics and eliminate streaking.
Proper paint application requires attention to these critical factors:
- Surface preparation – Sand with 220-grit progressing to 100-grit for uniform smoothness
- Brush quality – Replace worn brushes that can’t distribute paint evenly across details
- Loading technique – Avoid overloading brushes, which causes pooling and uneven coverage
- Environmental control – Monitor temperature and humidity affecting drying times
Apply multiple thin coats rather than single thick applications.
Maintain consistent brush direction per coat, changing directions between layers for ideal coverage.
Contrast and Visibility Issues on Tabletop
While your miniature might look perfectly painted at close range, distance alters even skilled work into a flat, lifeless figure without proper contrast. Proper contrast assessment requires evaluating your work under actual gaming lighting conditions, not studio lights. Judge contrast only after completing most paint layers—visible primer distorts your perception of true values.
For effective visibility enhancement, use glazes and contrast paints to build smooth gradients between light and dark areas. Apply zenithal priming as your foundation to establish natural shadow placement. Feather your brush strokes side-to-side to eliminate harsh glaze lines. Place complementary colors on adjacent areas to amplify separation.
Test your miniature’s readability at tabletop distance frequently, adjusting highlight and shadow intensity until details remain distinct under standard gaming conditions.
Paint Storage and Deterioration Problems
You can’t maintain paint quality without addressing three critical storage factors that directly impact your miniature painting results.
Improper sealing allows air exposure that thickens paint within weeks, while light and humidity variations cause pigment degradation and chemical breakdown that permanently alters color properties.
Paint separation occurs naturally over time, but poor storage conditions accelerate this process beyond what simple mixing can restore, leaving you with unusable paint that wastes money and disrupts your painting workflow.
Proper Paint Sealing
Proper sealing stands out as the most critical step for preserving your miniature paint work over time. This protective barrier absorbs impact damage that would otherwise chip or scratch your painted surfaces.
Most paint deterioration happens during storage and transport, not gameplay.
Essential Sealer Application Techniques:
- Wait for acrylic paint curing – Allow minimum 24 hours after painting before sealing to guarantee maximum adhesion and protection.
- Apply multiple thin coats – Spray from 10 inches away using smooth sweeping motions, starting and stopping off the miniature to prevent thick buildup.
- Use gloss for maximum protection – Apply matte varnish over gloss if you prefer reduced shine while maintaining superior durability.
- Inspect thoroughly – Check for complete coverage and uniform application across all painted surfaces before storage.
Light and Humidity
Environmental factors silently destroy your miniature paint collection and finished models through mechanisms you can’t see until significant damage occurs.
Light exposure breaks down paint pigments through UV radiation, causing irreversible color shifts and fading. Direct sunlight proves most destructive, while fluorescent lights create gradual deterioration over time.
Heat from intense lighting softens paint, making surfaces tacky and vulnerable to damage.
Humidity levels equally threaten paint stability. High humidity above 60% accelerates chemical breakdown, promotes bacterial growth, and creates condensation that dilutes paint consistency.
Low humidity increases solvent evaporation, thickening your paints beyond usability. Maintain 40-50% relative humidity for ideal storage conditions.
Store paints in opaque, airtight containers away from light sources. Use silica gel packets to control moisture and inspect regularly for separation or contamination.
Separation and Mixing
Paint separation strikes even properly stored collections, turning your carefully maintained bottles into layered disasters where heavy pigments settle like sediment while clear binders float on top.
Real pigments are naturally heavier than binder fluids, creating inevitable settling during storage periods.
Effective paint agitation requires multiple approaches:
- Manual stirring – Essential for breaking up pigment sludge that shaking alone can’t redistribute.
- Glass bead agitators – Superior to hex nuts for thorough remixing when combined with stirring.
- Regular maintenance – Shake bottles before each use to prevent sediment buildup.
- Container types – Airtight storage reduces water evaporation that thickens paint consistency.
Vortex mixers assist agitation but don’t replace manual intervention.
Test paint consistency on spare sprues to determine if dilution can restore usability before disposal.
Workspace Setup and Ergonomic Issues
While many hobbyists focus primarily on paint selection and brush techniques, an inadequately configured workspace can sabotage even the most skilled painter’s efforts. Poor workspace efficiency leads to accidental spills, damaged miniatures, and frustrated painters. You need a minimum 24-inch by 18-inch clear area to allow natural arm positioning without knocking over supplies.
Ergonomic seating prevents the back strain and fatigue that compromise precision work. Choose adjustable-height office chairs with lumbar support and wheels for mobility. Your work surface must support arm weight without wobbling. Maintain at least six inches of elbow clearance in your natural painting posture.
Use wheeled carts to organize paints and brushes within easy reach. Separate task areas minimize clutter and accidental damage. Proper lighting reduces eye strain while stable temperature and humidity optimize paint consistency.
Layer Timing and Drying Problems
You can’t rush the drying process between paint layers without creating serious problems that’ll compromise your miniature’s finish. When you apply new coats over insufficiently dried paint, the layers interfere with each other, causing unwanted color mixing, texture issues, and uneven coverage that destroys the clean shifts you’re working to achieve.
Your workspace environment directly affects drying times through humidity levels, temperature variations, and air circulation, forcing you to adjust your painting schedule based on conditions that change throughout the day.
Rushing Between Coats
One of the most common mistakes in miniature painting occurs when enthusiasm overrides patience, leading painters to apply subsequent coats before previous layers have properly dried. This rushing creates multiple technical problems that compromise your final results.
When you apply paint over wet layers, several issues emerge:
- Color bleeding – Wet paint underneath mixes with new applications, muddying your intended colors and losing fine details.
- Poor layer adhesion – Incompletely dried base coats repel fresh paint, causing patchy coverage and eventual chipping.
- Surface defects – Paint pooling, bubbling, and uneven texture occur when layers haven’t set properly.
- Reduced control – Brushwork becomes unpredictable as paint flows erratically across unstable surfaces.
Your drying environment notably affects timing. Higher humidity extends drying periods, while proper ventilation accelerates the process without damaging delicate work.
Paint Layer Interference
Beyond simply rushing between coats, paint layer interference encompasses a broader range of timing and application issues that disrupt the careful building process miniature painting requires.
You’ll encounter problems when overlapping wet paint onto incompletely dried layers, causing blending issues and uneven textures. Proper layer consistency prevents these conflicts—thin your paint using 1:1 ratios for base coats and highlights while allowing thicker applications for secondary shades.
Control interference by feathering brush strokes and maintaining adequate drying time between applications.
Paint feels tacky when not ready for subsequent layers. Your drying techniques should include observing surface conditions and adjusting wait times accordingly.
Clean brushes prevent contamination between layers, while proper surface preparation guarantees consistent adhesion and uniform drying across all paint applications.
Environmental Drying Factors
Environmental conditions dramatically affect how your paint layers dry and cure, making workspace control essential for successful miniature painting.
Temperature fluctuations cause uneven drying that leads to cracking or poor adhesion between coats. Sudden changes disrupt the curing process.
Effective humidity management prevents extended tackiness and contamination risks:
- Maintain 40-60% relative humidity to balance drying speed with paint film integrity
- Keep temperatures stable at 68-77°F to guarantee consistent solvent evaporation rates
- Control airflow effects using gentle, indirect ventilation to avoid rapid surface drying
- Apply thin layer thickness for even curing and ideal adhesion between coats
Proper environmental control reduces drying times while preventing defects.
Excessive heat accelerates surface drying faster than underlying layers, creating adhesion problems.
Paint Quality and Brand Selection Issues
Unfortunately, many miniature painters discover their paint problems stem directly from poor brand selection and quality issues that affect every aspect of their painting process.
Craft paints designed for general use often fail on miniatures despite proper priming. They’re too thick, fill fine details, and require multiple coats for adequate coverage. Their formulation lacks the finer pigments necessary for scale detail work.
Specialized miniature paint brands develop formulations specifically for fine-scale applications. They offer superior flow properties, better opacity, and enhanced coverage in fewer layers.
Quality brands provide improved paint longevity through better pigment stability and color vibrancy retention. Following established brand recommendations from experienced painters helps avoid compatibility issues.
Higher-end paints may cost more initially, but their superior performance and durability justify the investment for serious miniature painting projects.
Sealing and Protection Failures

Even top-quality paint applications can fail dramatically when proper sealing techniques aren’t followed or when environmental factors interfere with the protective coating process.
Sealer application requires precise environmental control and meticulous surface preparation to achieve superior protection.
Common sealing failures include:
- Cloudy finishes from insufficient aerosol shaking or volatile solvent interactions
- Poor adhesion when applied over contaminated surfaces with oils or debris
- Frosting effects caused by humid, cold, or excessively hot application conditions
- Premature wear from expired products or inadequate surface preparation
Apply thin multiple coats rather than single heavy applications.
Allow 24-hour drying periods between layers.
Shake aerosol cans vigorously every few minutes to prevent sediment settling.
Clean miniatures thoroughly before sealing to remove contaminants that compromise adhesion and long-term durability.
On a final note
You’ve now identified the nine critical failure points that derail miniature painting projects. Each problem stems from controllable variables in your process. Surface prep determines paint adhesion. Proper thinning ratios prevent texture issues. Clean brushes maintain detail precision. Quality lighting guarantees color accuracy. Your workspace setup affects consistency. Layer timing controls finish quality. Paint selection impacts durability. When you systematically address these factors, you’ll eliminate most painting failures before they occur.