We are supported by our audience. When you purchase through links on our site, we may earn an affiliate commission, at no extra cost for you. Learn more. Last update on 30th June 2025 / Images from Amazon Product Advertising API.
You’ll prevent miniature paint chipping by thoroughly cleaning surfaces with isopropyl alcohol, applying hobby-specific primers in thin coats from 6-12 inches away, and building multiple thin paint layers rather than thick ones. Use high-quality acrylic paints formulated for miniatures, allow 24+ hours curing time before handling, and apply matte or glossy protective varnish topcoats for impact resistance. Handle only by the base and store in compartmentalized containers at 70°F with 40-50% humidity. Mastering these foundational techniques opens the door to advanced protective strategies.
Notable Insights
- Clean miniature surfaces thoroughly with isopropyl alcohol and apply hobby-specific primer for maximum paint adhesion.
- Apply multiple thin paint coats rather than thick layers to build durable coverage that resists chipping.
- Use high-quality acrylic paints formulated for miniatures and ensure complete drying between each application layer.
- Apply multiple thin protective varnish topcoats to create a barrier against physical damage and impacts.
- Handle miniatures only by the base and allow 24+ hours curing time before gameplay or transport.
Essential Surface Cleaning and Preparation Methods
Before applying any primer or paint, you’ll need to remove every trace of contamination from your miniature’s surface. Surface contaminants like mold release agents, oils, and microscopic debris create barriers that prevent proper paint adhesion.
Start with thorough cleaning using isopropyl alcohol to dissolve residues. Alternatively, scrub with dish soap and a soft toothbrush, then rinse completely.
Clean miniatures thoroughly with isopropyl alcohol to dissolve residues, or scrub with dish soap and soft toothbrush before rinsing completely.
Mechanical preparation follows cleaning. Light sanding or careful filing removes flash, mold lines, and imperfections while creating microscopic surface texture for paint to grip. File cautiously to preserve fine details. Complete all assembly and conversion work before cleaning to avoid recontamination. Use synthetic hair brushes for detailed work as they provide better precision than bristled alternatives.
After preparation, verify complete drying using lint-free cloths or air drying. Handle miniatures with clean hands or holders to prevent oil transfer that compromises your careful preparation work. Use larger bases during preparation to provide better stability and reduce the risk of edge damage that could require future repainting.
Proper Priming Techniques for Maximum Adhesion
After completing surface preparation, primer selection becomes your most critical decision for preventing paint adhesion failures. Choose hobby-specific primers designed for miniature materials like plastic, resin, or metal. These formulations guarantee chemical compatibility with acrylic paints while providing superior bonding strength.
Apply primer in thin, even coats to preserve fine details. Hold aerosol cans 6-8 inches from the surface, moving in steady passes. For optimal results with aerosol applications, maintain the spray can approximately 10-12 inches from the surface to achieve consistent coverage without runs or drips. Primer Innovations now offer color-matched formulations that reduce coverage requirements and enhance paint vibrancy.
Essential application guidelines:
- Maintain 60-75°F temperature with low humidity during application
- Allow complete drying between coats to prevent tackiness
- Inspect for uniform coverage, touching up thin spots immediately
Proper priming creates Texture Effects that promote mechanical adhesion, forming the foundation for chip-resistant finishes. For situations where spray primer isn’t suitable, brush-on primer provides an effective alternative with precise application control. Matte finish primers provide the ideal surface for long-lasting paint adhesion and superior color blending.
Strategic Paint Application for Durability
Once primer has cured completely, your paint application technique directly determines the longevity of your miniature’s finish.
Apply thin, even coats instead of thick single layers. Multiple light applications build superior durability without cracking risks associated with heavy coverage. Respect drying times between coats—typically 30-60 minutes depending on humidity and temperature.
Focus your paint durability techniques on high-impact areas like edges and raised details where contact occurs most frequently. These zones need additional protective layers or specialized sealants. Use controlled brush loading to prevent detail clogging while maintaining consistent coverage. High-quality brushes with proper tip retention ensure consistent paint application and reduce the likelihood of streaking that can compromise coating integrity.
Implement miniature handling best practices during application. Work with clean, dry hands or wear nitrile gloves to prevent oil contamination. Always clean miniatures with dish soap and a toothbrush before painting to remove mold-release agents that can prevent proper paint adhesion.
Allow 24+ hours for complete curing before gameplay to maximize paint adhesion and longevity. Since chipping typically occurs on edges and protruding elements, these vulnerable areas may benefit from extra protective coating applications.
Building Paint Layers That Last
The foundation you’ve established through strategic application sets the stage for constructing a multi-layer paint system that withstands years of handling.
Each layer must follow the fat-over-lean principle, where subsequent coats contain higher oil content than previous ones. This creates maximum paint flexibility as lower layers absorb oils from upper coats, forming strong interlayer bonds.
- Apply thinned base coats with turpentine for peak adhesion to clean surfaces
- Maintain controlled layer thickness of 0.5-1.0 mil per coat to prevent cracking
- Allow complete drying between applications to guarantee structural integrity
Oil-rich top layers dry into elastic films that accommodate substrate movement without cracking.
Temperature and humidity control during curing prevents premature application issues. Molecular cross-linking occurs as the paint absorbs oxygen from the air, strengthening the film structure.
Multiple thin protective topcoats provide superior chip resistance compared to single thick applications. Professional-grade polyurethane varnish delivers scratch-resistant protection that maintains color integrity while forming a durable barrier against handling damage.
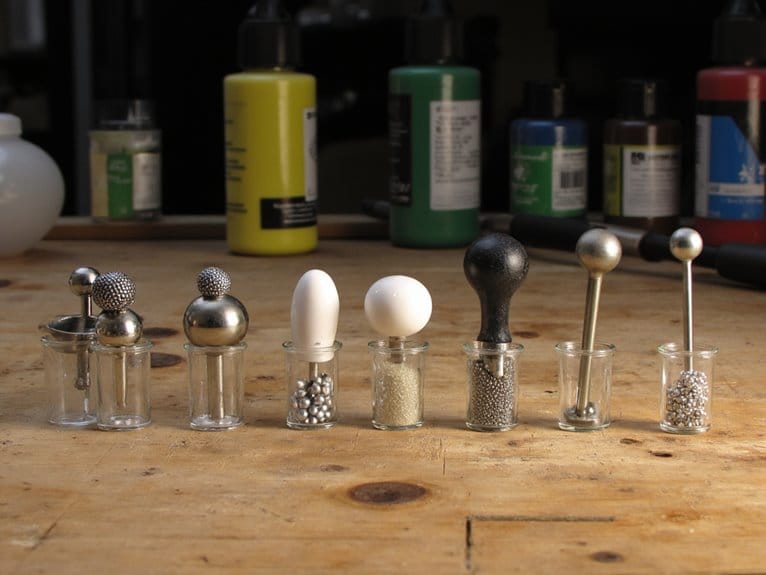
Selecting the Right Paints and Materials
Material selection determines whether your miniature’s paint job survives years of gaming or fails within months of completion. You’ll need specialized hobby primers like Vallejo surface primer to create proper adhesion.
These primers fill microscopic gaps and prevent chipping better than standard craft primers.
Choose high-quality acrylic paints formulated specifically for miniatures. These paints offer superior pigment concentration and flexibility compared to general-purpose acrylics.
Material compatibility between your primer, paint, and miniature surface prevents chemical reactions that cause peeling.
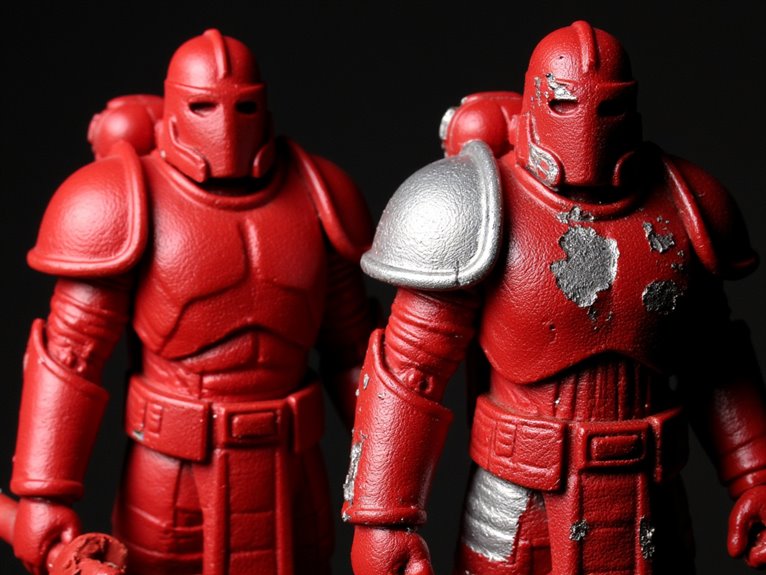
Paint color selection affects durability too. Darker colors typically show chips less than lighter ones.
Quality hobby paints require fewer coats, reducing stress on the paint film. Avoid DIY spray paints entirely—their chemicals can damage delicate miniature materials and compromise long-term adhesion.
Vallejo paints use water-based acrylic formulations that provide superior adhesion on both metal and plastic miniature surfaces while maintaining the flexibility needed to prevent cracking during handling.
Protective Coating Systems and Varnishing
You’ve selected your paints and primed your miniatures, but now you need a protective coating system to prevent the chipping that destroys hours of careful work.
Varnish layers serve as your primary defense against physical damage, creating a durable barrier that absorbs impact instead of allowing it to reach your paint.
The key to effective protection lies in proper application techniques and selecting the right coating durability enhancement methods for your specific miniature handling requirements.
While matte finishes preserve fine details and eliminate unwanted shine, glossy varnishes offer superior scratch resistance for miniatures that face frequent handling during gaming sessions.
Varnish Layer Application
Once you’ve completed your miniature’s base paint job, applying a protective varnish layer becomes crucial for preventing paint damage during handling and gameplay.
Understanding varnish types helps you select the right finish for your needs. Matte varnish reduces unwanted shine from ink washes, while gloss varnish creates protective barriers ideal for decal application.
Proper application techniques determine your coating’s effectiveness:
- Apply multiple thin coats rather than single thick layers to preserve paint detail.
- Maintain appropriate spray distance to prevent oversaturation and pooling in recesses.
- Verify surfaces are completely clean and dry before varnish application.
Monitor drying conditions carefully. Temperature and humidity affect curing time and final hardness.
Avoid varnishing in cold or high-humidity environments, which cause poor adhesion or clouding. Handle miniatures gently during the curing period.
Coating Durability Enhancement
Building upon proper varnish application, selecting the right protective coating system greatly extends your miniature’s lifespan against chipping and wear. Modern coating technologies offer distinct advantages: acrylic-based clear coats provide superior flexibility, reducing brittleness-related damage.
Polyurethane coatings deliver exceptional chemical resistance for frequently handled pieces. Epoxy formulations excel in adhesion strength but may yellow under UV exposure.
Test different systems through pilot projects on spare models before committing to valuable pieces. Combine primer, quality paint, and durable topcoat for multilayer protection.
Apply multiple thin layers using 10-inch spray distances with sweeping motions. This approach creates sacrificial barriers that absorb impacts before reaching base paint layers. Clear coats also filter UV light, preventing color degradation while maintaining mechanical integrity.
Safe Handling Practices During and After Painting
Your handling technique directly determines whether your carefully applied paint layers will survive the painting process and beyond.
You must establish proper grip methods that avoid contact with wet or curing paint surfaces, maintain consistent hand positioning throughout multi-session projects, and implement protective storage systems immediately after completion.
These practices form the foundation of paint preservation, as most chipping occurs during the vulnerable periods when paint hasn’t fully cured or when miniatures lack adequate physical protection.
Handle by Base Only
Throughout the entire painting process, your hands should only make contact with the miniature’s base to prevent paint damage and chipping.
This fundamental rule protects painted surfaces from finger oils, accidental pressure, and handling-related wear that compromises your work quality.
Base grip techniques require specialized miniature handles that secure firmly to the base using mounting putty or blue tack.
These handle designs provide stable control during detailed painting while eliminating direct contact with primed or painted areas.
- Use dedicated painting handles with secure mounting systems to maintain steady grip control
- Allow 24+ hours cure time before any handling to prevent paint dragging or peeling damage
- Store miniatures in handles or padded cases to avoid incidental contact during transport
This approach guarantees consistent paint durability and professional finish quality.
Avoid Wet Paint Contact
While proper base handling forms the foundation of miniature protection, wet paint contact represents the most immediate threat to your finished work.
Wet paint precautions require absolute avoidance of any surface contact during the drying phase. Paint skin forms within minutes, creating a vulnerable top layer that peels when disturbed. You’ll ruin fine details and blending efforts through even minimal contact.
Use painting handles, tweezers, or holders to manipulate your miniature without touching painted surfaces.
Paint adhesion techniques depend on complete curing time, which ranges from hours to days based on paint type. Moisture and oils from your fingers interfere with proper adhesion, causing uneven finishes and premature chipping.
Stop all surface contact until paint achieves full hardness.
Proper Storage Techniques
Once wet paint achieves initial skin formation, proper storage becomes your primary defense against damage during the extended curing process.
Temperature control remains critical—maintain storage environments at 70°F with 40-50% humidity to prevent paint cracking and material degradation. Container selection directly impacts long-term miniature preservation and accessibility.
Effective storage requires strategic planning:
- Protective packaging: Wrap miniatures in bubble wrap or soft towels, using cardboard frames to shield against impacts
- Compartmentalized containers: Choose boxes with removable dividers to prevent miniatures from colliding during movement
- Environmental monitoring: Use hygrometers and thermometers to track conditions, avoiding direct sunlight and high moisture areas
Line containers with padding to absorb shocks.
Store fewer painted miniatures per container compared to unpainted ones.
Label boxes clearly to minimize unnecessary handling and searching.
Storage Solutions to Prevent Damage
Proper storage forms the foundation of long-term paint preservation for your miniature collection.
You’ll need specialized storage container options that protect against environmental threats. Foam-lined cases with individual compartments prevent miniatures from colliding during transport or storage. These containers should feature customizable inserts that accommodate different miniature sizes and shapes.
Magnetized storage trays offer superior stability for metal-based miniatures. The magnetic force holds figures securely while allowing easy removal without handling painted surfaces.
Dust control methods require sealed containers or display cases with tight-fitting lids. Incorporate silica gel packets to maintain low humidity levels below 50%.
UV-filtering materials on transparent cases prevent paint degradation from artificial lighting. Position storage away from windows and heat sources to maintain stable temperatures between 65-75°F.
Transportation Tips for Painted Models
Moving painted miniatures safely requires systematic preparation that begins days before your departure. Inspect each model for loose components and repair fragile sections using appropriate adhesives.
Your transport logistics must account for weight distribution—place heavier models at the container’s bottom with delicate pieces on top.
Effective packing techniques involve multiple protective layers:
- Use magnetized bases to immobilize models and prevent movement-related damage
- Apply double-layer foam wrapping around protruding parts like spikes or antennas
- Secure all cushioning materials with tape to eliminate shifting during transit
Maintain stable temperature conditions throughout transport. Avoid extreme heat exposure that warps plastic or melts adhesives.
Always carry cases with both hands, and consider using carry-on compartments for air travel rather than checked luggage for maximum control.
Regular Maintenance and Inspection Routines

You’ll need a systematic approach to catch paint damage before it becomes irreversible.
Early damage detection requires regular visual inspections using magnification tools to spot micro-chips in high-wear areas like weapon tips, armor edges, and base rims.
Establishing scheduled cleaning protocols and immediate touch-up timing will preserve your miniatures’ appearance and extend their usable life markedly.
Early Damage Detection Methods
How can you identify paint damage before it becomes a costly restoration problem? Early detection requires systematic visual inspection using magnifying lenses to spot microscopic cracks invisible to naked eyes. High-intensity lighting reveals subtle surface irregularities and initial flaking signs that standard lighting misses.
Essential early detection techniques include:
- Tactile testing – Use soft tools to detect loose paint areas without causing damage.
- Adhesive tape pulls – Apply controlled tests on hidden spots to assess paint adhesion strength.
- Ultrasonic gauges – Measure paint thickness to identify thinning or peeling layers.
Paint preservation depends on monitoring color changes and gloss variations indicating underlying degradation.
Take high-resolution photographs periodically for comparison tracking. Focus inspection efforts on edges and corners where chipping typically initiates. Document findings systematically to establish deterioration patterns.
Scheduled Cleaning Protocols
While early detection identifies potential problems, establishing consistent cleaning protocols prevents most paint damage from occurring in the first place.
You’ll need scheduled brush cleaning after every painting session using lukewarm water and brush soap. Deep clean brushes weekly with specialized liquid cleaners to remove trapped paint from ferrule areas. This prevents bristle damage that causes paint flaking on miniatures.
Environmental factors considerably impact paint integrity. Maintain display areas at 20°C with 40-60% humidity levels. Use dust covers and sealed cases to minimize airborne particles. Clean storage shelves regularly with soft cloths.
Apply fresh protective varnish every 6-12 months depending on usage. Clean miniature surfaces before reapplication to guarantee proper adhesion.
Schedule biannual deep cleanings of storage areas using non-abrasive methods.
Touch-Up Repair Timing
Regular inspection schedules form the backbone of effective touch-up repair timing, requiring weekly or biweekly visual assessments under bright LED lighting to catch paint chips before they expand.
You’ll prevent extensive damage by documenting chip locations and acting within 24–48 hours of detection. Environmental factors like humidity fluctuations and UV exposure accelerate deterioration, making immediate repairs essential for chip prevention.
Your touch up techniques should follow strict timing protocols:
- Allow primers 20 minutes to overnight drying time before applying touch-up paint layers
- Apply thin coats with proper intervals between applications to prevent peeling
- Schedule repairs during stable environmental conditions for ideal paint adhesion
High-use miniatures need monthly maintenance cycles, while low-use models require quarterly inspections with immediate chip repair regardless of timing.
Quick Repair Techniques for Minor Chips
Three essential steps form the foundation of any successful minor chip repair on miniature figures: proper surface preparation, precise paint application, and protective finishing. These quick repair techniques restore your miniature’s appearance while preventing further damage.
Start by cleaning the chipped area with isopropyl alcohol. Sand chip edges using 8000-12000 grit sandpaper to smooth rough surfaces. Apply thin paint layers using size 000-0 detail brushes, allowing complete drying between coats. Finish with clear varnish for protection.
| Repair Stage | Tools/Materials |
|---|---|
| Surface Prep | 8000-12000 grit sandpaper |
| Paint Application | Fine detail brushes (000-0) |
| Color Matching | Hobby-grade acrylics |
| Magnification | Optivisors/magnifiers |
| Final Protection | Brush-on clear varnish |
These chip techniques guarantee professional-quality results when executed properly.
Environmental Factors That Affect Paint Longevity
Although proper painting techniques form your first line of defense against chipping, environmental conditions ultimately determine how long your miniature’s paint job will survive.
Environmental influences create multiple degradation pathways that compromise paint lifespan through different mechanisms:
- UV radiation from sunlight causes color fading and weakens protective coating properties, requiring UV-resistant finishes like polyurethane for outdoor display.
- Temperature fluctuations create expansion-contraction cycles that promote cracking and peeling, especially problematic in regions with wide daily temperature ranges.
- Humidity and chemical exposure accelerate paint breakdown through moisture penetration and airborne pollutants that attack paint films.
Dust and particulates physically abrade surfaces over time.
Climate-specific paint formulations offer superior resistance against regional environmental stresses. Protective topcoats and regular maintenance greatly extend coating durability in harsh conditions.
On a final note
You’ve now got the complete toolkit for preventing paint chips on your miniatures. Surface prep remains your foundation—without it, you’ll face constant repairs. Apply thin coats systematically. Build durable layer systems. Choose quality materials that match your project’s demands. Handle your models carefully during transport and storage. Inspect regularly for early damage signs. Address chips immediately when they occur. Follow these protocols consistently, and you’ll maintain professional-quality finishes indefinitely.