We are supported by our audience. When you purchase through links on our site, we may earn an affiliate commission, at no extra cost for you. Learn more. Last update on 30th June 2025 / Images from Amazon Product Advertising API.
You’ll need to match your primer type to your miniature’s material—use acrylic-based primers for plastic models, enhanced adhesion formulas for metal surfaces, and specialized primers for resin. Choose black primer to enhance shadows and contrast, white primer for maximum color vibrancy, or gray primer for neutral color fidelity. Apply spray primers in quick bursts under one second, maintaining 15-30 minutes between coats at 15-27°C with 40-60% humidity. Proper primer selection and application techniques form the foundation for achieving professional-quality results that extend far beyond basic surface preparation.
Notable Insights
- Choose primer type based on application method: spray for uniform coverage, brush-on for detail work, airbrush for maximum control.
- Select primer color strategically: black enhances shadows and metallics, white maximizes vibrancy, gray provides neutral color fidelity.
- Match primer to miniature material: acrylic-based for plastic, enhanced adhesion for metal, specialized primers for resin surfaces.
- Apply multiple thin coats using short bursts, maintaining 15-30 minutes drying time between coats for optimal smoothness.
- Maintain ideal conditions of 15-27°C temperature and 40-60% humidity, allowing 24-48 hours curing before painting for durability.
Understanding Different Types of Miniature Primers
When selecting a primer for your miniatures, you’ll encounter three primary application methods that each offer distinct advantages for different painting scenarios.
Spray primers deliver the most uniform coverage across complex surfaces. Brands like The Army Painter and Citadel produce specialized formulations with controlled flow rates that won’t obscure fine details. Bare plastic is slippery and causes paint to bead up without proper preparation.
Spray primers provide the most even coverage on intricate miniature details without clogging surface textures.
These cost £13-21.50 per 400ml can.
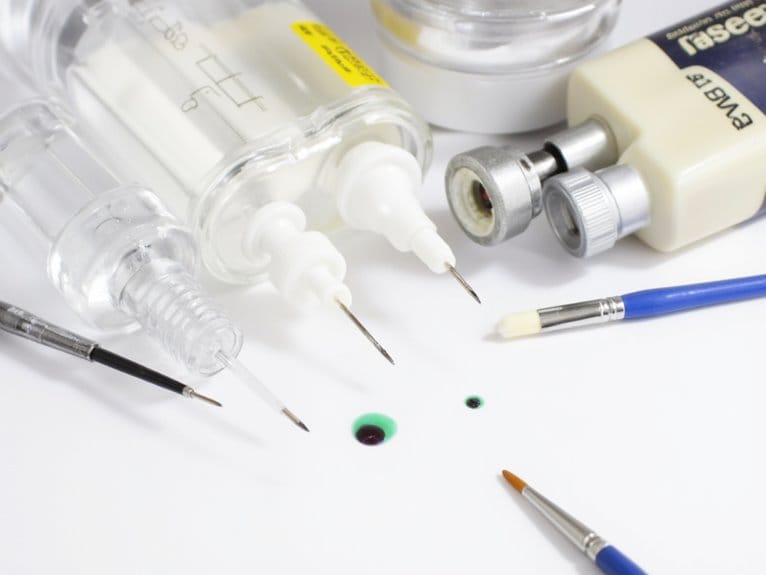
Brush-on primers excel for targeted applications and detail work. They’re thicker than spray variants and require careful thinning to prevent texture buildup.
These primer adhesives work best for touch-ups and indoor use without ventilation. Water-based primers are more suitable for indoor use and remain odor-free during application.
Airbrush primers offer maximum control over application thickness. They’re compatible with water-based miniature paint systems and enable advanced techniques like zenithal highlighting, though they require dedicated equipment and practice. The foundation color choice significantly impacts your final paint job since darker primers enhance shadow effects while lighter primers make colors appear more vibrant.
Material Compatibility: Matching Primers to Miniature Surfaces
Different miniature materials demand specific primer formulations to achieve ideal paint adhesion and longevity.
Plastic miniatures work best with acrylic-based primers featuring self-leveling properties that prevent detail obscuration. You’ll need enhanced adhesion primers for metal surfaces due to their smooth, non-porous characteristics. Polyurethane or enamel formulations resist chipping effectively on metals.
Resin miniatures present unique adhesion challenges requiring specialized primers that penetrate slightly porous surface textures without causing damage. Water-based acrylic polyurethane primers protect delicate resin surfaces while ensuring proper bonding.
Surface preparation greatly impacts primer effectiveness across all materials. Clean surfaces with appropriate solvents, remove microdust with tack cloths, and apply light sanding for mechanical grip enhancement. Choose primers with color options like white, gray, or black to complement your intended base colors and overall painting scheme. Apply primer using short, light passes to build coverage gradually without overwhelming fine details.
Multiple thin coats often yield superior results compared to single heavy applications, allowing for better control and reducing the risk of obscuring fine surface details.
Always test primer compatibility before full application to prevent paintwork compromise.
Spray Primers vs. Brush-On vs. Airbrush Applications
After selecting the right primer for your miniature’s material, you’ll need to choose an application technique that matches your project scope and skill level.
Spray primers excel at rapid batch coverage but demand precise control—maintain 10-12 inches distance with quick, sweeping motions to prevent pooling.
They’re sensitive to humidity and temperature, requiring ideal environmental conditions.
Brush-on primers offer targeted precision and eliminate overspray concerns, making them perfect for detail work and touch-ups.
However, they’re slower for large batches.
Airbrush primers deliver the smoothest, ultra-thin coats with superior detail preservation.
They require equipment investment and technical skill but provide maximum flexibility in your painting workflow. Multiple thin coats provide optimal results while maintaining consistent spray patterns and preventing primer buildup.
Consider your project size, experience level, and available workspace when selecting your application method. Indoor airbrush setups are advisable for minimizing outdoor temperature issues that can affect primer application quality. Proper primer color selection significantly impacts your final paint appearance, with white primers offering maximum color saturation while black primers create natural shadows.
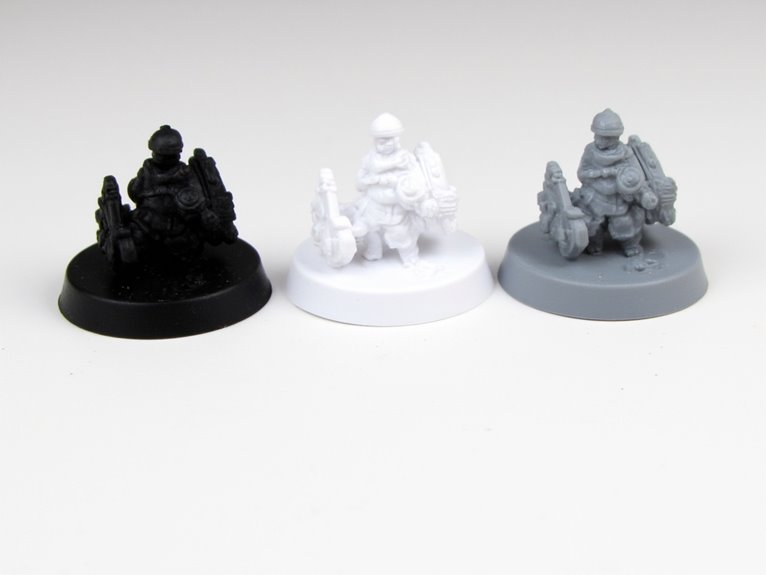
Color Selection: Black, White, and Gray Primer Effects
Your primer color choice dramatically affects how your miniature looks before you even apply the first coat of paint.
Black primer creates natural shadows that enhance contrast and depth, while white primer maximizes color vibrancy and brightness in your finished model.
Gray primer offers a balanced middle ground that works well with most color schemes without pushing your miniature toward either extreme darkness or brightness. Additionally, grey color enhances contrast for topcoats, making it easier to achieve even coverage with your subsequent paint layers. A matte finish is preferred for better paint adhesion on your miniatures.
Black Primer Shadow Enhancement
When you’re choosing black primer for shadow enhancement, you’re establishing the foundation for dramatic contrast and realistic depth in your miniature.
Black primer creates natural shadows depth by settling into recesses and undersides, simulating how light naturally falls on three-dimensional surfaces. This technique maximizes color richness in subsequent layers while maintaining authentic shadow placement.
The primer functions as your shadow map, preserving dark areas throughout the painting process. You’ll achieve stronger contrast when applying highlights because they stand out dramatically against the black base. This effect proves especially valuable for grimdark themes and realistic painting styles.
Black primer also controls color saturation, preventing overly bright results. While it mutes initial color vibrancy, the trade-off delivers superior tonal depth and three-dimensional appearance essential for professional-quality miniatures.
White Primer Brightness Boost
White primer transforms your miniature into a luminous canvas that amplifies every color you’ll apply afterward. This bright foundation creates an inherent lighting effect that makes colors appear more vibrant and saturated. You’ll achieve superior color accuracy since white primer acts as a neutral reflective base, preventing colors from darkening or muddling.
White primer techniques excel when you’re painting bright or pastel colors. The high-visibility surface allows you to recognize tones and shading early in the process. You’ll find layering and glazing work more effectively because the bright base reflects underlayers properly.
| Primer Type | Color Vibrancy | Best Applications |
|---|---|---|
| White | Maximum brightness | Pastels, yellows, whites |
| Gray | Balanced tones | General purpose painting |
| Black | Enhanced shadows | Dark schemes, contrast |
| Colored | Tint enhancement | Specific color matching |
| Zenithal | Gradient effects | Advanced highlighting |
Gray Primer Neutral Base
Gray primer strikes the perfect balance between the extremes of black and white, delivering a neutral foundation that won’t bias your color choices in either direction. You’ll achieve true color fidelity with transparent paints and washes while maintaining medium brightness control.
Gray primer advantages** include versatility across all color schemes** and enhanced shading-highlighting balance.
Gray primer disadvantages involve longer coverage time compared to specialized primers for specific effects.
Gray primer techniques**** work exceptionally well for zenithal highlighting when combined with lighter primers later.
Gray primer applications**** span plastic, resin, and metal miniatures with universal bonding properties.
This neutral base prevents the color-darkening effects of black primer and excessive brightening from white primer.
You’ll find brush-on formats useful for detailed work while spray versions provide even coverage on complex surfaces.
Popular Primer Brands Comparison and Analysis
You’ll find that primer brands differ greatly in their formulation, application methods, and cost-effectiveness for miniature painting projects.
The market offers everything from budget-friendly spray cans with basic coverage to premium airbrush formulas that preserve the finest surface details.
Understanding each brand’s strengths and weaknesses helps you match your specific needs with the right product while considering factors like your skill level, equipment availability, and project scope.
Brand Features Overview
When selecting a primer for your miniature painting projects, four major brands dominate the market, each offering distinct formulations and application methods that cater to different skill levels and project requirements.
The Army Painter combines primer and base coat functionality across 24+ colors, featuring fast-drying acrylic formula ideal for quick turnaround. However, spray nozzles may clog during extended use.
Vallejo’s brush-on primer uses water-based acrylic polyurethane, providing low-odor application with detailed control but requiring longer drying times.
BADGER Stynylrez delivers premium airbrush performance with self-leveling properties that preserve fine details across multiple surface materials.
Tamiya Surface Primer offers professional-grade aerosol application with extremely fine mist coverage, though at higher cost.
Each brand’s application techniques and primer longevity directly impact your project’s final quality and workflow efficiency.
Price Performance Analysis
Although primer selection often focuses on quality and application ease, cost-per-use calculations reveal that price doesn’t always correlate with value across different project scales. Your cost comparison should factor in coverage area, application efficiency, and project size. Performance metrics vary considerably between brands and application methods.
| Primer | Price per oz | Best Scale | Performance Rating |
|---|---|---|---|
| Rust-Oleum | $0.50 | Large armies | High durability |
| Vallejo | $2.67 | Small batches | Precision control |
| Army Painter | $0.68 | Medium projects | Balanced coverage |
| Citadel | $0.80 | Premium builds | Superior finish |
| Badger Stynylrez | $2.00 | Airbrush users | Self-leveling |
Rust-Oleum delivers unmatched value for bulk priming at $0.50 per ounce. Vallejo’s higher cost justifies itself through minimal waste and precise application control for detailed work.
Community Preference Trends
Spray primer preferences center on coverage efficiency.
Rust-Oleum Painter’s Touch 2X gains traction for bulk projects due to fast drying times.
Material compatibility drives selection patterns—plastic miniatures favor different primers than metal or resin surfaces.
Testing practices reveal community emphasis on adhesion quality over price considerations.
Zenithal priming techniques influence color variety demands, pushing brands toward expanded primer ranges.
Budget Considerations: Finding the Right Price Point
While building your miniature collection doesn’t require breaking the bank, understanding the price-to-performance ratio of different primers will help you make smarter purchasing decisions.
Your budget strategies should focus on cost per milliliter calculations. The Army Painter Warpaints cost $3.75 for 18ml, while Citadel paints run $4.55 for 12ml. Pro Acryl offers excellent value at $4.65 for 22ml bottles.
For price evaluations on large projects, Rust-Oleum Spray Primer delivers maximum coverage at $4 per can. Colour Forge primers provide 500ml cans at competitive rates, matching Citadel’s color range without the premium price.
Entry-level options like Rust-Oleum offer fast-drying formulas suitable for beginners. BADGER Stynylrez represents higher-end pricing but delivers superior detail preservation and self-leveling properties.
Don’t forget to factor in paint thinners when calculating your total project costs, as proper thinning agents can extend paint coverage and improve application quality.
Surface Preparation Techniques for Optimal Adhesion
Before primer touches your miniature, thorough surface preparation determines whether your paint job will last months or years.
Proper cleaning techniques remove mold release agents, dust, and oils that prevent adhesion. Use isopropyl alcohol or dish soap with a toothbrush to scrub assembled miniatures thoroughly. Rinse completely and dry before priming.
Surface smoothing with fine-grit sandpaper eliminates flash and imperfections while creating mechanical grip on smooth plastics.
Sand gently to preserve detail while ensuring uniform primer bonding. Complete all assembly, filing, and conversions before cleaning.
Handle cleaned surfaces minimally to avoid transferring oils. Mount miniatures on painting handles to maintain surface prep integrity.
Allow 24 hours for primer curing before painting, regardless of touch-dry times.
Proper Spray Primer Application Methods
You’ll achieve professional results by mastering three critical aspects of spray primer application: maintaining proper distance and controlling coverage patterns, applying multiple thin coats instead of single heavy layers, and setting up ideal environmental conditions.
These techniques directly impact primer adhesion, detail preservation, and final paint quality on your miniatures. Getting these fundamentals right prevents common issues like primer pooling, detail loss, and poor paint adhesion that can ruin expensive models.
Distance and Coverage Control
Achieving consistent primer coverage depends primarily on maintaining the correct distance between your spray can and the miniature throughout the application process.
The ideal primer distance ranges from 15–20 cm (6–8 inches) from your model’s surface. Holding the can closer risks obscuring fine details and creating uneven buildup. Spraying from too far away produces patchy, incomplete coverage that compromises paint adhesion.
Effective coverage techniques require consistent motion and controlled bursts. Never start spraying directly on your miniature—begin just off to the side, then sweep across in smooth movements.
Use short, controlled bursts lasting less than one second each. Apply approximately four quick bursts per facing angle, rotating your model at 90-degree intervals for complete coverage.
Test your spray pattern on cardboard first to verify proper flow and distance calibration.
Multiple Thin Coat Technique
Master the multiple thin coat technique by applying primer in controlled layers rather than attempting full coverage in a single pass. Your first coat should be thinned 10-15% to enhance surface grip and adhesion.
This initial layer creates the foundation for subsequent applications. Apply your second and third coats unthinned or with minimal thinning to build opacity gradually.
These advanced layering techniques preserve fine model details that thick coats would obscure. Each layer must dry completely before the next application—typically 15-30 minutes depending on temperature and humidity.
Maintain ideal drying times by following manufacturer recoat windows, usually 4 hours to 10 days.
Multiple thin applications deliver superior surface smoothness and consistent coverage compared to single heavy coats, ensuring your miniatures retain crisp detail definition throughout the priming process.
Environmental Conditions and Setup
Environmental conditions determine whether your spray primer application succeeds or fails before you even press the nozzle.
Temperature must remain between 15°C and 27°C (59°F-80°F) for proper drying—anything lower causes rough surfaces, while higher temperatures create grainy finishes. Keep relative humidity below 85% to prevent primer dilution and poor adhesion.
Set up your workspace using a large cardboard box or spray booth to contain overspray.
Position miniatures 1 cm apart on a handheld stick using sticky putty. This prevents shadowing and allows rotation without contaminating surfaces.
Always work in well-ventilated areas with open windows and fans running. Avoid rain, snow, or windy conditions that disrupt spray patterns.
These environmental factors and proper setup guarantee consistent primer application every time.
Brush-On Primer Techniques and Best Practices
Three essential elements determine successful brush-on primer application: proper material preparation, controlled application technique, and adequate drying conditions.
You’ll need a large, soft-bristled cosmetic brush and an old clam shell as your primer palette. Shake the primer vigorously before use, then apply with short dabbing motions rather than long strokes to prevent bubbles and preserve surface details.
Brush on advantages include excellent control for delicate models and indoor application capability without ventilation concerns. However, brush on limitations involve slower application times and increased brush maintenance requirements.
Rotate your miniature continuously to guarantee complete coverage, avoiding the base if you plan to add flocking later. Allow thorough drying between coats, using gentle heat sources like hair dryers in humid conditions for peak results.
Specialty Primers: Textured and Color-Shifting Options
Beyond standard primer formulations, specialty primers offer unique surface properties that can transform your miniature painting workflow.
Textured primers contain fine grit particles that create micro-roughness on smooth plastics and resins. This texture application enhances paint adhesion and reduces chipping during handling. However, excessive coating can obscure fine sculptural details.
Color-shifting primers feature pearlescent pigments that create dynamic visual effects based on viewing angle. The color shift phenomenon works particularly well for sci-fi and fantasy miniatures requiring unusual base tones. These primers can function as standalone finishes or subtle undercoats that influence overlying paint colors.
Both specialty types typically come in aerosol form for even coverage. Light, multiple coats prevent detail loss while building desired effects.
Test on spare materials first to determine ideal coverage levels.
Coverage Quality and Protection Against Paint Damage
You’ll find that primer adhesion strength determines whether your paint job survives regular handling or chips away after a few gaming sessions.
Strong primer bonds create a protective barrier that absorbs impact stress before it reaches your carefully applied paint layers, while weak adhesion leads to flaking that starts at edges and spreads across flat surfaces.
The right primer choice combined with proper application techniques can extend your miniature’s paint life from months to years, even with frequent tabletop use.
Primer Adhesion Strength
The foundation of successful miniature painting relies heavily on primer adhesion strength, which determines how well your base coat bonds to the model’s surface and protects subsequent paint layers from damage.
Proper primer formulation guarantees ideal bonding by matching chemical compatibility to your substrate material—whether plastic, resin, or metal. You can measure this bond strength through adhesion testing using pull-off methods that apply increasing force until separation occurs.
Test results expressed in psi or MPa reveal the weakest point in your coating system. Strong primer adhesion prevents paint chipping, cracking, and peeling during handling or gaming.
When primer bonds poorly to the substrate, your entire paint job becomes vulnerable to damage, making adhesion strength a critical factor in miniature durability.
Chipping Prevention Methods
Effective chipping prevention starts with mastering primer application techniques that create an impenetrable foundation for your paint layers.
Apply primer in multiple thin coats from 15-20 cm distance using short, controlled bursts. This prevents pooling and maintains detail clarity while ensuring uniform coverage.
Use hobby-specific primers designed for your miniature’s material—plastic, resin, or metal. Generic spray paints contain harsh chemicals that compromise surface integrity.
Apply 1-3 thin primer layers to fill microscopic gaps and reduce porosity, preventing moisture intrusion that causes paint lift.
Proper miniature care includes maintaining ideal environmental conditions during application. Temperature and humidity affect curing and adhesion.
Light sanding between coats creates superior surface handling characteristics, enhancing paint grip and dramatically reducing chip formation throughout your miniature’s lifespan.
Long-Term Durability Factors
While proper application techniques form the foundation of effective priming, long-term durability depends equally on how well your primer creates uniform coverage and protects against paint damage over months or years of handling.
Your primer’s chemical bond with plastic, resin, or metal directly determines paint adhesion strength and resistance to flaking. Durability testing reveals that specialized miniature primers outperform general-purpose options by 40-60% in adhesion strength.
Application longevity improves considerably when you allow 24-48 hours curing time before painting. Properly primed surfaces withstand repeated handling during gameplay and transportation without paint wear.
Material-specific primers create the grippy surface texture necessary for acrylic paint retention, while incorrect primer selection leads to coverage failures and premature paint deterioration.
Impact of Primer Color on Final Paint Appearance
When selecting primer for miniature painting, your chosen color directly determines how every subsequent paint layer will appear on the finished model. The primer application establishes the foundational tonal value that influences all overlying paints through transparency interactions.
Light primers enhance bright, vibrant colors by maximizing their intensity. They’re essential for achieving vivid yellows, bright reds, and clean whites.
Dark primers excel with metallic schemes and shadow-heavy models, adding natural depth to blues, greens, and grays while reducing required paint coats.
The color influence extends beyond simple coverage. Dark primers can obscure fine details but create richer color depth.
Light primers maintain detail visibility but may require additional coats for darker final colors. Your primer choice affects how contrast paints and washes behave, ultimately determining lighting effects and overall model appearance.
Durability and Long-Term Performance Factors
The durability of your primed miniature depends heavily on environmental conditions during application and the specific techniques you employ. Temperature between 15°C to 27°C and humidity levels of 40-60% guarantee ideal primer adhesion. Outside these ranges, you’ll encounter surface defects that compromise long-term performance.
| Factor | Ideal Range | Impact on Durability |
|---|---|---|
| Temperature | 15°C-27°C | Prevents rough/powdery surfaces |
| Humidity | 40-60% | Avoids tacky or rapid-dry defects |
| Coat Thickness | Multiple thin layers | Preserves detail, guarantees even coverage |
For primer longevity analysis, test samples before full application. Adhesion testing methods include evaluating grip quality and surface cleanliness. Dedicated miniature primers outperform general-purpose alternatives considerably. Multiple thin coats with proper drying time between applications maximize durability and resistance to chipping during handling.
Cost-Effective Primer Usage Strategies
Maximizing your primer efficiency requires strategic selection and application techniques that reduce waste while maintaining coverage quality.
Choose miniature-specific primers with finer mist patterns over generic alternatives. Opt for flat primers that enhance acrylic adhesion, reducing multiple coat requirements. Select contrasting primer colors to monitor coverage visibility effectively.
Apply primer in short bursts from 10-12 inches distance. This prevents midair drying and detail loss. Use application tools like spray sticks to hold multiple miniatures simultaneously, conserving primer per model.
Shake cans vigorously for 30 seconds before use to prevent clogs and uneven distribution. Clean miniatures thoroughly beforehand to improve primer adhesion. Prime only until surface shininess disappears.
Consider eco friendly primers for bulk applications while testing spray quality first. Store primers at room temperature to prevent nozzle blockages and material waste.
Troubleshooting Common Primer Application Issues
Even experienced painters encounter primer application problems that can ruin otherwise perfect miniatures.
Distance errors cause most issues. Spraying beyond 12 inches creates fuzzy, powdery coatings as primer dries mid-air. Maintain 10-12 inches for proper adhesion. Too close causes pooling and detail loss.
Shake cans vigorously for 30 seconds minimum before each primer application session. Cold temperatures and cheap products increase clogging risks. Clean nozzles with pins or solvent when blockages occur.
Fuzzy surfaces can sometimes be corrected through light sanding or careful reapplication.
However, prevention beats correction. Use short, sweeping motions while rotating your miniature. Multiple thin coats preserve details better than single thick applications.
Quality surface finishing requires matte primers that promote paint adhesion over glossy alternatives.
On a final note
You’ve now mastered the fundamentals of miniature primer selection and application. Your choice between spray, brush-on, or airbrush methods depends on your project scale and detail requirements. Black primers enhance shadows, white brightens colors, and gray provides balanced coverage. Match your primer to surface materials for maximum adhesion. Apply thin, even coats and allow proper curing time. These techniques guarantee professional results and long-lasting paint durability.