We are supported by our audience. When you purchase through links on our site, we may earn an affiliate commission, at no extra cost for you. Learn more. Last update on 30th June 2025 / Images from Amazon Product Advertising API.
You’ll need a dual-action airbrush with 0.15-0.20mm nozzles for detailed miniature work, paired with a compressor delivering steady 20-30 PSI pressure. Thin your hobby acrylics to skim milk consistency using a 1:3 paint-to-thinner ratio for ideal atomization. Master the dual-action trigger by pressing down for air and pulling back for paint, always starting sprays off your miniature to prevent pooling. Clean thoroughly between colors using dedicated airbrush cleaner. Proper setup and technique reveal advanced highlighting, weathering, and precision effects that elevate your painting capabilities greatly.
Notable Insights
- Use a dual-action airbrush with 0.15-0.20mm nozzle connected to a compressor delivering steady 20-30 PSI for miniature work.
- Thin acrylic paints to skim milk consistency using a 1:3 paint-to-thinner ratio for optimal flow and atomization.
- Master dual-action trigger control by pressing down for air and pulling back for paint while maintaining smooth strokes.
- Test spray patterns on practice surfaces before applying to miniatures to adjust pressure settings and paint consistency.
- Clean airbrush thoroughly between colors using dedicated cleaner and maintain equipment in dust-free environments for longevity.
Essential Airbrush Equipment Components
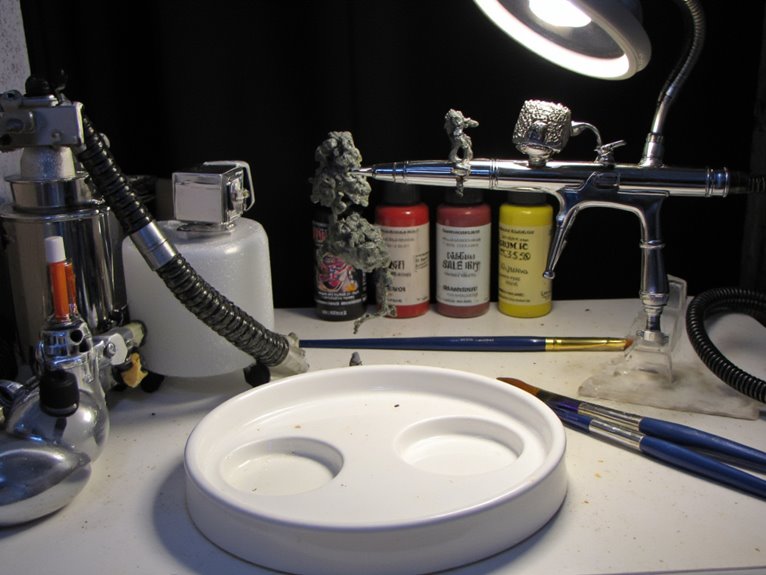
When setting up an airbrush for miniature painting, you’ll need several essential components that work together as an integrated system. The airbrush body forms the foundation, typically constructed from durable metal alloys that guarantee airbrush durability and corrosion resistance.
You’ll want a dual-action model with precision-machined components for smooth operation.
The nozzle and needle assembly directly affects your spray pattern quality. Choose 0.15mm to 0.20mm nozzles for detail work, or 0.40mm for terrain applications.
Interchangeable sets provide versatility between fine lines and broader coverage.
Your gravity feed paint cup enables efficient paint flow with minimal waste. This gravity-fed design places the paint reservoir on top of the airbrush, making it a popular choice among miniature painters. The trigger mechanism allows independent control of air pressure and paint flow.
Finally, you’ll need a reinforced hose with quick-connect fittings to link your airbrush to the compressor system. Quality materials in all components ensure optimal results and long-term performance for your miniature painting projects. The compressor should maintain consistent airflow at the proper pressure range to prevent fluctuations during extended painting sessions.
Choosing the Right Compressor and Pressure Settings

Your compressor choice and pressure settings directly determine the quality and consistency of your miniature painting results.
The compressor must deliver steady airflow between 2 to 3 bars (29-44 psi) while minimizing noise and vibration that can disrupt fine detail work.
Understanding how different compressor types—diaphragm, piston, and silent models—affect paint atomization will help you select equipment that matches your specific painting techniques and workspace requirements.
Tank-equipped models provide consistent pressure delivery during extended painting sessions, while tankless designs offer greater portability for artists working across multiple locations.
Quality compressors include a humidity trap that removes moisture from the air supply, preventing water contamination that can ruin paint finishes and cause splattering issues.
Look for compressors with dual cooling fans that prevent overheating during extended painting sessions, ensuring consistent performance throughout your miniature detailing work.
Compressor Features Explained
The foundation of any successful airbrush setup lies in selecting a compressor that delivers consistent, controllable air pressure for your miniature painting needs. Understanding different compressor types helps you make informed decisions.
Oil-lubricated models run quieter but require regular oil changes. Oil-free piston compressors need less maintenance but generate more noise. Diaphragm compressors offer portability with moderate noise levels.
Key features determine performance quality. Adjustable pressure regulators provide precise airflow control for different paint viscosities and offer superior control compared to adjustable air bleeds for miniature painting applications. Tank capacity affects duty cycle—larger tanks cycle less frequently, delivering steadier air pressure. Dual gauges monitor both tank and output pressure simultaneously. Quick-connect fittings simplify setup changes between painting sessions. For optimal miniature painting, ensure your compressor can regulate PSI within the 10-40 range for versatile painting techniques.
Essential maintenance tips include draining moisture traps regularly and checking air filters for contamination. These practices promote consistent paint quality and extend compressor lifespan considerably.
Optimal Pressure Ranges
After selecting your compressor, finding ideal pressure settings becomes your next priority for achieving professional miniature painting results.
Start with 20-30 psi (1.4-2.1 bar) for general miniature work. This range balances control and coverage effectively. Pressure impacts your paint flow directly—higher settings increase coverage speed but reduce precision.
For fine detail work, reduce pressure to 17 psi (1.2 bar) or lower. Paint viscosity determines your pressure needs considerably. Thicker paints require 30-35 psi to atomize properly, while thinned paints work well at lower pressures.
Test different settings on scrap material first. Beginners should stay within 2-3 bar (29-43 psi) initially. Higher pressures up to 40 psi can create spatter effects for weathering or texture applications. Always adjust pressure with air flowing to maintain accurate readings and ideal spray patterns.
Adjusting for Detail Work
When detail work becomes your primary focus, compressor selection shifts toward models that excel at consistent low-pressure delivery rather than raw power. Double-piston compressors offer superior airflow management, delivering steady 25-35 PSI ranges essential for precise miniature painting.
You’ll need compressor durability that withstands frequent pressure adjustments without performance degradation.
Diaphragm compressors with small tanks eliminate pulsing issues that disrupt fine detail work. Tank-equipped models buffer airflow inconsistencies, ensuring smooth paint atomization at lower pressures.
Single-piston units work adequately for thin paints but may struggle with consistency during extended sessions.
Consider compact models like the Master Airbrush TC-40T or Grex AC1810-A for indoor setups. These balance noise reduction with adequate PSI capability while maintaining consistent airflow.
Moisture traps prevent contamination, protecting your detailed work from air quality issues that compromise precision painting.
Selecting Optimal Nozzle Sizes for Different Models
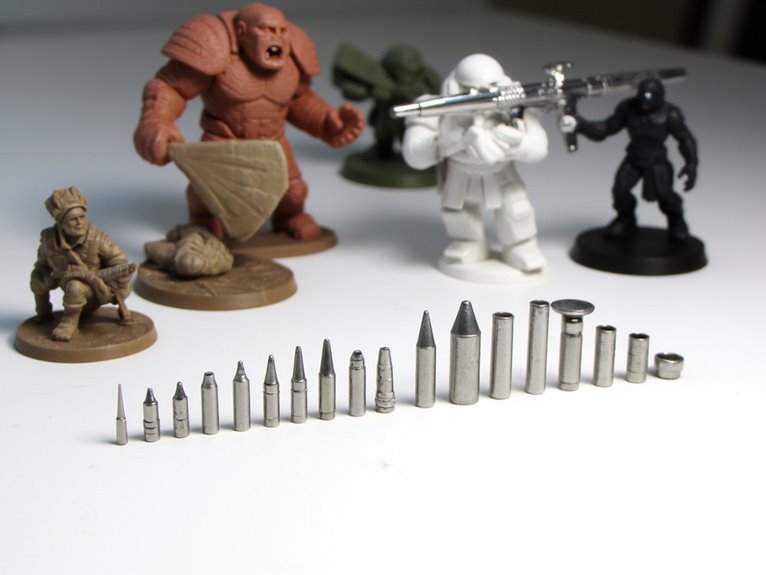
Five critical nozzle sizes can transform your miniature painting results, each designed for specific model types and detail requirements. Understanding nozzle compatibility guarantees peak performance across different painting tasks.
For highly detailed miniatures, you’ll need 0.15mm to 0.20mm nozzles. These provide superior precision control and fine atomization. The size benefits include crisp line work and controlled paint delivery for intricate details.
Medium-scale models perform best with 0.3mm to 0.4mm nozzles, balancing detail capability with coverage efficiency.
Large models and terrain require 0.4mm to 0.6mm sizes for rapid surface coverage without excessive paint thinning.
Very large projects benefit from nozzles up to 1.0mm, handling thick primers and metallics effectively.
Choose airbrush systems with interchangeable nozzle sets for maximum versatility across your entire model collection. Professional models like the Harder & Steenbeck Evolution 2024 CRplus offer dual-action designs with tool-free assembly for easy nozzle changes during painting sessions.
Paint Preparation and Thinning Techniques
Getting your paint consistency right makes the difference between smooth, professional results and frustrating spray patterns that ruin your miniature’s details.
You’ll need to thin most acrylic paints to milk-like viscosity using a 1:3 paint-to-thinner ratio as your starting point, though this varies greatly between brands like Vallejo and Citadel.
Always test your thinned paint on a practice surface first—proper consistency flows smoothly without splattering while maintaining enough coverage to build up thin, even layers.
Professional airbrush kits typically include multiple nozzle sizes ranging from 0.2mm for fine detail work to 0.5mm for broader coverage, allowing you to adjust your setup based on the specific painting requirements of your miniatures.
Achieving Proper Paint Consistency
Although paint consistency might seem like a minor detail, it’s actually the foundation of successful airbrush miniature painting. Proper paint viscosity directly impacts spray quality and clog prevention throughout your painting session.
Target a consistency similar to skimmed milk for ideal atomization. This benchmark provides excellent flow while maintaining coverage. However, “skimmed milk” remains subjective—practical experience will refine your perception of correct thickness.
Test spray before painting your miniature. Observe how paint flows during these tests rather than relying solely on mixing ratios. Paint behavior varies based on nozzle diameter, air pressure settings, and environmental conditions like humidity.
Adjust thinning incrementally to prevent over-thinning, which causes poor coverage. Use airbrush-ready paints when possible, as they require minimal adjustment for proper flow.
Optimal Thinning Ratios
Establishing the correct thinning ratio transforms your paint from tube consistency into airbrush-ready medium. Start with a baseline 1:3 ratio—one part paint to three parts thinner—for hobby acrylics like Army Painter and Citadel.
Vallejo and Reaper paints need less thinning due to their naturally thinner formulation. Your target paint viscosity should resemble whole milk or skimmed milk.
Add thinner before paint in your airbrush cup to prevent nozzle clogging. Smaller nozzles (0.15-0.3mm) require thinner ratios approaching ink consistency, while larger nozzles (0.3-0.5mm) handle thicker mixtures.
Experiment with ratios from 1:1 to 1:4 based on your nozzle size and desired technique. Always use dedicated airbrush medium rather than water alone for ideal flow control and paint integrity.
Testing Before Application
Before you commit paint to your carefully prepared miniature, testing your thinned mixture on scrap material saves you from costly mistakes and guarantees ideal spray characteristics.
Use paper or plastic cards as disposable test surfaces to evaluate paint flow and atomization quality.
Start with 30-35 PSI air pressure for initial testing techniques. Look for consistent, fine mist patterns without heavy droplets or sputtering. Your dual-action airbrush should produce even coverage across the test surface.
Begin each spray burst with air only, then gradually add paint flow to prevent spitting.
During spray evaluation, observe paint behavior for smooth flow without thick streaks or pooling. Adjust your thinning ratio if the mixture appears too thick or runs excessively.
Test every new paint batch before application.
Achieving Proper Paint Consistency of
Why does achieving the perfect paint consistency make or break your airbrushing results?
Paint viscosity directly controls your spray quality and coverage effectiveness. You’ll want consistency similar to skim milk for peak performance. Thick paint clogs nozzles and creates uneven patterns, while overly thin paint requires multiple passes to build opacity.
Start with thinning ratios between 1:1 to 7:3 (thinner to paint), depending on your technique. Metallics typically need 8:2 ratios.
Always add thinner to your airbrush cup first to prevent clogging. Use specialized airbrush medium to maintain pigment quality.
Proper viscosity enables smooth layering techniques and fine detail work. Test spray frequently while thinning incrementally.
Mix paint thoroughly before application and use wet palettes to maintain consistency throughout your session. Properly thinned paint responds better to trigger control and air pressure adjustments.
Most double-action airbrushes require paint thinning of 20-30% to achieve optimal flow control and prevent clogging during detailed miniature work.
Pressure Control and Airbrush Settings

Setting your airbrush pressure correctly forms the foundation of professional miniature painting results.
You’ll need to master ideal PSI ranges between 20-30 PSI, develop precise trigger control techniques for consistent paint flow, and learn dynamic pressure adjustment methods during active painting sessions.
These three core skills work together to give you complete control over paint atomization, surface finish quality, and detail precision on your miniatures.
Optimal PSI Settings
Pressure control serves as the foundation of successful miniature airbrushing, with ideal PSI settings typically ranging between 20-30 PSI (1.3-2.0 bar) for most detailed work.
Beginners should start at 25-30 PSI with standard paints and 0.15-0.20mm nozzles. Lower your pressure to 20 PSI for fine detail work like highlights and weathering effects.
PSI adjustment techniques require active calibration while spraying to maintain consistent pressure. Set your regulator at 1.8 bar (26 PSI) for peak performance with 1:1 paint-to-thinner ratios at 3-5cm distances.
Air pressure influences both atomization quality and paint flow speed. Higher pressures above 40 PSI risk overspray and control loss.
Balance pressure with paint consistency—thinner mixtures work effectively at lower PSI settings, providing superior control for layering techniques.
Trigger Control Techniques
Mastering your airbrush trigger transforms mediocre miniature painting into precision artwork through deliberate control over air and paint flow sequences.
You’ll initiate airflow by pushing down first, then pull back for paint release. This prevents splattering and guarantees smooth delivery. Release requires reverse order: push forward to stop paint, then lift to cut airflow.
Your trigger pressure directly controls paint volume. Partial pulls create minimal flow for details, while deeper pulls provide broader coverage. Smaller nozzles (0.15-0.20mm) demand more precise movements than larger sizes. Paint viscosity affects sensitivity requirements too.
Effective trigger practice involves fade-in and fade-out control exercises on paper before touching miniatures.
Develop muscle memory through repetitive drills focusing separately on air initiation and paint release movements for coordinated handling.
Dynamic Pressure Adjustment
Once you’ve established basic trigger control, your next critical skill involves adjusting air pressure dynamically to match paint viscosity and application requirements.
Start with 25-30 PSI for standard miniature paints, but always perform pressure calibration while holding the trigger down. Your gauge reading changes dramatically between idle and active spraying states.
Make dynamic adjustments based on paint consistency changes throughout your session. Thinner paint requires lower PSI to prevent overspray and spiderwebbing. Thicker paint demands higher pressure but increases clogging risks.
Using an air regulator with gauge enables real-time pressure modifications while spraying.
Monitor your spray pattern constantly. Splattering indicates excessive pressure, while uneven coverage suggests insufficient pressure.
Recalibrate whenever switching paint types or thinning ratios to maintain ideal atomization and finish quality.
Fundamental Spraying Techniques
When you’re ready to begin spraying, proper paint consistency forms the foundation of successful airbrush technique. Thin your paint to skim milk consistency for ideal flow. Add thinner before paint to prevent clogs. Set air pressure between 12-16 PSI for steady spray patterns.
Master the dual-action trigger sequence: press down for air first, then pull back for paint. Start spraying off your miniature to avoid pooling. Use gradual horizontal strokes in light, multiple passes rather than heavy coats. This approach guarantees smooth coverage and texture control.
Release paint flow before air flow when finishing strokes to prevent splatters.
Practice these fundamental spraying techniques with water first to build muscle memory. Effective paint application depends on consistent trigger control and proper movement patterns for professional results.
Advanced Painting Methods and Effects
Beyond basic spraying techniques, advanced airbrush methods reveal sophisticated effects that transform miniatures into museum-quality pieces.
You’ll master techniques that professional painters use to create competition-winning models.
Advanced Airbrush Techniques:
- Advanced highlighting – Use varying spray angles and distances to build smooth light shifts without laborious hand-painting.
- Stenciling techniques – Apply masking tape or custom stencils for precise patterns, insignias, and camouflage effects.
- Weathering effects – Layer thin washes, spatter effects, and transparent glazes to simulate realistic wear, rust, and grime.
- Metallic finishes – Spray multiple thin coats of metallic paints for smooth, reflective surfaces without brush strokes.
These texturing methods require proper paint thinning ratios and pressure control.
Special effects like color-shifting highlights and heat discoloration emerge through careful layering of transparent colors over metallics.
Daily Cleaning and Maintenance Procedures
Professional airbrush techniques demand consistent tool performance, which requires disciplined daily maintenance habits. Your routine maintenance schedule should include flushing paint residue between color changes using dedicated airbrush cleaner or appropriate thinner.
Empty the paint cup completely before spraying cleaner until output runs clear. Remove the needle carefully and wipe with thinner to prevent sticking. Clean the nozzle‘s front surface using small, soft brushes to eliminate dried paint buildup.
Your cleaning tools should include inter-dental brushes for tight passages, Q-tips for detailed work, and lint-free cloths for wiping components. Maintain two separate thinner containers: one for initial cleaning and another for final rinsing.
Always spray cleaner downward to prevent liquid backflow into trigger mechanisms, ensuring ideal airbrush longevity.
Long-term Care and Storage Practices
Three critical factors determine your airbrush’s lifespan and performance consistency: storage environment, component protection, and systematic organization.
Proper storage solutions require clean, dust-free environments with stable temperature and humidity levels. Store your equipment in dedicated cases away from direct sunlight to prevent seal degradation.
Essential long-term care practices include:
- Complete disassembly – Remove needle, nozzle, and cup after cleaning to prevent dried paint buildup
- Component protection – Apply light airbrush lubricant on needles and store parts in labeled containers
- Paint longevity management – Keep paints upright in cool, dark locations using airtight containers
- Pre-use maintenance – Test spray function and inspect compressor lines for blockages before each session
Label paint bottles with opening dates and maintain updated inventory lists for ideal supply management.
Helpful Accessories and Practice Tips
While proper storage forms the foundation of airbrush longevity, acquiring the right accessories and developing solid practice techniques will dramatically accelerate your miniature painting skills and equipment reliability.
Essential accessory recommendations include paint strainers to prevent nozzle clogs, water traps for moisture removal, and quality cleaning brushes sized for your specific airbrush model.
Paint strainers, water traps, and properly-sized cleaning brushes form the essential accessory trinity for reliable airbrush performance.
Quick disconnects improve workflow efficiency, while spray-out pots contain overspray during color changes.
Effective practice strategies begin with water-only sessions to master trigger control without paint complexity.
Always thin paints with proper thinners rather than water to achieve peak viscosity. Start each spray pass with air-only flow to prevent paint blobs, then engage paint flow smoothly. End passes with air-only to cut paint flow cleanly.
Maintain consistent cleaning routines between colors and sessions to prevent dried paint buildup.
On a final note
You’ve now assembled the essential knowledge for successful airbrush miniature painting. Your equipment choices directly impact paint flow consistency and detail quality. Proper maintenance extends airbrush lifespan considerably while preventing costly clogs. Start with basic techniques before advancing to complex effects. Practice on spare models first. Remember that paint viscosity affects spray patterns more than pressure adjustments. You’ll achieve professional results through consistent preparation routines and systematic cleaning protocols.