We are supported by our audience. When you purchase through links on our site, we may earn an affiliate commission, at no extra cost for you. Learn more. Last update on 30th June 2025 / Images from Amazon Product Advertising API.
Your miniature paints develop consistency problems when pigment particles settle to the bottom while water separates on top, creating a watery layer over dense sediment that disrupts the critical pigment-to-binder ratio needed for smooth application. Chemical aging causes polymer binders to cross-link in acrylics, while evaporation of volatile solvents increases viscosity. Temperature fluctuations above 80°F accelerate degradation, and humidity changes create cycling stress that damages paint layers. Proper storage, regular inspection, and gentle rehydration with distilled water restore flow characteristics—understanding these fundamentals prevents application issues before they occur.
Notable Insights
- Watery layer forms atop thick sediment due to colloidal suspension breakdown and chemical aging of polymer binders.
- Temperature fluctuations and humidity changes destabilize paint suspension, causing separation and consistency problems in miniature paints.
- Inadequate surface preparation and improper priming lead to poor paint adhesion, clumping, and uneven coverage on miniatures.
- Use distilled water for gradual rehydration and gentle circular stirring to redistribute settled pigments without over-thinning.
- Regular visual inspection detects separation issues early, while proper storage prevents temperature and humidity damage.
Understanding Why Paint Thickens and Separates Over Time
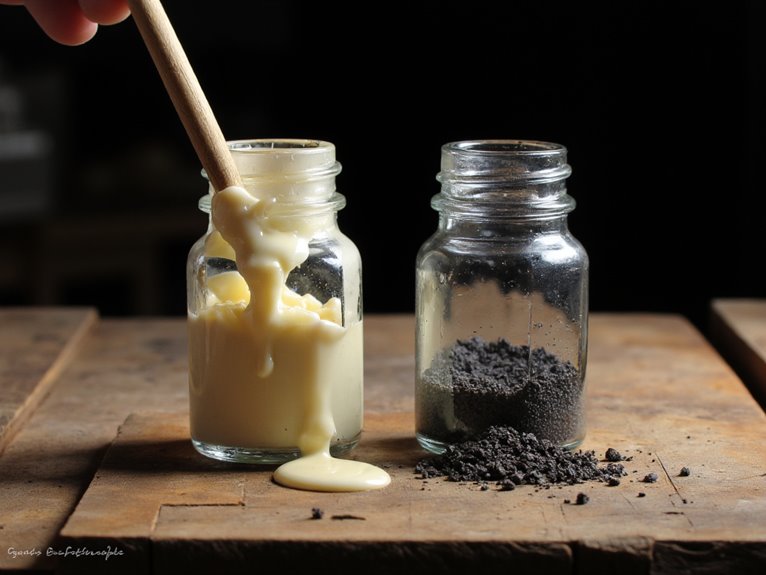
When you open a bottle of miniature paint that’s been sitting unused for months, you’ll often find a watery layer on top with thick, paste-like sediment at the bottom. This occurs because paint is a colloidal suspension where heavier pigment particles settle due to gravity while lighter liquid components rise.
Paint viscosity increases as volatile solvents evaporate through microscopic gaps in bottle seals, concentrating the remaining solids.
The primary separation causes include chemical aging of polymer binders and natural settling over time. In acrylic paints, binder molecules may cross-link, permanently altering flow characteristics.
Chemical aging causes polymer binders in acrylic paints to cross-link, permanently changing their flow properties over time.
Oil-based formulations face oxidation that creates gel-like consistency. Temperature fluctuations accelerate these processes by causing component expansion and contraction, further disturbing the suspension’s stability. Poor storage conditions can significantly worsen these separation issues, making proper paint storage essential for maintaining consistency. To determine if paint has reached the proper viscosity, it should flow like heavy cream rather than in thick globs or water-like streams. Many manufacturers now produce ready-to-spray formulas that eliminate the need for mixing paint ratios and provide consistent flow characteristics.
Environmental Factors That Accelerate Paint Degradation
Your miniature paints face constant environmental threats that can rapidly destroy their consistency and performance.
Temperature fluctuations cause paint layers to expand and contract at different rates, creating stress that leads to cracking and separation within 24-48 hours of exposure.
High humidity levels above 60% RH promote mold growth while low humidity below 30% RH makes paint films brittle. When acrylic miniature paints dry completely, they transform into persistent microplastics that can accumulate in your workspace and eventually enter water systems.
Additionally, direct UV light exposure breaks down pigment molecules at wavelengths between 290-400 nanometers. UV-resistant paints protect against color fading in sunlight, and proper chemical compatibility ensures stronger adhesion that prevents degradation from environmental stressors. Environmental pollutants can penetrate paint surfaces and cause chemical degradation that weakens the binding medium over time.
Temperature and Humidity Effects
Environmental conditions directly determine your miniature paint’s long-term stability and performance.
Temperature fluctuations cause paint layers to expand and contract repeatedly, creating mechanical stress that leads to cracking and delamination. When temperatures drop below 50°F, your paints become brittle and susceptible to damage during handling.
Heat above 80°F makes paint layers pliable, increasing smudging risk and accelerating chemical degradation.
Humidity extremes pose equally serious threats.
Low relative humidity below 30% causes paint and substrate contraction, introducing brittleness and separation between layers.
High humidity above 70% can weaken adhesives and cause swelling. Rapid humidity changes create cycling stress that accumulates over time. These fluctuations have cumulative damaging effects that compound with each environmental change cycle.
Microclimates near walls amplify these effects, creating localized conditions that differ dramatically from room averages. Maintaining the 40-60% range for relative humidity provides optimal preservation conditions for painted surfaces.
Light Exposure Damage
Although invisible to the naked eye, light exposure creates a relentless chemical assault on your miniature paints that accumulates with every hour of display time. UV radiation breaks down organic pigments at the molecular level, causing irreversible fading and brittleness.
Red lakes and organic compounds prove most vulnerable to this photochemical degradation. Light pollution from windows and unfiltered artificial sources accelerates damage exponentially.
Your display strategies must prioritize color preservation through measured exposure limits. Install UV protection filters on display cases and windows to block harmful wavelengths while maintaining visibility.
LED lighting designed for artwork reduces UV emission by 90% compared to fluorescent sources. Position miniatures away from direct sunlight and limit display intensity to 150 lux maximum. Heat combined with light exposure can cause warping and buckling of painted surfaces, particularly when miniatures are displayed near heat sources.
Consider rotating displays periodically, as damage operates like a finite “light bank” with irreversible tolerance thresholds.
Surface Preparation Issues That Affect Paint Performance
Your miniature’s surface condition directly determines whether paint will flow smoothly or create frustrating consistency problems during application.
Residual oils from manufacturing, inadequate priming, and poor surface texture preparation cause paint to behave unpredictably—leading to clumping, uneven coverage, and adhesion failures.
These preparation issues often masquerade as paint consistency problems, but they’re actually surface-related factors that you can control through proper cleaning, priming techniques, and texture management.
Acrylic-based primers provide superior adhesion on both plastic and metal miniatures, preventing the paint flow irregularities that result from incompatible surface treatments.
Cleaning Residues and Oils
Before you apply the first coat of primer, invisible contaminants on your miniature’s surface can sabotage even the highest-quality paints.
Mold release agents from manufacturing, finger oils from handling, and plastic dust from assembly create barriers that prevent proper paint adhesion.
Effective residue identification starts with understanding what you’re removing.
Release agents leave invisible films that cause paint to bead and peel. Fingerprints deposit oils that create uneven coverage. Assembly debris obscures fine details and creates texture inconsistencies.
Your cleaning techniques should follow a systematic approach.
Dip or brush surfaces with 70-99% isopropyl alcohol to dissolve oils and residues.
Follow with dish soap and soft toothbrush scrubbing for stubborn contaminants. Rinse thoroughly with water and air dry completely before priming.
Proper Priming Techniques
Even the most thorough cleaning won’t guarantee paint success if your priming technique falls short.
Your primer application directly determines paint adhesion quality and final finish smoothness. Choose primer compatible with your miniature’s material—plastic requires different formulations than resin or metal. Apply multiple thin coats rather than single thick applications to preserve surface details.
Spray primers deliver superior consistency compared to brush-on alternatives.
Environmental conditions critically affect primer performance. Maintain temperatures between 18-25°C and work in low-humidity environments.
Allow complete curing between coats—rushing this process causes paint lifting and cracking later. Your primer color affects subsequent paint vibrancy greatly.
- Use thin, even coats for adhesion improvement without detail loss
- Match primer type to miniature material specifications
- Control temperature and humidity during application
- Allow full curing time between primer coats
Surface Texture Preparation
Perfect primer application won’t overcome surface preparation failures that compromise paint performance before you begin. Mold lines, flash, and casting defects create uneven surfaces that cause inconsistent paint application and blotchy coverage.
Remove these imperfections with hobby knives or files before cleaning to prevent contamination spread.
Texture uniformity directly affects paint absorption and finish quality. Rough surfaces trap paint, creating build-ups that obscure fine details. Conversely, overly smooth surfaces may resist paint adhesion.
Balance surface abrasion carefully—vigorous brushing with a hard toothbrush roughens glossy areas for better grip, while brush-on sealers smooth excessive roughness.
Surface smoothing must avoid creating micro-scratches that trap dirt or cause inconsistent paint distribution. Properly prepared textures stabilize paint films against handling wear and environmental factors.
Visual Testing Methods for Evaluating Paint Thickness
Three primary visual testing methods allow you to evaluate miniature paint thickness without expensive equipment or laboratory analysis.
Visual inspection relies on detecting surface uniformity changes, gloss variations, and opacity differences that indicate thickness inconsistencies. You’ll notice thin areas through uneven sheen, streaking patterns, or color saturation changes.
Cross-sectional microscopy provides precise thickness measurement by cutting miniature V-grooves through paint layers. This semi-destructive method delivers accurate values but requires laboratory conditions.
Ultrasonic gauges offer non-destructive thickness measurement with ±3% accuracy, converting pulse echoes into digital readouts.
Key visual testing considerations:
- Lighting angle and intensity affect detection accuracy
- Pattern recognition software reduces subjective interpretation
- Defects like bubbles indicate thin coating spots
- Reflectance deviations flag inconsistent film areas
Bottle Inspection Techniques for Identifying Separation
You can identify paint separation before dispensing by examining the bottle itself through systematic visual inspection methods.
Remove the dropper tip to check for clogged residue and inspect the paint’s internal layers, which often reveal separation problems not visible from the outside.
Settlement patterns at the bottle’s bottom and watery layers near the neck provide clear indicators of pigment-to-binder ratio disruption that affects your paint’s performance.
Proper paint storage becomes even more critical when you have an extensive collection, and modular storage systems can help organize your miniature paints while keeping them easily accessible for regular inspection.
Visual Layer Detection Methods
Detecting paint separation requires systematic visual inspection of your miniature paint bottles before each use.
Visual layering techniques help identify distinct phases ranging from watery top layers to thick sediment accumulation at the bottom. Look for color consistency variations and opacity changes throughout the bottle contents. Paint separation indicators include pale or faint areas suggesting water separation, visible sediment deposits, and textural differences between layers.
Key Visual Layer Detection Methods:
- Backlighting inspection – Hold bottles against light sources to reveal translucent versus opaque layer boundaries
- Color gradient analysis – Check for uniform pigment distribution from bottle neck to bottom
- Sediment mapping – Identify settled particles and clumped material locations within the container
- Opacity variation tracking – Document consistency changes through bottle transparency observation
Regular visual assessment prevents application issues and maintains paint quality standards.
Dropper Removal Inspection
One of the most revealing inspection techniques involves physically removing the dropper nipple to examine internal paint conditions that aren’t visible through standard bottle assessment.
Nipple removal exposes paint buildup around the bottle neck and dropper tip that restricts flow. You’ll often discover thickened, gummy paint clinging to the nipple’s interior surface, indicating drying or clogging issues.
This paint inspection method reveals hardened material blocking smooth dispensing. Thick, pasty consistency around the tip confirms internal drying problems requiring immediate attention.
Pull the nipple carefully to avoid paint spillage, then examine both the tip and bottle opening for accumulated residue.
Regular nipple removal prevents prolonged clogging while maintaining consistent paint flow. Any lost drops during inspection are minimal, and you can recover paint by dipping your brush directly into the bottle.
Settlement Pattern Recognition
When paint components separate inside bottles, distinctive visual patterns emerge that reveal the extent of pigment settlement and binder separation.
You’ll notice clear layering with watery, pale liquid at the top and dense sediment collecting at the bottom. This gradient becomes most visible in translucent bottles, while opaque containers mask these telltale signs.
Key settlement patterns to identify:
- Gradient layering – Clear separation between thin upper layer and thick bottom sediment
- Color variations – Noticeable lightening at top with darker concentration below
- Sediment accumulation – Dense pigment clusters settled at bottle base
- Floating binders – Clear or milky layer rising to surface
Effective separation prevention requires regular bottle agitation every few months.
Early pigment settling detection saves paint quality and prevents application problems during your miniature painting sessions.
Rehydrating Thickened Paint With Distilled Water
As your miniature paints thicken over time, distilled water serves as the primary tool for restoring their original consistency and flow characteristics.
You’ll avoid contaminants found in tap water that can compromise paint quality and introduce unwanted minerals. Proper paint storage prevents excessive thickening, but effective thinning techniques require gradual water addition.
Add small amounts of distilled water incrementally to prevent over-thinning. Stir thoroughly with a brush or toothpick, focusing on lifting settled pigment from container bottoms and sides. Mechanical shaking alone won’t redistribute particles effectively. Continue this process until paint flows smoothly while maintaining adequate opacity.
Test consistency frequently during rehydration. Over-thinned paint loses coverage ability and separates faster than properly restored formulations.
Water-only restoration provides temporary solutions, while acrylic medium additions offer improved long-term stability. When preparing paints for airbrush application, maintaining proper viscosity becomes even more critical as thick paints require specific pressure adjustments between 15-50 PSI for optimal spray patterns.
Proper Stirring and Shaking Procedures
Proper stirring and shaking procedures form the foundation of consistent paint application and directly impact your miniature’s final appearance.
Effective stirring guidelines require gentle circular motions to avoid introducing air bubbles that compromise finish quality. Use dedicated stirrers or brushes to thoroughly mix pigments before each application session.
Shaking techniques involve firm 10-20 second bursts rather than continuous agitation, preventing foam formation while ensuring proper pigment redistribution. Tap jar bottoms gently after shaking to settle contents effectively.
- Stir gently with brushes to prevent air bubble formation
- Shake in short bursts for 10-20 seconds maximum
- Check consistency on palette after mixing
- Load brush halfway for ideal paint control
Test consistency on your thumb before miniature application to verify proper mixing results.
Selecting the Right Thinning Agents and Mediums
Once you’ve mastered proper stirring techniques, selecting the appropriate thinning agent becomes your next critical decision in achieving perfect paint consistency.
Water remains the most accessible option for basic thinning techniques. You’ll find it works well for general painting and layering, though over-thinning risks breaking pigment-binder bonds. Filtered water reduces mineral contamination that compromises paint chemistry.
Acrylic mediums offer superior medium compatibility by maintaining proper pigment-to-binder ratios. They’re safer for larger dilutions and ideal for creating glazes without disrupting surface finish quality. Manufacturer-specific products like Games Workshop Lahmian Medium guarantee maximum compatibility with corresponding paint lines.
Flow improvers reduce brush strokes while retarders extend working time for wet blending.
No universal mixing ratios exist—experimentation remains essential for mastering consistency across different brands and techniques.
How Thick Paint Obscures Fine Detail Work
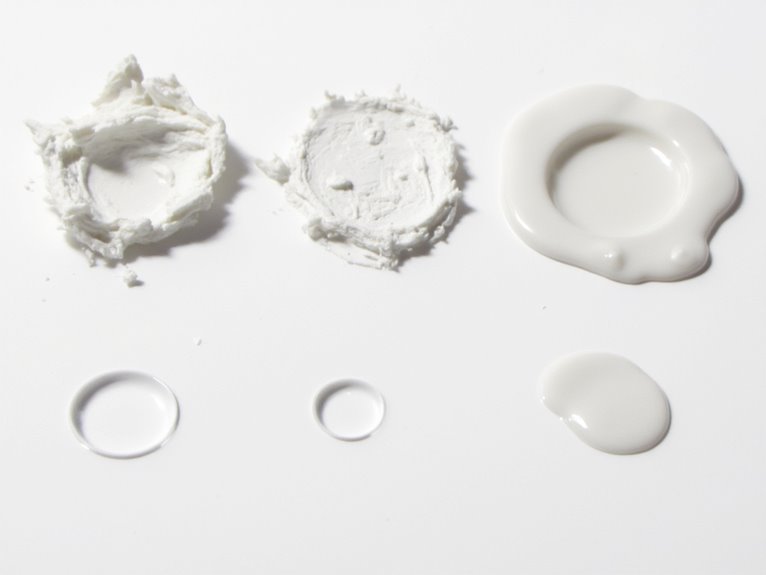
When paint consistency becomes too thick, it acts like a blanket that smothers the intricate details you’ve worked hard to achieve on your miniature. Excessive paint opacity creates texture masking that eliminates surface definition. Your model’s fine engravings, armor ridges, and facial features disappear under heavy coats.
Key problems with thick paint applications:
- Detail obliteration – Thick layers fill recessed areas and smooth raised surfaces
- Brush stroke visibility – Heavy consistency leaves obvious application marks
- Reduced wash effectiveness – Sealed cracks prevent proper shading penetration
- Lost surface texture – Original sculpted details become completely obscured
Thick paint requires multiple heavy coats for coverage, compounding the problem. Each application adds another layer of texture masking.
You’ll lose the subtle variations that make miniatures visually compelling when paint opacity becomes uncontrolled.
Problems Caused by Over-Thinning Your Paints
The pendulum can swing too far in the opposite direction when you thin your paints excessively.
Over-thinning creates multiple serious problems that compromise your miniature’s finish quality. You’ll lose opacity and coverage as diluted pigment concentration fails to hide underlying layers effectively. This forces you to apply multiple coats, extending painting time considerably.
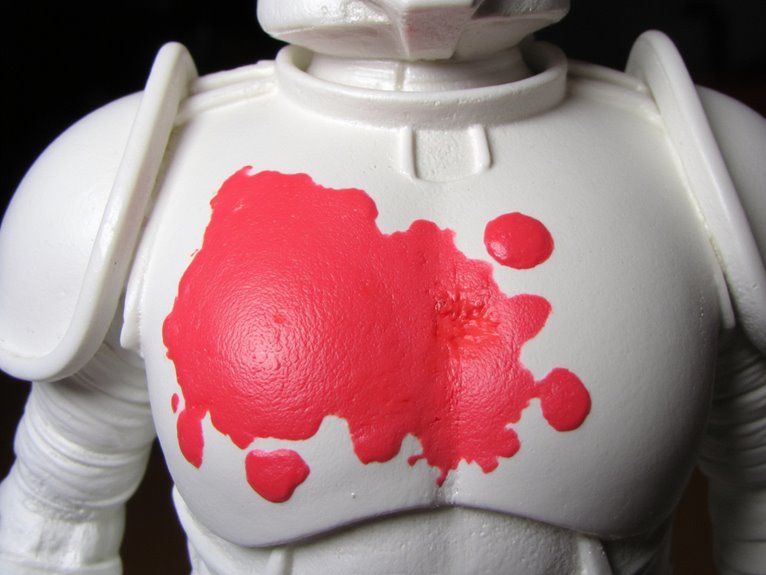
Watery paint runs uncontrollably into recesses, pooling where you don’t want it. The resulting paint film becomes fragile and prone to scratching during handling.
Most paint types require specific mixing ratios to maintain their structural integrity. Excessive water or medium disrupts these ratios, weakening adhesion strength.
Your precision techniques suffer dramatically. Edge highlighting becomes impossible as over-thinned paint won’t hold sharp lines.
Dry brushing and layering lose effectiveness when consistency drops too low.
Storage Solutions for Preventing Consistency Problems
Proper storage prevents most paint consistency problems before they start. Temperature fluctuations and humidity cause separation and thickening in your miniatures paints.
Store bottles at room temperature in climate-controlled areas away from direct sunlight and heat sources.
Effective paint storage requires customized containers with individual slots. You’ll maintain paint organization using modular racks designed for upright bottle positioning. Dividers prevent contamination between colors while protecting caps from damage.
- Use sealed containers with soft padding to prevent punctures and dust accumulation
- Install individual slots or modular organizers to keep bottles upright and accessible
- Maintain stable room temperature storage away from humidity and heat sources
- Create custom dividers using repurposed boxes or dedicated hobby storage systems
Portable solutions need secure locking mechanisms and shock absorption for transport consistency.
Routine Maintenance Schedule for Paint Collections
Although many painters overlook systematic maintenance, your paint collection requires consistent inspection schedules to maintain ideal consistency and performance.
Establish a weekly paint inventory review to check for separation, skin formation, and viscosity changes. Your maintenance checklist should include stirring containers before use, cleaning rim residue for airtight sealing, and monitoring environmental conditions.
Rotate older paints forward monthly to prevent deterioration. Track opening dates and observe color shifts or textural inconsistencies indicating replacement needs.
Maintain storage temperatures between 65-75°F with stable humidity levels. Clean brushes thoroughly after each session using soap and gentle twisting motions.
Document thinning medium usage and paint condition status. Replace paints showing degradation immediately to preserve miniature detail quality and color saturation.
On a final note
You’ll maintain ideal paint consistency by implementing these systematic approaches. Store bottles at 65-75°F with tight seals to prevent separation. Test viscosity regularly using the brush-flow method. Thin paints gradually using 10% increments of appropriate medium. Clean bottle threads monthly to guarantee proper sealing. Replace dried paint immediately rather than attempting restoration. Your miniature detail work depends on consistent paint flow—these preventive measures eliminate most viscosity problems before they affect your projects.