We are supported by our audience. When you purchase through links on our site, we may earn an affiliate commission, at no extra cost for you. Learn more. Last update on 5th July 2025 / Images from Amazon Product Advertising API.
Prepping miniatures for painting involves a series of vital steps that guarantee a strong bond between the paint and material, a smooth finish, and a visually appealing model. Start by cleaning the miniature surface to remove dirt, grime, and manufacturing residue, taking care not to touch areas to be painted. Remove excess material, or flash, and sand the surface to smooth out rough spots. Fix mold lines and imperfections, and assemble multi-part miniatures. Finally, prime the miniature to create a uniform surface for painting. By following these essential steps, you’ll set the stage for a professional-looking paint job and discover the secrets to bringing your miniatures to life.
Clean the Miniature Surface
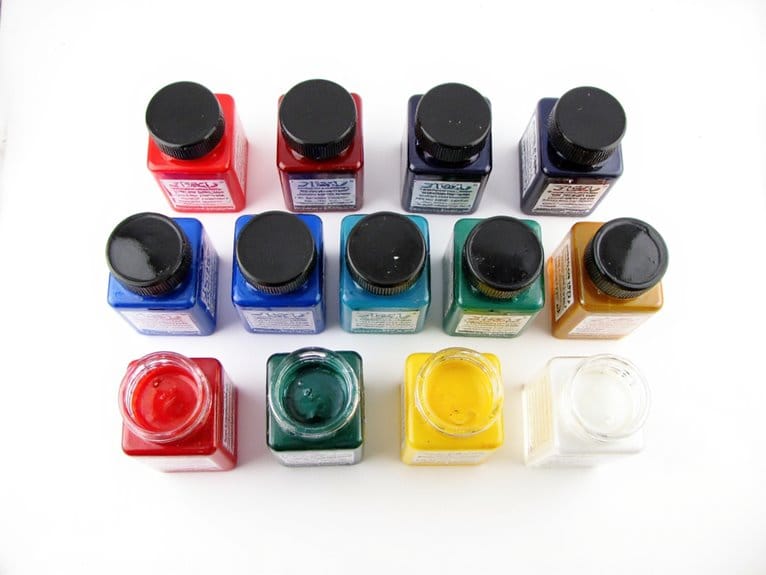
Wrapped in a layer of dirt, grime, and manufacturing residue, the miniature surface can be an intimidating blank slate for painting. Before applying the first coat of paint, it’s essential to clean the miniature surface to guarantee a strong bond between the paint and the material.
Proper miniature handling is vital during surface preparation. Hold the miniature by the base or a sturdy section to avoid touching the areas to be painted. Oils from human skin can interfere with paint adhesion, leading to uneven coats or peeling. When choosing a paint for your miniature, it’s important to follow specific miniature paint recommendations to ensure the best results. Using a primer designed for miniatures can also improve adhesion and help the paint to apply more evenly. Additionally, following the manufacturer’s instructions for thinning and drying times can help achieve a professional-looking finish.
Use a soft-bristled toothbrush or a small, dry paintbrush to gently sweep away loose debris. For more stubborn residue, dampen the brush with water, but avoid soaking the miniature. A mild soap solution can be used, but test it on a non-visible area first to verify it doesn’t damage the material. Finally, wipe the miniature clean with a lint-free cloth and allow it to air dry. A clean surface is now ready for further preparation and painting.
Remove Flash and Excess Material
Most newly acquired miniatures come with excess material, commonly referred to as flash, which is a byproduct of the molding process. This flash must be removed to guarantee a smooth, even surface for painting. Flash removal techniques vary depending on the type and location of the excess material.
| Tool | Description | Use Case |
|---|---|---|
| Hobby knife | A sharp, precise blade for cutting and trimming | Removing small amounts of flash from intricate areas |
| Clippers | Small, pointed scissors for cutting and trimming | Removing flash from larger areas, such as between limbs |
| Files | Small, handheld files for smoothing and shaping | Trimming excess material from edges and corners |
| Sandpaper | Fine-grit paper for smoothing rough surfaces | Final polishing of surfaces after flash removal |
Excess material trimming requires patience and attention to detail. It’s essential to work carefully to avoid damaging the miniature. Start by identifying areas with excess material and choose the appropriate tool for the job. Gently trim or file away the flash, taking care not to scratch or mar the surrounding surface.
Sand and Smooth Out Rough Spots
With the excess material removed, the miniature’s surface may still have rough spots that need attention. Sanding is an essential step in preparing the miniature for painting, as it helps to smooth out the surface and create an even texture. Start by using a coarse sandpaper, such as 120-grit, to remove any remaining bumps or rough patches. Gradually move to finer grits, such as 220-grit and 320-grit, to achieve a smooth finish.
When sanding, pay particular attention to areas with intricate details, as rough spots can be more pronounced in these areas. Use a gentle touch and work in small circular motions to avoid scratching the surface. Different sandpaper types, such as aluminum oxide or silicon carbide, can be used depending on the surface textures and the desired finish. By sanding carefully and methodically, you can achieve a smooth, even surface that is ready for priming and painting.
Fix Mold Lines and Imperfections
The miniature’s surface, now smooth to the touch, may still harbor subtle imperfections in the form of mold lines – faint ridges or seams where the mold was split to release the casting. These imperfections can be distracting and detract from the overall appearance of the finished model. To address this, employ mold removal techniques such as gently scraping the affected area with a hobby knife or file to remove the raised edges.
When dealing with deeper gaps or recesses, filling gaps becomes necessary. Apply a small amount of modeling putty or green stuff to the affected area, smoothing it out with a damp brush or tool. Allow the putty to dry completely before sanding it down to a smooth finish. Be cautious not to overfill the gap, as excess putty can be difficult to remove.
Prime the Miniature for Painting
Across the miniature’s surface, a uniform coat of primer serves as the foundation for a successful paint job, allowing for ideal paint adhesion and a smooth, even finish. Primer provides a bond between the miniature’s material and the paint, ensuring that the colors adhere evenly and last longer.
There are various primer types available, each suited for specific miniature materials and desired finishes. Acrylic primers work well on resin, metal, and plastic, while spray primers are ideal for large, smooth surfaces. Some primers are formulated to create a textured, rough finish, while others provide a smooth, glossy base.
When applying primer, it’s essential to follow the manufacturer’s instructions and take necessary safety precautions. Hold the canister 8-10 inches away from the miniature and spray in light, even coats, allowing each layer to dry before applying the next. Avoid over-priming, as this can lead to a rough, uneven surface. A well-applied primer sets the stage for a professional-looking paint job, ensuring that the miniature’s details are accentuated and the colors pop.
Assemble Multi-Part Miniatures
Many multi-part miniatures require assembly before painting, and this essential step demands attention to detail and patience. A well-assembled model guarantees a strong bond between parts, reducing the likelihood of damage during painting and handling. When selecting a model, consider the complexity of the assembly process and choose one that suits your skill level.
To assemble multi-part miniatures, start by cleaning the parts of any mold lines or debris. Apply a small amount of super glue to the joining areas and align the parts carefully. Use a magnifying glass or tweezers to confirm precise part alignment. Hold the parts in place for a few seconds to allow the glue to set. Use clamps or rubber bands to hold larger parts together while the glue dries completely.
Proper part alignment is pivotal to achieve a sturdy and visually appealing model. Take your time when assembling the model, and don’t hesitate to seek reference images or tutorials if needed. A well-assembled model sets the stage for a successful painting process, guaranteeing your miniature looks its best on the tabletop.