We are supported by our audience. When you purchase through links on our site, we may earn an affiliate commission, at no extra cost for you. Learn more. Last update on 30th June 2025 / Images from Amazon Product Advertising API.
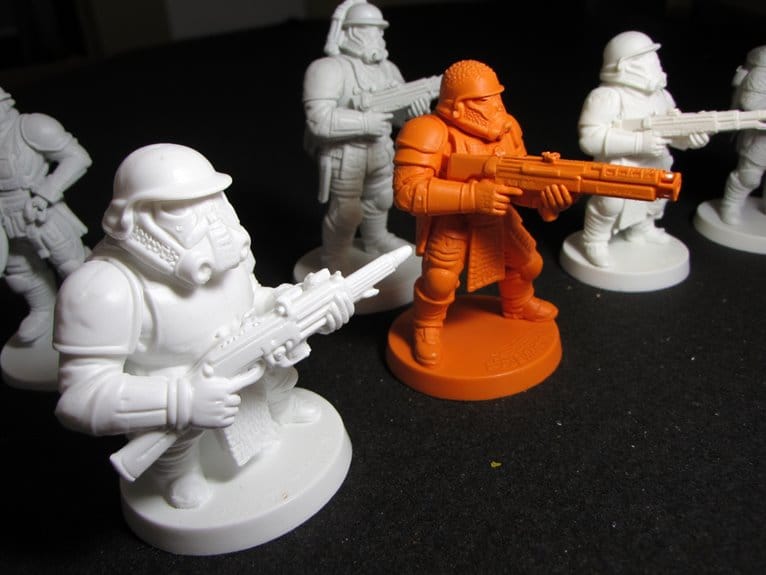
You’ll achieve realistic weathering on painted miniatures by combining dry brushing with lighter shades, sponge chipping using torn microcell foam, and strategic wash applications mixed 1:1 with painting medium. Focus weathering effects on high-contact areas like joint interfaces, edges, and grip surfaces while avoiding uniform distribution. Use fine detail brushes (sizes 0-3) for precise applications and allow complete drying between layers. Apply effects in moisture zones at armor bases and UV-exposed horizontal surfaces for authenticity. Master these foundational methods to reveal advanced layering strategies.
Notable Insights
- Use dry brushing with lighter shades than base color, applying gentle sweeping motions to gradually build realistic highlights on edges.
- Apply sponge chipping with torn microcell foam on high-wear areas like joints and edges to simulate natural damage patterns.
- Create washes by mixing paints 1:1 with medium, applying thin layers over bright undercoats for realistic dirt and grime effects.
- Focus weathering on logical zones: UV damage on horizontal surfaces, rust at moisture points, and streaks flowing downward.
- Layer multiple weathering techniques starting with base washes, adding texture layers, then refining with thinned oil paints for depth.
Understanding Different Types of Weathering Effects
Before you begin weathering your miniatures, you’ll need to understand the four primary categories of weathering effects that replicate real-world deterioration.
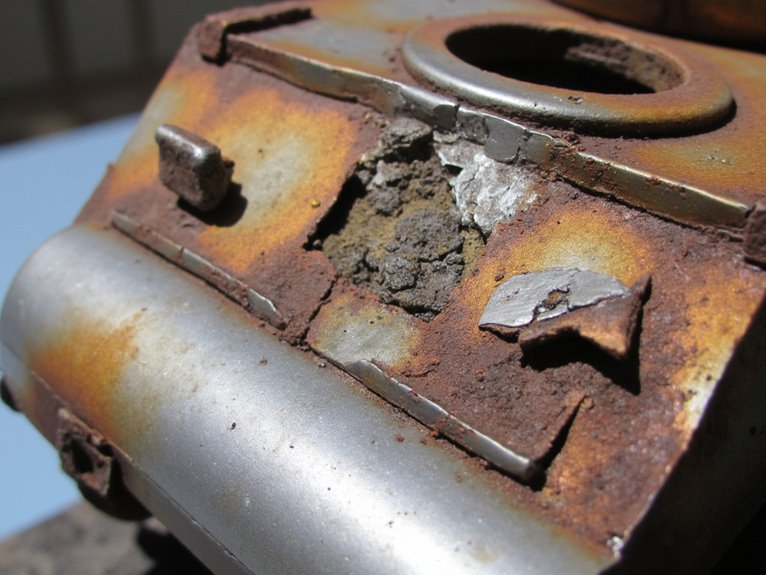
Surface damage and wear includes chipping, scratches, rust, scrapes, and pitting that show physical deterioration.
Physical deterioration creates the foundation of realistic weathering through carefully applied chipping, scratches, rust, scrapes, and pitting effects.
Environmental effects encompass mud, dirt, dust, water streaking, snow, and salt staining from natural exposure.
Material-specific aging techniques target different surfaces like metal corrosion, fabric wear, wood aging, and plastic discoloration.
Chemical and exhaust effects simulate oil stains, fuel smears, soot, and burn marks from mechanical operations. These weathering effects add narrative depth to your models by telling the story of their experiences and environmental exposure.
Each category requires specific weathering styles and application methods.
You’ll use sponges for chipping, fine brushes for scratches, and pigments for environmental buildup. Oil paints and odourless thinner provide an accessible foundation for most weathering techniques across these categories.
For achieving realistic metallic surfaces that require weathering, metallic paints with heavy-bodied formulations provide the excellent coverage needed as a base layer before applying aging effects.
These aging techniques layer together to create realistic deterioration patterns that transform pristine miniatures into battle-worn pieces.
Essential Tools and Materials for Weathering

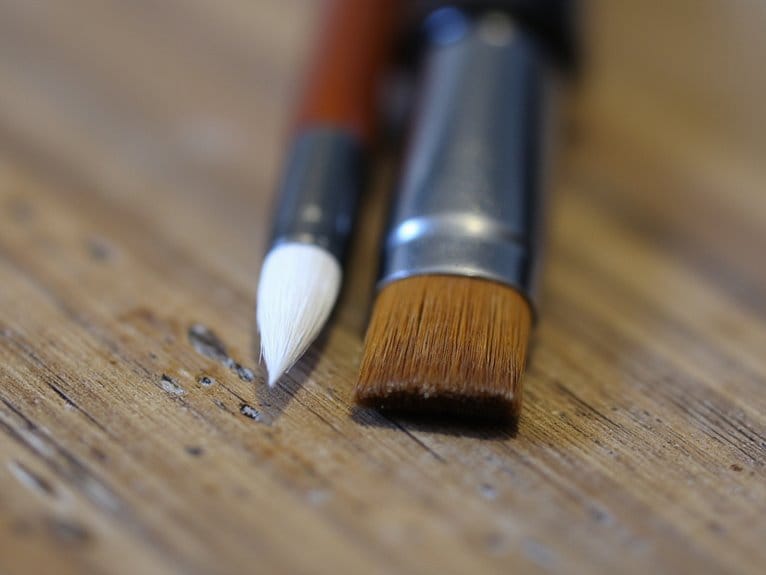
While your standard modeling brushes and paints can handle basic miniature work, successful weathering demands specialized tools designed for texture creation and realistic aging effects.
Proper brush selection starts with fine detail brushes sized 0 to 3 for precise rust streaks and chipped paint. Stippling brushes with stiff bristles create textured dirt buildup, while fan brushes produce subtle dusting through dry brushing techniques.
Oil paints remain the preferred medium due to their extended drying time, allowing realistic blending. Enamel washes create manipulatable streaks before setting. Mineral spirits effectively thin oil paints for airbrush application while enhancing their ability to flow into miniature details.
Natural sponges excel at irregular chipping effects, and cotton swabs assist with gentle blending.
Essential cleaning techniques preserve brush integrity when using harsh weathering mediums. Specialized brush cleaning solutions extend tool life considerably. Proper brush care prevents dried weathering mediums from ruining bristles permanently. Synthetic bristles perform exceptionally well with fast-drying acrylic weathering paints.
Paper towels handle excess paint removal and mistake correction during detailed weathering applications.
Dry Brushing and Highlight Techniques
Once you’ve assembled your weathering toolkit, dry brushing becomes your primary method for creating realistic highlights and worn surfaces on miniatures. Load paint halfway up your brush bristles, then wipe almost completely dry on a paper towel. The brush should appear nearly empty before paint application begins.
Essential dry brushing steps:
- Choose lighter shades than your base color to highlight raised details effectively.
- Apply gentle sweeping motions across surfaces rather than pressing or scrubbing.
- Build highlights gradually using two layers maximum for ideal contrast.
Use flat brushes for controlled application and dedicate specific brushes solely to dry brushing for proper brush maintenance. This prevents wet paint buildup that damages bristles.
Practice light touches on less important models first. Too much paint creates unnatural, heavy highlights that ruin realistic weathering effects. For wooden surfaces like doors or gates, brush carefully in the direction of wood grain to create more convincing weathering patterns. Consider not washing brushes between highlight layers to achieve smooth blended transitions across weathered surfaces. Professional quality paints with high pigmentation eliminate the need for excessive paint buildup that compromises the subtle effects essential to realistic weathering.
Sponge Chipping and Damage Simulation
Nothing transforms a pristine miniature into a battle-worn veteran quite like realistic chipping effects created through sponge techniques. Microcell foam delivers superior sponge texture compared to makeup sponges due to its smaller, uniform cells.
You’ll achieve tighter chipping patterns by tearing foam into irregular shapes rather than cutting uniform pieces. Attach foam to tweezers or handles using superglue for precise control.
Paint consistency affects your results—unthinned paint works well, though slight water dilution improves blending. Mix dark brown with black or create brownish-red rust tones for realistic damage colors.
Blot excess paint on paper towels before application. Dab lightly without brushing or smearing. Focus chipping on edges, raised details, and high-wear areas where natural damage occurs.
Layer multiple chip sizes using different foam pieces for authentic variation and depth. Build up the effect slowly with gentle pressure on the surface to maintain control over the weathering process. When securing foam pieces to your tools, choose a clear-drying formula that won’t interfere with your paint application or create visible residue on your miniature.
Wash and Pigment Application Methods
Strategic chip placement sets the physical foundation for weathering, but washes and pigments create the atmospheric effects that sell the illusion of age and use. Proper wash dilution starts with bright undercoats like white or ivory to maximize color vibrancy.
Mix washes 1:1 with painting medium rather than water for smoother flow and better control. Apply thin layers, pre-wetting designated areas to guide placement.
Pigment layering requires dry application with old brushes, dabbing colors that complement your base tones. Multiple pigment layers with varied intensities create realistic weathering textures.
For enhanced flow control during detailed work, consider thinning your washes with isopropyl alcohol to improve application precision on intricate miniature features.
Essential Application Guidelines:
- Position miniatures strategically during drying to control gravity effects on wash flow.
- Allow complete drying between layers to prevent smudging and unwanted blending.
- Fix pigments with matte varnish or pigment fixer for durability.
Strategic Placement for Realistic Wear Patterns

You can’t randomly splash weathering effects across your miniature and expect convincing results—realistic wear follows predictable patterns based on how objects actually age and deteriorate.
High-contact damage areas like weapon grips, armor joints, and boot soles receive the heaviest abuse through repeated friction and mechanical stress.
Environmental exposure zones such as horizontal surfaces, fabric edges, and metal plates facing outward accumulate dirt, moisture damage, and UV fading at accelerated rates compared to protected recesses.
High-Contact Damage Areas
Anyone can slap weathering effects randomly across a miniature, but achieving convincing wear patterns requires understanding how real objects deteriorate under use.
Damage concentration occurs where friction and impact happen most frequently. Your wear mapping should target specific zones that experience mechanical stress during operation.
Focus your weathering efforts on these critical areas:
- Joint interfaces and articulation points – Hinges, ball joints, and rotating mechanisms show concentrated paint loss from repeated movement.
- Contact surfaces with terrain – Feet, knee pads, and lower leg armor accumulate scratches and chips from ground interaction.
- Grip areas and tool interfaces – Weapon handles, control surfaces, and maintenance access points display heavy wear from handling.
Edge chipping appears most prominently on corners and raised details where physical contact strips away protective coatings.
Environmental Exposure Zones
Beyond mechanical stress points, environmental factors create distinct weathering patterns that follow predictable exposure zones across your miniature’s surface.
UV damage accumulates on horizontal, sky-facing areas like shoulders and helmet tops, requiring lighter, bleached paint effects.
Moisture zones appear at bases and lower armor edges where water runoff creates rust streaks and corrosion patterns.
Windward-facing surfaces show dust and sand abrasion from airborne particles.
Gravity dictates weathering flow—streaks run downward from contact points while dust accumulates in recessed, sheltered areas with matte finishes.
Atmospheric exposure consequences include acid rain effects near joints and salt corrosion on lower extremities in marine environments.
Strategic placement avoids uniform distribution, emphasizing logical environmental interaction patterns.
Building Up Effects Through Layered Application
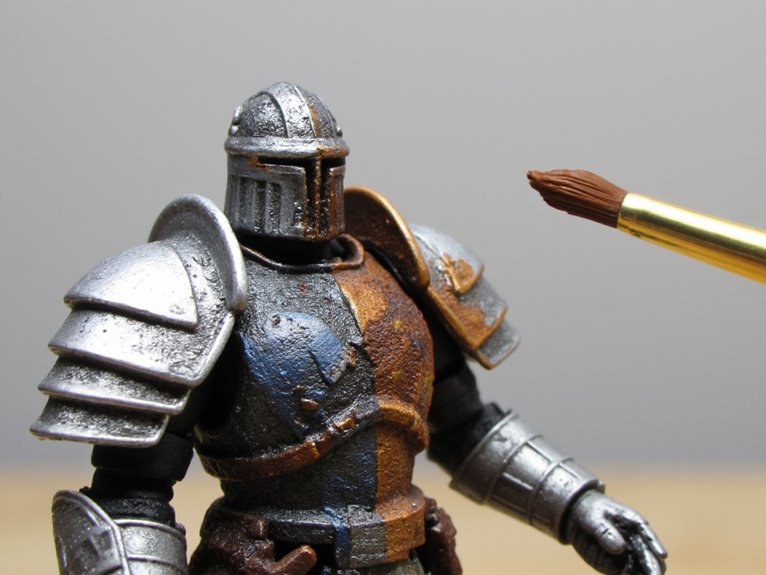
While a single weathering technique can add interest to a miniature, combining multiple layers creates the depth and complexity that transforms a basic paint job into a convincing representation of real-world wear.
Effective layering techniques start with proper base preparation. Apply acrylic primers followed by base coats, then seal with protective varnish like Future acrylic before adding weathering layers. This foundation prevents damage to underlying paint when applying oils or other mediums.
Build complexity through strategic layer combinations:
- Base weathering: Apply washes and filters to establish depth in recesses.
- Texture layers: Add sponge chipping and drybrushing for surface variation.
- Detail refinement: Use thinned oil paints for subtle gradients and final touches.
Each layer serves visual storytelling purposes, depicting specific environmental exposure or usage patterns.
Allow complete drying between applications to prevent muddying effects.
On a final note
You’ve now mastered the fundamental weathering techniques that’ll transform your painted miniatures from pristine to battle-worn. Start with subtle dry brushing, then progress to sponge chipping for realistic damage. Apply washes strategically where dirt naturally accumulates. Layer your effects gradually—you can’t easily remove excessive weathering. Focus on high-wear areas like edges, joints, and contact points. Practice these methods on test pieces first. Your miniatures will display authentic wear patterns that enhance their visual storytelling impact.