
We are supported by our audience. When you purchase through links on our site, we may earn an affiliate commission, at no extra cost for you. Learn more. Last update on 30th June 2025 / Images from Amazon Product Advertising API.
You’ll achieve professional terrain results by selecting larger brushes for base coverage and fine detail brushes for intricate work, while using cost-effective craft acrylics for broad areas and premium paints for details. Start with black primer to create natural shadows, then apply base colors using dry brushing techniques that save 70% of highlighting time. Secure textures with PVA glue, add flock for vegetation effects, and use natural sponge dabbing for realistic weathering. Master these foundational techniques to access advanced methods that create museum-quality battlefield environments.
Notable Insights
- Use PVA glue to secure sand, flock, and natural materials for realistic terrain textures and three-dimensional base effects.
- Apply black primer for natural shadows, then use drybrushing techniques to highlight raised surfaces and save 70% highlighting time.
- Choose craft acrylics for large terrain areas and reserve premium miniature paints for detailed work to reduce costs by 60-70%.
- Create weathering effects with natural sponge dabbing, applying darker base colors first then layering lighter highlights for realistic wear.
- Use larger brushes for broad coverage, fine detail brushes for intricate features, and repurposed makeup brushes for specialized techniques.
Essential Materials and Brush Selection for Terrain Work
When painting terrain, your brush selection differs considerably from miniature work due to the larger scale and varied surface textures you’ll encounter.
You’ll need larger brushes for broad coverage across expansive surfaces. Craft paint tubes provide better volume and cost efficiency than miniature paint pots. Cheap makeup brushes excel at dry brushing techniques, while repurposed oil painting brushes work perfectly for washes and streak effects.
Fine detail brushes remain essential for intricate features. Artist-grade craft acrylics balance quality with quantity needs. PVA glue serves as an excellent adhesive for securing texture materials like sand and small rocks to your terrain surfaces. Water-based formulas ensure safe workspace conditions while providing excellent adhesion for realistic terrain effects. Proper brush maintenance techniques include keeping bristles wet during sessions and cleaning thoroughly between colors.
Quality brushes and proper maintenance separate amateur terrain work from professional-looking results that enhance any tabletop gaming experience.
Effective terrain layering strategies require varied brush sizes—from broad flats for base coats to fine rounds for detail work. Water dilution improves paint flow on large surfaces. A turntable allows easy rotation of terrain pieces during painting for consistent coverage and access to all angles.
Cost-Effective Paint Choices and Quality Considerations

When painting terrain, you don’t need expensive miniature paints for every surface.
Smart budget allocation means using craft acrylics for large areas while reserving premium paints for detailed miniatures themselves. Many budget acrylic paint sets offer excellent blending capabilities that work perfectly for creating natural-looking terrain transitions and weathering effects.
This approach can cut your paint costs by 60-70% without sacrificing visual quality on terrain pieces. Cheap large brushes work perfectly with budget acrylics on rough terrain textures where precision is less critical than coverage.
Just as artists share their work to build community dialogue, miniature painters benefit from connecting with others to exchange cost-saving techniques and terrain painting tips.
Budget Paint Selection
Although miniature painting demands precision and quality, you don’t need to break your budget on premium paints for every aspect of your project. Budget brands like Reeves acrylics offer 75ml bottles for approximately 4€, compared to 17ml miniature-specific paints.
Hobby Lobby’s 3 oz acrylic paints cost under a dollar and perform adequately for terrain work. Paint mixing with craft acrylics achieves custom colors while maintaining cost efficiency.
Reserve premium paints for detailed miniature work where pigment density and smooth consistency matter most. Use inexpensive craft paints for large terrain areas and bases without quality loss. The Army Painter provides an affordable option with a vast color range that focuses on quick application, making it ideal for mass painting armies and newcomers.
Dilute budget paints with water and apply by dabbing for better texture control. Test budget varnishes before sealing to avoid unwanted sheens. Use old brushes specifically for terrain painting to preserve your quality brushes for detailed miniature work. This strategic approach optimizes your budget distribution effectively.
Quality Material Allocation
Since successful miniature projects require a strategic approach to material allocation, you’ll maximize both quality and budget by matching paint types to their intended use. Reserve premium miniature paints for detail work where precision matters most. Your material selection should prioritize craft acrylics for large terrain areas and bases.
| Paint Type | Application | Cost Efficiency |
|---|---|---|
| Premium Miniature | Detail work | Low volume/high cost |
| Craft Acrylics | Base layers/terrain | High volume/low cost |
| Artist Acrylics | Mixed applications | Medium volume/medium cost |
| Household Emulsion | Large terrain pieces | Highest volume/lowest cost |
Conduct durability assessment by testing paint adhesion on sample materials. Apply craft paints while glue remains wet to reduce drying time. Use makeup brushes for drybrushing terrain features cost-effectively. Choose heavy body acrylics for terrain coverage as they provide excellent color saturation while remaining budget-friendly for large surface areas.
Protective Gear and Safety Equipment for Messy Techniques
While miniature painting might seem like a harmless hobby, the reality is that many basing and terrain techniques expose you to potentially dangerous fumes, particles, and chemical substances that require proper protective equipment.
Respiratory hazards demand properly fitted respirators with regularly changed filters. OSHA mandates fit testing to guarantee adequate sealing during painting operations. Full-face respirators protect both lungs and eyes simultaneously, making them ideal for spray techniques.
Eye safety requires goggles or protective glasses with side shields. These prevent splashes, sprays, and particulate matter from causing irritation or injury during sanding and dry brushing.
Nitrile gloves provide chemical resistance while maintaining dexterity for detailed work.
Disposable coveralls with elastic cuffs create barriers against paint splashes. Always consult Safety Data Sheets to select appropriate protection for specific paint products.
Foundation Basecoating Methods and Application
You’ll need quality acrylic paints and properly prepared brushes to establish effective foundation basecoats on your miniature terrain projects.
Acrylic craft paints offer an economical alternative to premium miniature paints while delivering comparable coverage and adhesion properties for terrain applications.
Your brush selection should prioritize fine-tipped brushes with excellent paint-holding capacity, requiring thorough cleaning and proper dampening before each basecoating session.
For beginners starting terrain projects, comprehensive paint kits like The Army Painter GameMaster Adventure Kit provide essential tools and colors specifically designed for immediate project success.
Affordable Acrylic Paint Selection
When selecting affordable acrylic paints for miniature basecoating, pigment density and opacity become your primary considerations since these properties directly determine coverage efficiency and final color saturation.
Monument Hobbies Pro Acryl stands out for exceptional paint opacity, particularly their super opaque white that delivers solid coverage in fewer coats. This brands comparison reveals significant quality differences—Monument’s high pigment density reduces layer requirements while maintaining smooth application.
Budget alternatives like Fanta Story Starter Sets offer cost savings but sacrifice consistency.
For terrain work, craft acrylics provide economical solutions in larger volumes. Monument’s 24 colors plus 5 metallics come in 17ml dropper bottles designed to prevent clogging. Their paints thin easily, dry with matte finishes, and work effectively with both brushes and airbrushes for versatile application methods.
Proper Brush Preparation Techniques
Since exceptional basecoats begin with methodical brush preparation, proper conditioning and loading techniques directly impact your paint’s coverage efficiency and final finish quality.
Brush conditioning requires soaking bristles in water before use to maintain flexibility and prevent damage. Load paint by pulling it evenly along bristles while twisting the brush, achieving saturation at halfway to two-thirds up the bristles. Avoid paint seeping into the ferrule, which compromises brush performance.
Surface preparation involves testing paint flow on disposable material before application. Remove excess paint by gently touching the brush to paper towels, maintaining the sharp tip essential for precision work.
These staining techniques guarantee consistent coverage without obscuring miniature details. Proper preparation establishes the foundation for smooth, even basecoats that enhance subsequent washing and highlighting stages.
Dry Brushing Techniques for Highlighting Raised Details
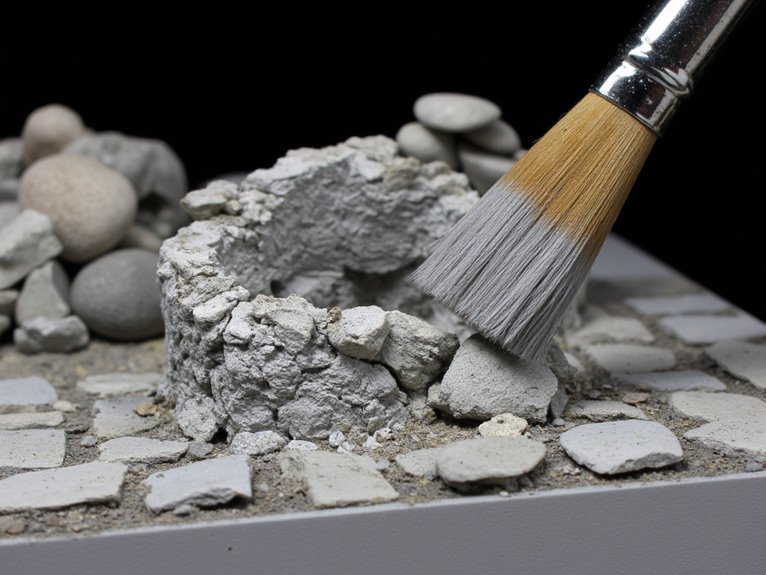
Although dry brushing ranks among the most fundamental highlighting techniques in miniature painting, mastering its execution requires precise brush preparation and controlled paint application.
You’ll need a flat-shaped brush with stiff bristles, though round brushes work adequately. Load paint halfway up the bristles, then wipe off nearly all paint on an absorbent surface until the brush appears dry.
Your dry brushing techniques should emphasize light, sweeping motions across raised surfaces only. Maintain minimal pressure while brushing repeatedly back and forth to gradually build highlights.
Two layers typically produce ideal results: the first creates soft, dark highlights, while the second adds stronger emphasis. These highlight applications work exceptionally well on textured terrain and sculpted details, leaving recesses dark for enhanced depth and three-dimensional appearance.
When painting modular terrain sets, dry brushing proves particularly effective for bringing out architectural details and weathering effects across multiple battlefield configurations.
Sponge Texturing and Random Pattern Creation

Natural sponge texturing creates realistic weathering effects that brushes simply can’t replicate on miniature terrain.
These sponge techniques produce organic, irregular surfaces that mimic real-world wear patterns.
Select soft, fine-weave craft sponges and cut them into small pieces for precise control. Dampen slightly and remove excess paint on paper towels before application. Use straight up-and-down dabbing motions with light pressure, building effects gradually through multiple layers.
Essential sponge weathering steps:
- Target high-contact areas – Focus on edges, corners, and wear-prone surfaces for authentic chipping effects.
- Vary your approach – Rotate sponge position and adjust pressure between dabs to create random patterns.
- Layer strategically – Apply darker base colors first, then lighter highlights to simulate paint depth.
Allow drying between color applications. This methodical approach guarantees three-dimensional texture that enhances terrain realism considerably. Store your stay wet palettes with dampened sponges between terrain painting sessions to maintain paint workability and prevent waste.
Color Mixing Strategies for Natural Effects
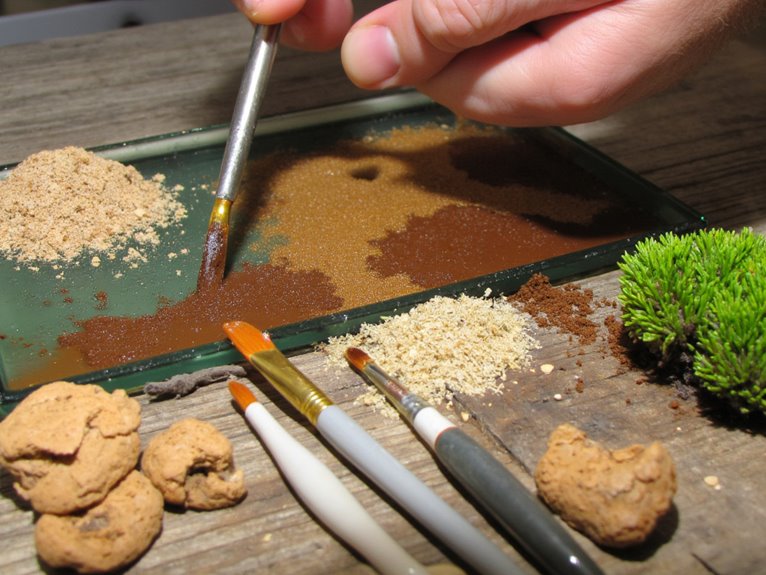
Natural miniature terrain requires convincing color foundations that mirror real-world environments through strategic mixing techniques.
You’ll master three essential color categories that transform basic paint into realistic landscapes: earth tone foundations that ground your terrain, vegetation color blends that bring foliage to life, and weathering effects that add authentic damage and age.
These mixing strategies work together to create depth, variation, and believable natural surfaces on your miniature bases.
Earth Tone Foundations
When establishing realistic terrain bases, you’ll achieve the most convincing results by building your color palette around Burnt Umber as your primary foundation.
This dark brown covers approximately 90% of your initial ground area, creating the essential base layer for effective earth tone layering.
Your mixing strategy should focus on 50/50 combinations of Burnt Umber with lighter tans like Teddy Bear Tan. This creates perfect mid-tone shifts for natural color variations across your terrain surfaces.
Transform your basecoat application with these essential techniques:
- Apply thinned earth tone washes to unify separate terrain pieces into cohesive landscapes.
- Layer from dark to light using successive dry-brushed passes for maximum depth.
- Incorporate cost-effective craft paints in yellow ochre and dungeon grain colors as miniature paint substitutes.
Vegetation Color Blends
Effective vegetation painting relies on strategic color layering that mimics nature’s complexity through deliberate green combinations.
Start with darker base greens like Clover for shaded foliage areas. Apply medium tones such as Grass Green using dry brushing to build texture and depth. These layering techniques create realistic foliage variations.
Mix greens with Burnt Umber for moss effects on rocks and terrain bases. A 50-50 ratio works best for undersides, then overlay lighter greens for natural gradients. Add yellowish tan highlights sparingly to simulate sunlight on leaves.
Integrate multiple color tones including subtle purples with your greens. Apply glazes like Army Painter Strong Tone to unify layers and adjust overall warmth.
Use dabbing motions rather than brushing to maintain texture and avoid flat appearances.
Weathering and Damage
Mastering weathering effects transforms ordinary terrain pieces into convincing battle-worn landscapes through strategic color mixing and application techniques.
Rust techniques begin with burnt sienna mixed with small amounts of blue or green, creating natural oxidation stages through raw umber additions.
Chipping methods involve layering base colors with lighter grays using sponge application, while dark undertones add depth.
Soot effects combine black with dark gray and brown touches for realistic staining patterns.
Essential weathering strategies for maximum surface realism:
- Layer damage progression systematically – Start with base weathering, add chips, then apply dust layers for authentic wear patterns
- Blend complementary colors gradually – Mix opposing hues like orange rust with blue-green patinas for convincing corrosion
- Vary application techniques deliberately – Combine washes, dry brushing, and stippling for complex mud textures and smoke simulation effects
Speed Painting Methods for Quick Results
Three fundamental approaches can drastically reduce painting time while maintaining tabletop-quality results: optimized priming techniques, streamlined color application, and strategic shortcut methods.
Black primer naturally creates shadows in recessed details, eliminating additional shading steps. You’ll achieve quick results by airbrushing or using rattle cans for even coverage across multiple miniatures. Limit your color palette to three or four base colors, following boxart schemes to eliminate decision-making delays.
| Technique | Application Method | Time Savings |
|---|---|---|
| Drybrushing | Large brush, minimal paint | 70% faster highlighting |
| Washing | Liberal application | Instant depth/shadows |
| Sponge weathering | Random stippling | Quick texture effects |
| Airbrush basecoats | Broad coverage | 80% faster than brushing |
| Limited palette | 3-4 colors maximum | Reduces mixing time |
Drybrushing highlights raised surfaces efficiently while washes automatically enhance detail contrast. Speed painting sacrifices fine precision for dramatic time reduction.
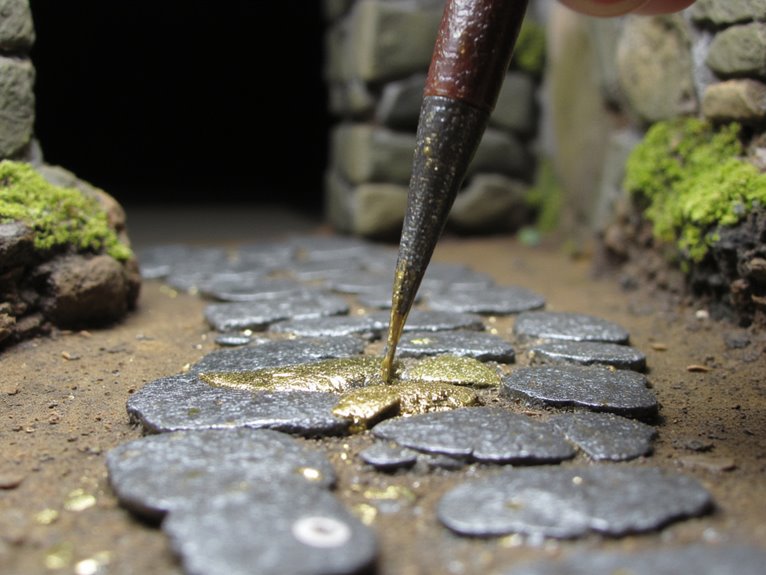
Damage and Weather Effects Using Dark Accents
You’ll achieve the most convincing battle damage and weathering effects by mastering black paint applications and scorched surface techniques that simulate real-world destruction.
Black paint creates deep shadows in bullet holes, blast craters, and structural damage while establishing the foundation for layered weathering effects.
Scorched surfaces require careful gradation from pure black char marks through dark grays to simulate fire damage and explosive impacts on your terrain pieces.
Black Paint Applications
Your weathering arsenal should include these essential methods:
- Precision brush work – Use fine brushes to create realistic scratches and damage lines that tell a story of battle.
- Dry brushing applications – Build subtle weathered textures that catch light naturally across surface variations.
- Strategic wash layering – Allow diluted black paint to flow into crevices, emphasizing depth and accumulated grime.
Combine black with dark browns or blues for complex tonal variations that enhance rust simulation.
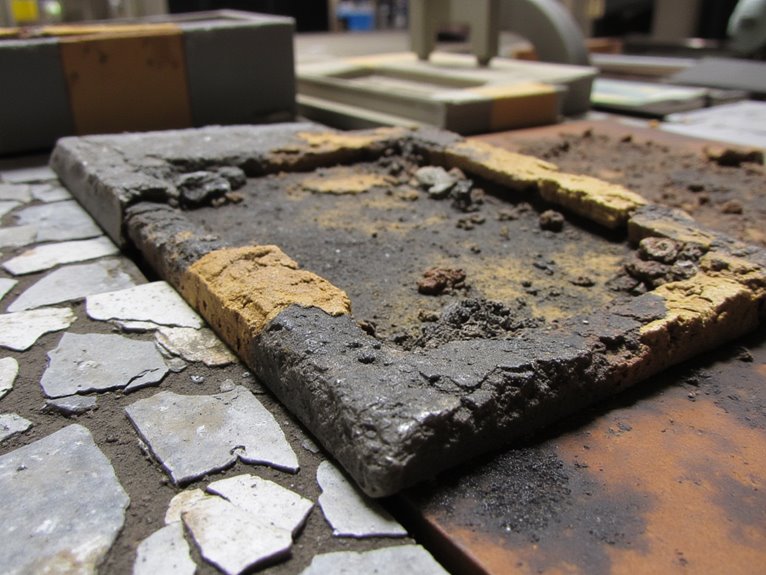
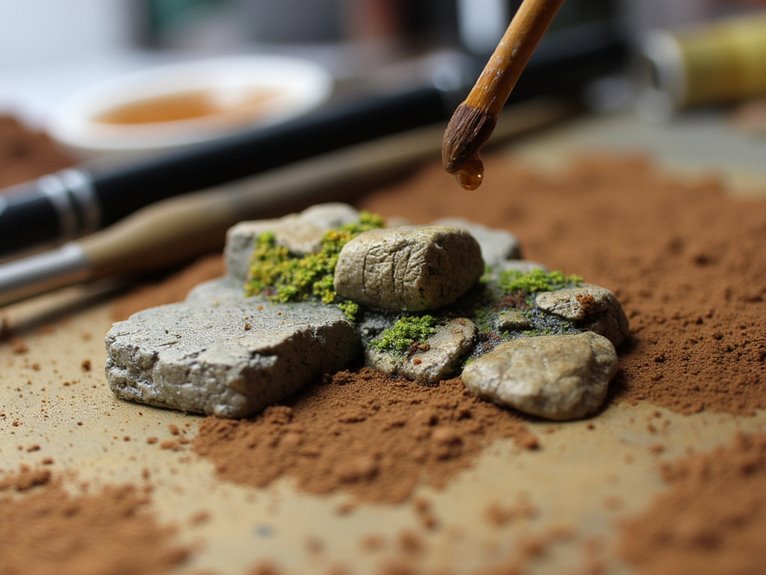
Scorched Surface Techniques
The most convincing scorched terrain emerges when you layer heat damage effects systematically across your miniature bases.
Begin with pigments mixed with subtle red tones to simulate burn damage and rust accumulation. This foundation creates authentic scorched earth appearances that enhance terrain realism greatly.
Apply sepia-toned washes diluted 6:1 with thinner for organic staining effects. Follow with dirt splatter using a 50-50 water and pigment mixture in surface recesses.
Drybrush ash gray or light tan colors on elevated features to simulate wear patterns.
Build weathering gradually through multiple wash layers, alternating between application and selective wiping.
Focus washes on lower terrain areas to replicate mud splash and environmental staining. Incorporate muted greens and purples sparingly to prevent monotonous coloration while maintaining realistic earth diversity.
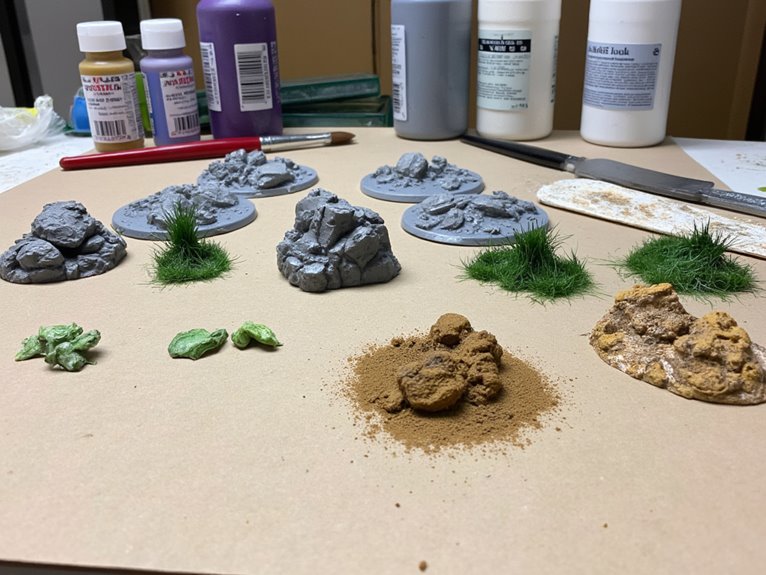
Multi-Layered Vegetation and Moss Simulation
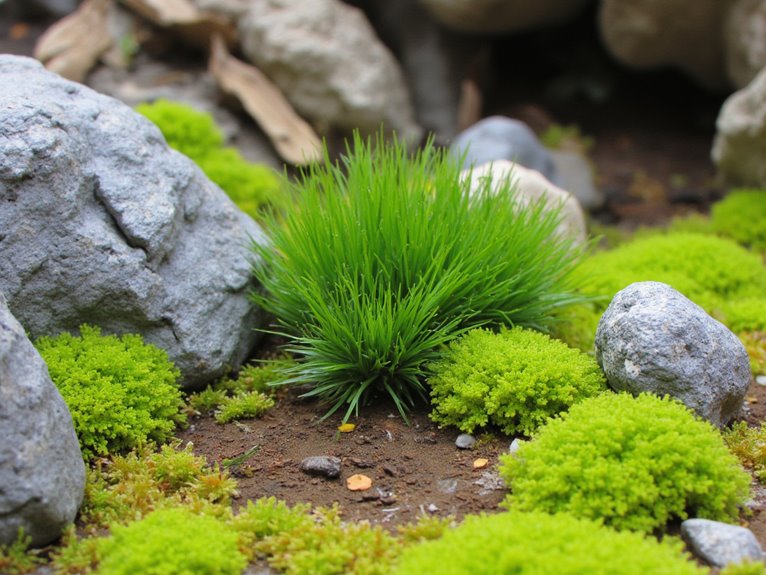
When creating realistic moss and vegetation effects on miniature bases, success depends on selecting appropriate materials and applying them through careful layering techniques.
Different moss types serve specific purposes: preserved natural moss provides authentic texture but requires cleaning, while synthetic alternatives offer durability and consistent coloring. Choose materials based on your miniature’s scale—fine flock works for ground cover, chunkier moss simulates bushes.
Apply vegetation in multiple thin layers rather than one thick application. Start with fine flock as your base layer, then add mid-level moss clumps in varying shades. Use PVA glue for primary adhesion, combining it with superglue on vertical surfaces.
Essential techniques for professional results:
- Layer progressively from fine base materials to chunky highlights
- Vary moss colors to simulate natural sunlight and shadow effects
- Integrate debris like twigs and stones between layers for authenticity
Surface Texturing With Flock and Natural Materials
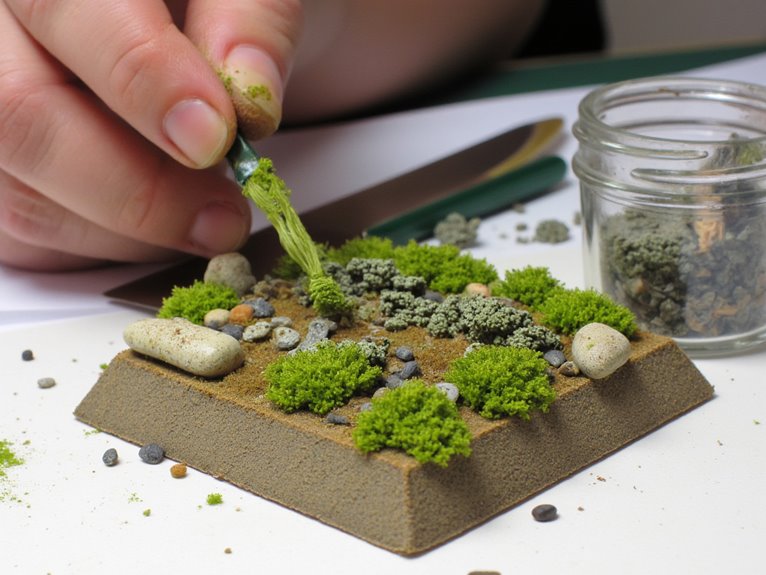
Building upon your vegetation layers, surface texturing transforms flat miniature bases into convincing terrain through strategic application of sand, grit, and natural debris.
Apply PVA glue evenly before sprinkling fine sand for subtle base textures. Coarse grit creates pronounced irregularities simulating rough stone surfaces. Secure larger elements with undiluted PVA first, then fill gaps using thinned adhesive with finer materials.
Flock applications provide grass-like finishes that break up monotonous surfaces while adding color variation. Natural materials including bark chips, cork pieces, and dried moss fragments enhance three-dimensional realism.
Source bark chips from reptile stores and cork from railway hobby suppliers. Combine different grit sizes with natural debris for convincing micro-ecosystem effects.
Seal completed textures with thinned PVA to prevent shedding during gameplay.
Testing and Sample Preparation Best Practices

Effective miniature painting demands rigorous testing before you commit paint to your final models.
You’ll need multiple pre-primed test miniatures with diverse surface textures—armor, robes, fur—to evaluate paint performance across different materials.
Maintain test dummies with black, white, and grey primers to assess how primer color affects paint vibrancy and final tone.
Test integration requires checking paint flow, opacity, and drying speed on these surfaces first.
Verify layering techniques and specialty paint interactions before application. Sample uniformity becomes critical when scaling up—prepare small batches to test complete processes before committing to full terrain tables or large unit painting.
Essential testing priorities:
- Primer compatibility verification – Test adhesion and curing times
- Weathering technique validation – Trial effects without damaging final pieces
- Batch consistency confirmation – Confirm uniform results across multiple models
Matte Varnishing and Surface Protection
Three distinct varnish types—spray, brush-on, and airbrush formulations—each serve specific application needs while delivering critical surface protection for your painted miniatures and terrain pieces.
Spray applications require 25-30 cm distance with thin, even coats to preserve detail integrity. Multiple layers outperform single thick applications for ideal control.
Maintain proper spray distance and apply multiple thin coats rather than single heavy applications for superior detail preservation.
Matte varnish eliminates unwanted reflections while maintaining realistic finishes on historical miniatures. Apply it over PVA-based terrain to strengthen material adhesion and prevent shedding.
A 50/50 matte-satin blend creates balanced protection without excessive dulling effects.
Test all products on scrap materials first—some “matte” formulations retain unwanted sheen.
Brush-on techniques demand smooth strokes to avoid permanent air bubble damage. Surface durability improves considerably when each coat cures completely before handling, ensuring professional-grade protection for your investment.
Final Detailing and Display Enhancement Techniques
After achieving proper varnish protection, your miniatures and terrain require strategic detailing enhancements that transform basic painted surfaces into compelling, realistic displays.
You’ll create miniature narratives through weathering effects, props, and environmental details that establish thematic consistency across your collection.
Apply dry brushing techniques from multiple angles to build natural highlights on raised edges. Layer subtle color variations—greens and purples in soil effects—to mimic natural substrate variations. Incorporate cracked walls, moss, and battle damage for narrative depth.
Essential enhancement techniques include:
- Strategic prop placement with barrels, crates, and signposts to guide viewer attention
- Multicolor layering using pigments and powders for realistic dirt accumulation
- Elevation integration through modular terrain pieces that separate models effectively
Position weathered elements to reinforce your terrain’s story while maintaining visual coherence.
On a final note
You’ve now mastered essential terrain painting fundamentals. Your basecoating provides solid color foundation. Dry brushing reveals surface details effectively. Flock adds realistic texture variation. Testing prevents costly mistakes on finished pieces. Matte varnish protects your work from handling damage. Quality brushes and paints make significant differences in final results. Practice these techniques consistently. Start with simple projects before attempting complex dioramas. Remember that patience produces better outcomes than rushing through steps.