We are supported by our audience. When you purchase through links on our site, we may earn an affiliate commission, at no extra cost for you. Learn more. Last update on 30th June 2025 / Images from Amazon Product Advertising API.
You’ll need LED desk lamps with 5000K-6000K color temperature and 90+ CRI rating for accurate miniature paint colors. Position your main light at 45 degrees above eye level, then add fill lights to control shadows without eliminating them completely. Target 800-1200 lumens brightness for detail work. Avoid traditional bulbs under 4000K since they shift reds to browns and mask cooler tones. A dual-lamp setup eliminates harsh shadows while maintaining depth perception essential for precision painting. Understanding material-specific lighting techniques will elevate your results further.
Notable Insights
- Use 5000K-6500K LED lights with 90+ CRI rating to ensure accurate color representation and prevent color distortion during painting.
- Position main light at 45-degree angle above eye level with fill lights to control shadows while maintaining depth and detail visibility.
- Choose matte finish surfaces to absorb light evenly and eliminate glare, while using diffused lighting for glossy or metallic surfaces.
- Implement dual-lamp configuration with 800-1200 lumens brightness to eliminate harsh shadows and enhance fine detail work on miniatures.
- Budget-friendly setups under $50 using daylight LED desk lamps provide professional results with long-term energy efficiency and cost savings.
Choosing the Right Color Temperature for Accurate Paint Colors
Why does your miniature’s vibrant red armor look muddy brown under your desk lamp? The culprit is incorrect color temperature. Your color perception depends entirely on light quality, specifically the Kelvin rating of your light source.
You need lighting between 5000K and 6000K for accurate paint representation. This range replicates natural daylight conditions.
Light below 4000K creates warm, yellowish distortion that shifts reds toward brown and affects color mixing decisions. Sources above 6000K produce cool, bluish casts that wash out details and create false contrast readings.
Poor lighting temperature distorts color perception, making warm sources shift reds to browns while cool sources wash out crucial details.
Target 5500K for best results. This temperature provides consistent daylight balance without color shifts. Combined with a CRI rating above 90, proper color temperature prevents costly painting mistakes and guarantees your finished miniatures appear identical under natural light conditions. Proper lighting also reduces shadows around miniature details, allowing you to see fine textures and surface elements that would otherwise remain hidden. Quality lighting setups significantly reduce eye strain during extended painting sessions, allowing you to work comfortably for hours without fatigue.
Strategic Light Positioning to Eliminate Shadows
Even with perfect color temperature, poor light positioning creates shadow problems that hide essential details and distort your perception of the miniature’s form.
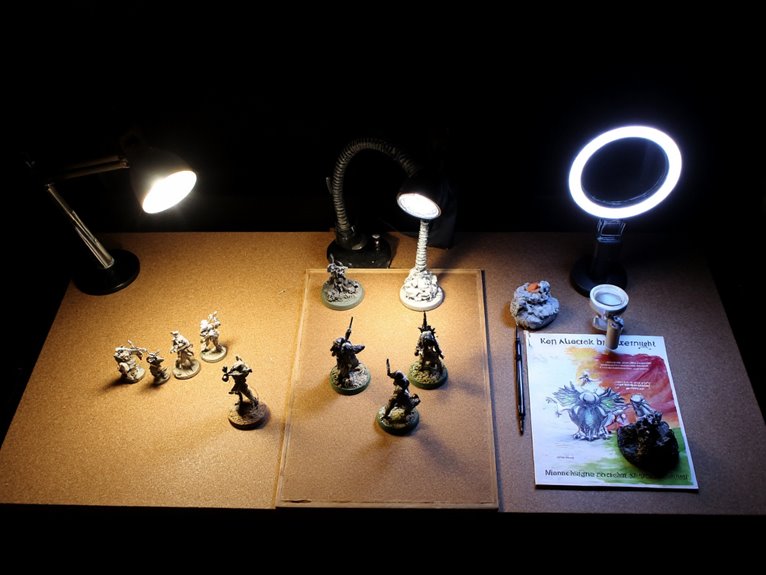
You’ll need multiple light sources positioned at 45-degree angles from your primary workstation to achieve effective shadow reduction techniques. Place your main light front-left and a secondary source front-right, both slightly above eye level.
Position adjustable LED desk lamps with diffusers to soften harsh shadow edges. Place fill lights opposite your primary source at lower intensity to brighten recessed areas without washing out highlights. Use reflectors or white boards to bounce light into stubborn shadow zones.
Your ambient light adjustments should complement painted lighting effects on the miniature. When painting Object Source Lighting effects, remember that light strength decreases with distance from the source, which affects how you perceive and paint these effects under your workspace lighting. For basic setups where budget is a concern, compact table lamps can be raised using books or DVDs to achieve better positioning angles.
Consider lamps with swing arm flexibility that extend up to 35 inches, as this positioning range allows you to achieve optimal angles without constantly readjusting your workspace setup.
Avoid overhead-only lighting that creates strong shadows underneath raised details, obscuring your work’s visual clarity and accuracy.
LED Desk Lamps vs. Traditional Lighting Options
When you’re choosing between LED desk lamps and traditional lighting for miniature painting, you’ll notice significant differences in color temperature performance.
LEDs offer adjustable 5000K-6500K daylight simulation compared to incandescent bulbs’ warmer 2700K-3000K range that distorts paint colors.
LED lamps provide superior shadow control through adjustable positioning arms and focused beam patterns, while traditional fixed-position lamps often require multiple units to achieve adequate coverage. For detailed miniature work, you’ll want brightness levels between 1200 to 1500 lumens to achieve the precision needed for intricate painting tasks.
You’ll face higher upfront costs with quality LED systems, but they’ll deliver substantial long-term savings through 25,000-50,000 hour lifespans and reduced energy consumption compared to traditional bulbs’ frequent replacements and higher electricity usage. LED systems also produce low heat, preventing paint from drying too quickly during extended painting sessions.
For optimal miniature painting results, select LED lamps with CRI ratings of 90 or higher to ensure accurate color representation that closely mimics natural sunlight conditions.
Color Temperature Comparison
Understanding color temperature differences between LED desk lamps and traditional lighting options will dramatically impact your miniature painting accuracy and overall results.
LED desk lamps provide consistent 5000K-6500K daylight temperatures with 90+ CRI ratings, ensuring faithful color representation throughout their lifespan.
Traditional incandescent bulbs emit warm 2700K light that shifts paint colors toward yellows and reds, while fluorescent options vary widely with potential flicker issues.
Color temperature effects become critical when matching paint colors across sessions:
- LED lamps maintain stable color output, preventing temperature drift over time
- Warm traditional lighting masks cooler paint tones and subtle shading details
- Daylight-range LEDs minimize color distortion for accurate blending techniques
Ambient lighting considerations require consistency.
LED technology delivers precise color rendering that traditional options can’t match, making them essential for professional-quality miniature painting results.
Shadow Control Differences
Beyond color accuracy lies another fundamental difference between LED and traditional lighting: shadow control.
LED desk lamps produce sharper, harder shadows due to their concentrated point sources. You’ll notice pronounced contrast that can obscure miniature details without proper diffusion.
Traditional incandescent or fluorescent lights create softer, more diffused shadows through broader light dispersion.
Shadow dynamics change dramatically between these lighting types. LEDs offer precise directional control through adjustable arms, letting you minimize unwanted shadows strategically.
However, their high-contrast output requires commitment to specific light orientations since shadows shift noticeably with angle changes.
Traditional lighting provides more forgiving viewing angles but less precise control.
Lighting accessories become essential with LEDs. Diffusers and frosted covers soften harsh shadows, while multiple LED sources help fill shadows effectively for enhanced miniature realism. Understanding light fall-off becomes crucial when positioning multiple sources, as intensity changes non-linearly with distance adjustments.
Cost and Efficiency
Two primary factors drive lighting decisions for miniature painters: upfront investment and long-term operating costs. Traditional incandescent lamps cost less initially but consume considerably more power, converting most energy into heat rather than light.
LED desk lamps require higher upfront investment but deliver substantial energy savings over time through superior efficiency.
Consider these key cost factors:
- LED lamps operate 30-50°C cooler than 200°C incandescent bulbs, reducing cooling costs.
- Extended LED lifespan decreases replacement frequency and maintenance expenses.
- Superior color rendering (5000-6000K) improves painting accuracy, reducing material waste.
Quality LED options like budget models around $24 or premium Redgrass R9 systems represent smart long-term investments.
You’ll recover initial costs through reduced electricity bills while enjoying better lighting quality and workspace comfort.
Managing Shadows for Better Detail Visibility
When painting miniatures, shadows serve as your primary tool for creating depth and visual separation between surface details. Understanding shadow dynamics requires observing real-world light behavior.
Place your miniature under overhead lighting during preparation to study natural shadow placement.
Forced shadows compensate for scale limitations by exaggerating contrast ratios beyond natural proportions. This technique guarantees details remain visible at miniature scale.
Position your main light source above and slightly forward at approximately 45 degrees to reveal crevice details without obscuring facial features.
Use zenithal priming as your foundation—spray dark primer first, then apply lighter colors from above. This mimics natural overhead lighting patterns.
Balance harsh directional light with subtle diffusion to maintain shadow definition while preserving detail visibility in recessed areas.
For extremely fine detail work, consider using a magnifying glass with LED lighting to reduce eye strain while maintaining precise control over your brush strokes in poorly lit areas.
Lighting Different Miniature Materials and Textures
Different miniature materials require specific lighting approaches to reveal their unique surface properties effectively.
Matte surfaces like primed plastic or resin absorb light evenly, allowing you to use direct illumination at 4500K-6000K without worrying about unwanted reflections that might obscure paint details.
Glossy and metallic surfaces demand controlled diffuse lighting positioned at strategic angles to minimize glare while still capturing the reflective qualities that make these materials visually striking.
Matte Vs Glossy Surfaces
The surface finish you choose for your miniatures fundamentally alters how light interacts with the painted model, creating dramatically different visual effects that can enhance or detract from the final result.
Matte benefits include eliminating glare and maintaining consistent color appearance across different lighting angles. Your miniatures will display fine details clearly without distracting reflections.
However, glossy drawbacks become apparent under direct lighting, where specular highlights can obscure texture work and create harsh reflections that mask painted details.
Consider these key lighting interactions:
- Matte surfaces diffuse light evenly, reducing eye strain during extended viewing.
- Glossy finishes require precise lighting angles to prevent detail-masking reflections.
- Combining both finishes creates visual contrast through varying reflectivity levels.
Adjust your lighting setup intensity and angle based on your chosen finish to optimize detail visibility.
Metallic Reflection Techniques
Metallic surfaces present unique challenges that require specialized lighting approaches to achieve convincing results on miniatures. You’ll need daylight-balanced lighting at 4500-5000K to accurately render metallic sheen without color distortion. Diffused light sources prevent harsh reflections that wash out detail work.
| Lighting Aspect | TMM Technique | NMM Technique |
|---|---|---|
| Light Intensity | Medium-high lumens | Adjustable intensity |
| Angle Control | Multiple positions | Precise directional |
| Shadow Management | Natural shadows | Hand-painted shadows |
| Highlight Placement | Light-dependent | Artist-controlled |
| Color Temperature | 5000K ideal | 4500K preferred |
Your highlight placement must follow natural light physics for TMM work, while NMM allows artistic interpretation. Multiple light angles help evaluate reflective qualities during painting sessions.
Budget-Friendly Lighting Setups Under $50
While expensive lighting systems might seem necessary for quality miniature painting, you can achieve professional-grade illumination with budget setups under $50. IKEA desk lamps paired with daylight LED bulbs deliver exceptional value.
These affordable options provide 4500K-5000K color temperature essential for accurate color rendition.
- Dual-lamp configuration: Position two LED clip lights on opposite sides to eliminate shadows and enhance detail visibility.
- High CRI priority: Select bulbs with 80+ color rendering index for superior paint hue accuracy.
- Flexible positioning: Choose adjustable arms or clamp designs for ideal angle control.
DIY solutions maximize your budget effectiveness.
Repurpose existing desk lamps by swapping standard bulbs for daylight-balanced LEDs.
Small LED panels arranged strategically provide even illumination with minimal heat output.
Target 800-1200 lumens brightness for comfortable detail work without eye strain.
For optimal miniature painting conditions, aim for 2,100 Lux minimum brightness to ensure proper visibility of fine details and color accuracy.
On a final note
You’ll transform your miniature painting with proper lighting setup. Choose 5000K-6500K color temperature for accurate color matching. Position lights at 45-degree angles to minimize harsh shadows. LED desk lamps offer superior control and longevity compared to traditional options. Use multiple light sources to eliminate detail-hiding shadows completely. Adjust intensity based on material reflectivity—metals need diffused light, while matte surfaces handle direct illumination. Quality results don’t require expensive equipment.