We are supported by our audience. When you purchase through links on our site, we may earn an affiliate commission, at no extra cost for you. Learn more. Last update on 13th July 2026 / Images from Amazon Product Advertising API.
When I paint miniatures with inks, I always start by choosing the right colors-considering opacity and versatility, acrylic paints work best for different effects like glazing, depth, and blending. Next, preparing the miniature’s surface is crucial; clean it thoroughly, apply primer evenly for a smooth base, and pay attention to drying. Mixing inks and paints requires experimentation with ratios and quality inks for excellent results. Airbrushing techniques involve precise adjustments for smooth shifts and shading, plus proper thinning to prevent clogging. For a flawless finish, achieve smooth applications by using techniques like layering and highlighting. Enhancing shading effects and mastering brush control are key for professional-level results. Ultimately, applying matte varnish as a final touch guarantees durability and a professional finish. Get ready to elevate your miniature painting game with these expert tips!
Choosing the Right Inks
When choosing inks for painting miniatures, it is important to carefully consider the opacity and versatility of each color to meet your specific painting requirements. Acrylic paints offer a wide range of options, from transparent to opaque, each serving different purposes in the painting process. For instance, transparent yellow is a valuable addition for glazing and creating subtle color variations. Dark red or magenta can be used to add depth and richness to your miniatures, while blue is versatile for various blending techniques. Semi-opaque brown is a must-have for its ability to cover well while still allowing some light to pass through, giving a sense of depth.
Adding just one or two essential colors to your collection can greatly enhance your painting capabilities. Transparent inks are perfect for glazing and filtering, allowing you to alter colors without completely obscuring the underlying layers. On the other hand, opaque inks are great for airbrushing techniques and drawing intricate patterns with nib pens. However, remember that opaque inks may require more thorough cleaning to prevent clogging, especially when used with fine tip tools. By carefully selecting a mix of transparent and opaque acrylic inks, you can create custom washes by diluting them with water and matte mediums. These washes are invaluable for shading, highlighting, and adding depth to your miniature paintings.
Preparing Your Miniature Surface
Before delving into the detailed process of painting miniatures with inks, it is essential to prepare the surface meticulously. Clean the miniature thoroughly to rid it of any debris that may hinder paint adhesion, and then apply a primer evenly to create a smooth base for the inks. The choice of primer color will influence the overall look of the miniature, so select wisely to achieve the desired effect.
Clean Surface Thoroughly
To guarantee perfect adhesion and a flawless finish with inks, thorough cleaning of the miniature surface is essential. Before diving into the intricate world of ink application techniques, it’s vital to start with a pristine canvas. Here are some key surface cleaning methods and ink adhesion tips to take into account:
- Use a gentle soap and water solution or isopropyl alcohol to remove any dust, oils, or debris.
- Make sure the miniature surface is completely dry before proceeding with any primer or base coat application.
- A clean surface provides a smooth foundation for the inks to adhere to, enhancing the final painting results.
- Properly preparing the miniature surface sets the stage for achieving a professional and long-lasting finish with inks.
Apply Primer Evenly
For achieving best results in painting miniatures with inks, the key step of applying primer evenly plays a pivotal role in preparing the miniature surface. When it comes to primer application, utilizing proper brush techniques is essential. Begin by applying thin, even coats to guarantee that intricate details are not obscured. Proper drying is vital for a flawless finish; manage your time effectively between layers to allow each coat to dry completely. If encountering issues like a thick or grainy primer coat, troubleshoot by adjusting your technique or considering a different primer. Choose a light-colored primer to enhance colors and details, or opt for a dark primer for a more dramatic effect with shadows and depth.
Mixing Inks With Paints
When mixing inks with paints for miniature painting, it’s vital to pay attention to the consistency of the ink to achieve desired effects. Color blending techniques play a significant role in creating unique shades and highlights on miniatures. Proper surface preparation methods are essential for ensuring the inks and paints adhere well and result in a professional finish.
Ink Consistency Tips
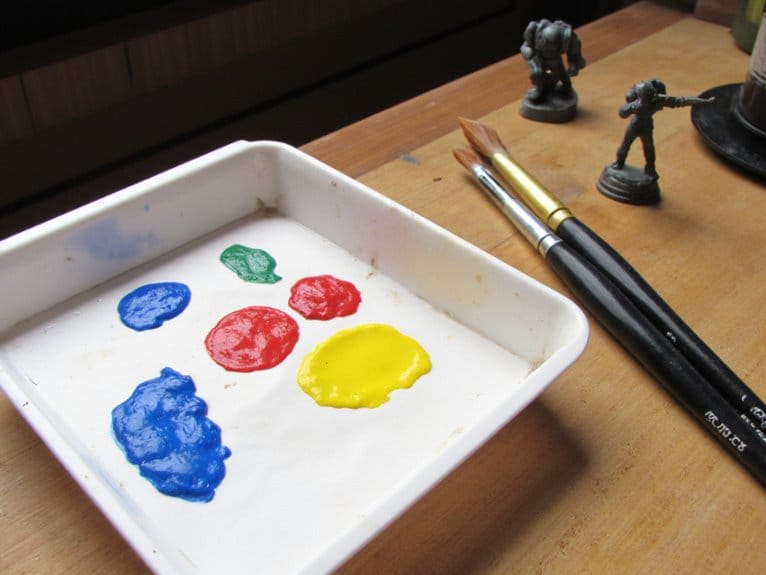
Achieving the ideal consistency when blending inks with paints requires starting with a small amount of ink and gradually incorporating it into the paint on a palette. Experimenting with different ink-to-paint ratios is key to finding the perfect balance for your desired effect. Testing the mixed ink and paint combination on a separate surface before applying it to your miniatures can help guarantee the desired outcome. Investing in quality inks from reputable brands is essential for consistent results when mixing with paints. Following tutorials and guides on ink application, blending, and layering techniques can provide valuable insights to enhance your miniature painting skills.
Color Blending Techniques
Mixing inks with paints on the palette is a technique that allows for the creation of custom colors and enhances vibrancy in miniature painting. When blending inks with paints, understanding color theory is essential for achieving desired shades. Experiment with different ratios to control color intensity and transparency. Utilize inks for smooth shifts between colors, employing highlight techniques and shadow blending for depth. Wet blending techniques can facilitate seamless color shifts, while layering effects with thin ink applications help build up colors gradually. Consider applying matte varnish over ink-painted areas to maintain a consistent finish. Mastering the art of ink blending can elevate the quality of your miniature painting by adding richness and dimension to your work.
Surface Preparation Methods
To prepare the surface for painting miniatures, I combine acrylic inks with paints on a palette to create custom colors for a vibrant and personalized finish. When mixing inks with paints, it is important to experiment with different ratios to achieve the desired transparency and intensity. Start by using a small amount of ink at a time to carefully control the color saturation in your mixes. Blend the inks with paints smoothly to create shifts for shading and highlighting effects. Mastering blending techniques will enhance your ability to mix inks with paints effectively for miniature painting, ensuring a professional and polished result.
- Ink application
- Ink drying
- Ink layering
Airbrushing Techniques With Inks
When airbrushing with inks for painting miniatures, precise adjustments of airbrush pressure and ink-to-thinner ratio are essential for achieving ideal results. Ink blending is a critical aspect of airbrushing techniques with inks, as it allows for smooth shifts between colors and helps in achieving a seamless finish on miniatures. Controlling the airbrush is key to mastering shading techniques with inks. By varying the distance between the airbrush and the miniature, different shading effects can be achieved, adding depth and dimension to the paint job.
Maintaining airbrush control also involves consistent hand movements and a steady flow of ink to guarantee uniform coverage. Thin inks with airbrush medium to prevent clogging and ensure an even flow, which is vital for achieving professional-looking results. Practice on a test surface before working on your miniatures to perfect these techniques and get a feel for how the inks behave when airbrushed. This preparation will help you understand how different pressures and ratios affect the outcome, allowing you to make informed decisions when painting your miniatures. Mastering airbrushing techniques with inks takes time and practice, but with attention to detail and dedication, you can achieve stunning results on your miniatures.
Experimenting With Ink Ratios
Experimenting with different ink ratios allows for precise control over the opacity and intensity of colors in miniature painting. By adjusting the proportion of ink to paint, you can achieve varying levels of color richness and impact on the base color. Here are some key techniques to ponder when exploring with ink ratios:
- Ink blending techniques, color intensity: Mixing inks with different paint ratios can help you create custom colors with unique strengths. This method allows for a wide range of color variations, from subtle shades to vivid hues.
- Ink washes, ink layering: Employing different ink-to-paint ratios for washes and layering can enhance the depth and dimension of your miniatures. Trying out washes and layers at various proportions can add richness and complexity to your paint job.
- Ink glazing, ink shading: Glazing with varying ink ratios can provide a smooth and translucent finish, ideal for producing gradients and subtle shifts. Shading with inks at different proportions can help you add depth and definition to specific areas of your miniature.
Testing out these techniques with different ink ratios on a spare surface can give you a better understanding of how each ratio affects the final result. Finding the perfect balance between ink and paint ratios is essential for achieving consistent and desired outcomes in your miniature painting projects.
Achieving Smooth Applications
For achieving seamless applications in tiny painting, utilizing a wet palette can be a vital technique to preserve the workability of acrylic inks and paints over extended periods. When using inks, it is essential to utilize a fine brush and work in thin layers to prevent pooling or streaking on the miniature surface. Experimenting with different dilution ratios of inks to water or medium can help achieve the desired transparency and consistency, assisting in smooth applications.
To avoid blending colors or smudging, make sure each layer of ink dries completely before adding the next one. Using a hairdryer on a low setting between layers can speed up the drying process, making smoother applications easier. Layering techniques and highlighting methods can also improve the overall finish of the miniature, adding depth and dimension to the painted surface.
Mastering ink application and brush control is crucial in achieving smooth results. Practice blending colors seamlessly to avoid sharp changes and maintain a unified look throughout the miniature. By paying attention to these details and employing proper techniques, you can achieve professional-level results in your miniature painting pursuits.
Enhancing Shading Effects
To improve shading effects on miniatures, thin out translucent acrylic inks with water for a smooth application. By carefully blending these thinned inks, you can achieve realistic shadow depth and highlights on your miniature figures. Here are some techniques to help you master shading effects:
- Blending techniques: Experiment with blending different tones of translucent inks to create smooth shifts between light and shadow areas. Practice layering these inks to build up depth gradually.
- Ink application: Use a fine brush to apply the thinned inks precisely in specific areas where shadows naturally fall. This targeted application technique helps in creating realistic shading effects that enhance the details of the miniature.
- Shadow depth: Layering translucent inks over base colors allows you to control the intensity of shadows and highlights, adding dimension to your miniatures. Varying the opacity of the inks can help you achieve varying levels of shadow depth for a more realistic finish.
- Color experimentation: Don’t be afraid to mix different tones of translucent inks to create custom colors for shading. This experimentation can lead to unique and visually appealing results, adding complexity to the shadows on your miniatures.
Finishing Touches and Sealants
For a professional finish on your miniature figures, the application of a matte varnish is vital to control the glossiness of the acrylic inks and guarantee long-lasting protection. When applying the matte varnish, opt for a quality product to secure durability and longevity of the painted miniatures. To achieve a protective finish, consider using a brush for application. This method allows for precision and control over the varnish, ensuring an even coat that maintains the desired matte effect.
Alternatively, if you prefer a more efficient application process, utilizing an airbrush can provide excellent coverage while maintaining consistency across the miniature’s surface. The airbrush technique allows for a smoother finish compared to brush application, giving your miniatures a professional look. Whichever method you choose, make sure to allow the matte varnish to fully dry before handling or displaying the miniatures. This step is pivotal in preventing any smudges or imperfections on the painted surface.