We are supported by our audience. When you purchase through links on our site, we may earn an affiliate commission, at no extra cost for you. Learn more. Last update on 1st July 2025 / Images from Amazon Product Advertising API.
You’ll need 91% isopropyl alcohol, two airtight containers, nitrile gloves, and safety glasses to clean resin prints safely. Immerse your print in IPA for 1-3 minutes with gentle agitation, then transfer to a second clean bath. Remove all uncured resin until surfaces aren’t reflective. For curing, use UV stations with 15-minute exposure times, rotating prints for even coverage. Always wear PPE, maintain proper ventilation, and store chemicals in sealed containers. These fundamental steps form the foundation for achieving professional-quality results.
Notable Insights
- Use 91% or higher isopropyl alcohol with two-bath washing technique lasting 1-3 minutes each with proper agitation.
- Wear nitrile gloves, safety glasses, and respirators while maintaining proper ventilation to handle VOCs and hazardous fumes.
- Store uncured resin in sealed, UV-shielded containers and dispose of uncured materials as hazardous waste properly.
- Cure prints using UV light for approximately 15 minutes, rotating regularly for uniform exposure and consistent temperature.
- Position cleaning stations near exhaust points and ensure continuous fresh airflow from intake to contaminated air removal.
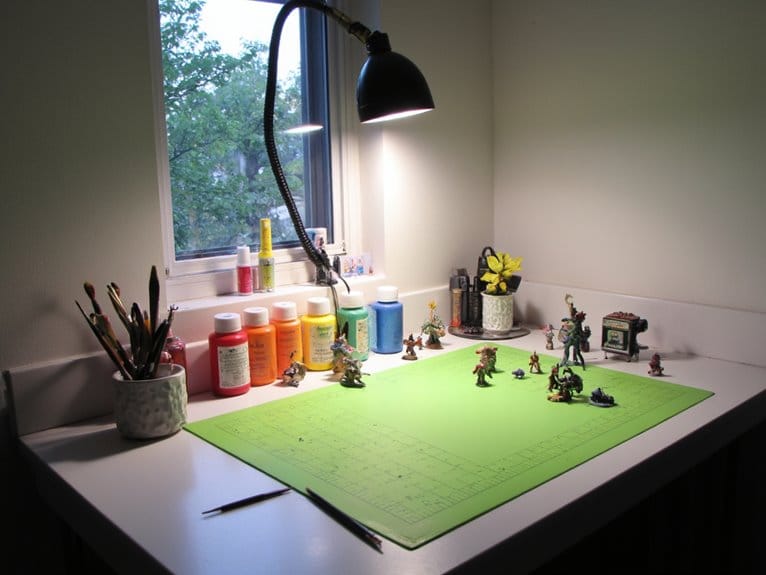
Essential Materials and Equipment for Resin Print Cleaning
Before diving into the cleaning process, you’ll need to assemble the right materials and equipment to handle resin prints safely and effectively.
Start with isopropyl alcohol at 91% concentration or higher as your primary solvent. This dissolves uncured resin residues efficiently. You’ll need two large, airtight containers for soaking and agitating prints.
Essential safety gear includes nitrile gloves—plan for 1-2 pairs per print due to resin adhesion concerns. Safety glasses protect against splashes.
Cover your workspace with a large silicone mat featuring raised edges to contain spills during print surface preparation.
Gather silicone spatulas, metal scrapers, side cutters, and soft brushes for support removal. A flex plate simplifies print detachment without damage. Soft brushes are particularly important for detailed cleaning in small corners where uncured resin tends to accumulate.
Stock paper towels and lint-free cloths for final drying steps. If 91% isopropyl alcohol becomes too costly or difficult to locate, consider Mean Green cleaner as an economical alternative that nearly matches the cleaning effectiveness.
Consider adding an ultrasonic cleaner to your equipment setup, as ultrasonic cleaners enhance cleaning performance and provide more thorough removal of uncured resin from intricate details.
Step-by-Step Washing Techniques and Methods
The proper washing technique determines whether your resin print achieves professional-quality results or develops surface defects that compromise the final piece. Begin with full immersion in 90-99% IPA for ideal solvent effectiveness. Quick washing techniques require two consecutive baths lasting 1-3 minutes each, depending on resin viscosity.
| Method | Duration | Agitation Type |
|---|---|---|
| Manual Soaking | 1-3 minutes | Hand stirring |
| Automated Washer | 2-4 minutes | Mechanical rotation |
| Ultrasonic Cleaner | 30-60 seconds | Ultrasonic vibration |
Advanced agitation methods include automated washers that provide consistent mechanical movement and ultrasonic cleaners using non-flammable detergents. Always wash before removing supports to prevent damage. Use syringes to flush narrow channels and internal features. Inspect for stickiness after washing—repeat the process if necessary before proceeding to curing. Continue cleaning until the surface is no longer reflective to ensure complete removal of uncured resin. After the initial wash, rinse parts in clean water to achieve the best possible surface quality and remove any remaining solvent residue.
Safety Protocols and Protective Measures
Working with resin requires strict safety protocols to protect yourself from toxic exposure and prevent environmental contamination.
You’ll need thorough personal protective equipment including nitrile gloves, safety glasses, and respiratory protection to handle uncured resin safely.
Proper ventilation, chemical storage practices, and disposal procedures are equally critical components of a safe resin printing workflow. Resin 3D printers emit volatile organic compounds (VOCs), ultrafine particles, and hazardous fumes that require effective ventilation in all settings.
If resin accidentally contacts your skin, immediately clean the area with paper towels and wash thoroughly with soap and water, avoiding solvents like IPA.
Personal Protective Equipment
Since uncured resin poses significant health risks through skin contact, inhalation, and eye exposure, you’ll need extensive personal protective equipment to handle cleaning and curing operations safely.
Choose nitrile or neoprene gloves over latex for superior chemical resistance. Long-cuff models protect your wrists and forearms from splashes. Perform glove inspection before each use, checking for tears or pinholes that compromise protection.
Use respirators with ADEK2-rated filters to block volatile organic compounds released during printing operations. Standard face masks won’t filter toxic resin fumes effectively. Respirator maintenance includes regular filter replacement to guarantee peak performance.
Wear safety glasses with UV protection and chemical splash resistance ratings. Cover exposed skin with long sleeves and pants made from resin-resistant materials. Install eye wash stations near your work area for immediate response to accidental resin exposure.
- Inspect gloves for damage before each use
- Replace respirator filters regularly for ideal protection
- Cure contaminated gloves under UV before disposal
- Store PPE in clean, dry areas
Ventilation and Workspace Safety
Beyond personal protective equipment, proper ventilation forms your primary defense against toxic resin vapors and ultrafine particles that escape during cleaning and curing operations.
Two primary ventilation types serve this purpose: natural airflow through open windows and doors, or mechanical systems using exhaust fans. High static pressure centrifugal fans outperform basic axial models for forcing contaminated air outside.
Your workspace layout should establish clear airflow pathways from fresh air intake to contaminated air exhaust. Position cleaning and curing stations near exhaust points to capture fumes at their source. Avoid enclosed spaces without outdoor air access.
In colder climates, you’ll need supplemental heating to maintain proper temperatures while sustaining air exchange rates. Install exhaust fans in windows or walls to create negative pressure that draws fresh air through the workspace continuously.
Chemical Storage and Disposal
Effective ventilation systems work hand-in-hand with proper chemical handling protocols to create an all-encompassing safety framework for resin printing operations.
You’ll need dedicated storage areas with UV-shielded, cool environments to prevent premature curing. Chemical labeling requirements mandate clear identification of all containers and storage zones.
Waste segregation protocols distinguish between fully cured resin, which becomes regular household waste, and uncured materials requiring hazardous waste handling.
You must store uncured resin in sealed containers away from ignition sources and incompatible chemicals.
Essential storage and disposal practices include:
- Store resin in locked, ventilated cabinets with minimal air headspace
- Label all storage areas with hazard identification and contents
- Segregate cured from uncured waste materials immediately
- Contact certified disposal companies for hazardous waste removal
UV Curing Best Practices and Timing Guidelines
After you’ve thoroughly cleaned your resin print, proper UV curing transforms the cleaned but soft material into its final hardened state through controlled light exposure. Effective curing techniques require dedicated UV chambers with proper intensity and wavelength matching your specific resin type.
Commercial curing stations offer convenience, while DIY setups using UV LED strips in foil-lined containers provide budget alternatives.
Exposure timing averages 15 minutes for typical prints using electric UV sources. Follow manufacturer guidelines strictly—under-curing leaves prints sticky and weak, while over-curing causes yellowing and brittleness.
Rotate prints regularly during curing to guarantee uniform exposure on all surfaces. Bottom layers need longer exposure times for strong adhesion. Temperature consistency prevents curing speed variations.
Oxygen inhibition creates tacky surfaces, so choose formulated resins or extend curing times to eliminate residual stickiness completely.
Quality Control and Print Inspection Standards
Successful resin printing doesn’t end at curing—systematic quality control guarantees your prints meet required specifications and performance standards. Your quality assessment process must include thorough visual inspection under bright, even lighting to eliminate shadows that hide defects.
Use magnification tools to examine fine surface details and detect layer lines, support marks, or incomplete curing spots.
Defect identification requires systematic evaluation of dimensional accuracy against your CAD model, accounting for post-cure shrinkage. Check edges and corners carefully after support removal to maintain detail integrity. Surface inspections should verify absence of gouges, blemishes, or cracking.
- Establish controlled environmental conditions to reduce false positives during inspection
- Document print and post-processing parameters for quality traceability
- Verify dimensional conformity within acceptable tolerance bands
- Train operators on proper support removal techniques to minimize damage
Alternative Cleaning Solutions and Advanced Equipment Options
You don’t have to rely solely on isopropyl alcohol for cleaning your resin prints.
Several alternative solvents offer unique advantages, from Mean Green’s nonflammable properties to bio-based solvents’ environmental benefits.
Advanced cleaning equipment like ultrasonic baths and automated wash stations can dramatically improve your cleaning efficiency and safety when paired with the right solvent choice.
Ultrasonic cleaners operating at frequencies between 40-42kHz can penetrate deep into surface cavities and remove stubborn resin residue more effectively than manual cleaning methods.
Alternative Solvent Options
While isopropyl alcohol remains the gold standard for cleaning resin prints, several alternative solvents can effectively remove uncured resin when IPA isn’t available or cost becomes a concern.
These solvent comparisons reveal varying effectiveness ratings across different cleaning agents.
Denatured alcohol provides similar cleaning power to IPA but with potential concentration variations.
Mean Green cleaner offers a budget-friendly option, though it requires ultrasonic agitation for ideal results.
Propylene carbonate presents lower volatility than IPA, demanding increased mechanical action during cleaning.
For industrial applications, specialized solutions like Poly-Flush SLA deliver superior safety profiles despite higher costs.
- Denatured alcohol: Cost-effective IPA substitute with comparable cleaning effectiveness
- Mean Green cleaner: Budget option requiring ultrasonic enhancement for best results
- Propylene carbonate: Lower volatility formula needing additional agitation
- Poly-Flush SLA: Premium solution offering enhanced safety with reduced volatility
Advanced Cleaning Equipment
Beyond manual cleaning methods, automated equipment transforms routine post-processing into a streamlined operation. These cleaning technologies deliver consistent results while reducing manual labor.
The Zortrax Cleaning Station accommodates prints up to 300 x 210 x 270 mm with 18 liters of solvent capacity. Meanwhile, the Phrozen Wash Mega S features dual-speed vortex agitation for thorough cleaning cycles.
Automation benefits include reduced solvent exposure and enhanced safety protocols. Combined wash and cure systems integrate both processes, eliminating workflow gaps. You’ll achieve consistent quality through automated agitation and rinsing cycles.
Ultrasonic cleaners offer exceptional effectiveness but require non-flammable liquids only. These stations minimize contamination risks while handling large print batches efficiently. Advanced equipment guarantees proper ventilation and waste disposal compliance, making professional-grade post-processing accessible for all skill levels.
On a final note
You’ve mastered the fundamentals of safe resin print processing. Follow these protocols consistently to achieve professional results. Always prioritize safety by wearing nitrile gloves and ensuring adequate ventilation. Your wash times should range from 2-6 minutes depending on resin type. UV curing requires 1-3 minutes per side at 405nm wavelength. Inspect each print thoroughly for uncured spots before handling. These techniques will deliver reliable, high-quality finished parts every time.