
We are supported by our audience. When you purchase through links on our site, we may earn an affiliate commission, at no extra cost for you. Learn more. Last update on 30th June 2025 / Images from Amazon Product Advertising API.
You’ll master dry brushing by selecting dense synthetic brushes and thick acrylic paints like titanium white and burnt sienna. Load your brush two-thirds full, then remove excess paint using paper towels until it’s nearly dry. Apply light pressure with directional strokes, targeting raised surfaces and edges to build progressive highlights from dark to light tones. Use weathering powders sparingly for realistic environmental effects, fixing them with matte varnish. Advanced techniques with specialized materials reveal professional-quality results.
Notable Insights
- Use synthetic brushes with dense, soft fibers and load them halfway with thick acrylic paint, removing excess to prevent detail obscuring.
- Apply light pressure with almost-dry brushes using gentle back-and-forth movements that follow the miniature’s natural directional forms.
- Build highlights progressively from dark to light tones, focusing on raised surfaces, edges, and ridges for professional results.
- Prepare surfaces properly by cleaning oils and debris, then seal finished work with appropriate varnishes for protection.
- Layer weathering powders sparingly using 2-3 related colors per effect, fixing with matte varnish for realistic environmental simulation.
Essential Tools and Materials for Success
Before you can achieve professional-quality dry brushing results, you must assemble the proper tools and materials. Start with surface preparation equipment including hobby knives with blunt edges, sponge files, and manicure files for mold line removal.
Your miniature preparation requires gentle cleaning agents to eliminate oils and debris from models. Precision tweezers with fine tips provide exact gripping power for handling delicate miniature components during assembly and detail work.
Select thick acrylic paints in essential colors: white, Venetian red, raw umber, burnt sienna, buff titanium, and neutral grey. These provide ideal opacity without thinning. Matte finish acrylics prevent unwanted glossiness during highlighting. Avoid using contrast or shade paints of as these very thin liquid paints are not suitable for dry brushing.
Essential cleaning techniques demand paper towels for excess paint removal and clean water jars for brush maintenance.
Add cardboard palettes, magnification tools, and protective gear. Complete your setup with matte varnish sealants to preserve finished work and weathering powders for realistic effects. Practice your initial techniques on bargain bin models from your local hobby shop to develop skills before working on valuable pieces.
Choosing the Right Brushes for Optimal Results
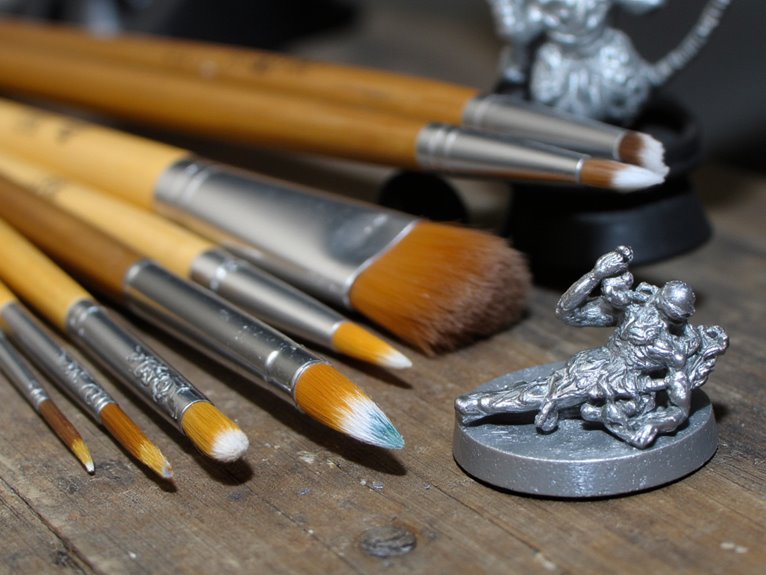
With your materials properly organized, selecting the correct brushes becomes the foundation for achieving smooth, controlled highlights on your miniatures. Synthetic brushes outperform natural hair for dry brushing due to superior brush durability against abrasive techniques. Dense, soft synthetic fibers maintain their shape while providing better paint control than natural alternatives.
| Brush Type | Best Use | Size Recommendation |
|---|---|---|
| Flat | Directional strokes, sharp edges | Medium to large |
| Round | All-over coverage, diffuse highlights | Half-inch diameter |
| Angled | Tight corners, controlled application | Small to medium |
Budget makeup brushes offer excellent alternatives at $10. The daVinci NOVA Series provides half-round options that work exceptionally well for dry brushing applications. Old brushes are particularly effective for drybrushing because their wear creates ideal paint distribution characteristics. Proper brush maintenance through frequent cleaning preserves bristle integrity. Using dedicated dry brushes separate from detail brushes extends tool lifespan remarkably. Specialized dry brush sets typically feature dome-shaped tips that excel at creating weathering effects and metallic luster on miniatures.
Paint Selection and Color Recommendations
Your paint selection directly determines the quality and visual impact of your dry brushing results.
You’ll need specific acrylic formulations, finish types, and supplementary materials that work together to create professional-looking miniatures.
The choice between matte and glossy finishes, essential color palettes, and weathering powder applications each serves distinct technical purposes in achieving realistic texture and depth. Highly pigmented formulations deliver superior color saturation that maintains vibrancy even when applied lightly during the dry brushing process.
Opaque paints provide the coverage and mixing versatility that miniature painters prefer for achieving consistent results across different surface textures. Non-toxic formulations ensure safe handling during extended painting sessions while maintaining the permanent pigment quality necessary for durable finishes.
Essential Acrylic Paint Colors
Five essential primary colors form the foundation of any effective miniature painting palette for dry brushing techniques. Your primary color selection should include Cadmium-Free Yellow Deep for warm yellows and Cadmium-Free Yellow Light for cool variations.
Add Cadmium Red for warm reds and Alizarin Crimson Permanent for cool tones. Complete the set with Phthalo Blue Green Shade for blue mixing.
Your foundational paint choices extend beyond primaries. Burnt Umber creates rich earth tones, while Raw Umber adds warmth. Yellow Ochre provides natural earthy bases.
Titanium White lightens colors and creates highlights essential for dry brushing effects. Ivory Black darkens colors and creates deep shadows.
Select opaque paints for visible dry brush strokes. Consider color bias when mixing to achieve accurate results and guarantee lightfastness ratings prevent fading over time. Starting with a simplified palette prevents being overwhelmed by the numerous color options available.
Matte Versus Glossy Finishes
Understanding finish types becomes essential when you’re selecting varnishes for your dry brushed miniatures, as each creates distinctly different visual and functional results.
Matte finishes reduce light reflection and maintain color accuracy, making them ideal for gaming miniatures where glare interferes with visibility. These finishes preserve the subtle highlights created during dry brushing without adding unwanted shine.
Glossy finishes intensify color vibrancy and create reflective surfaces that enhance ornamental details like gems or wet effects. Both provide effective paint protection when applied correctly.
Your aesthetic choices should guide finish selection. Matte works best for realistic, military-style models, while gloss suits display pieces requiring enhanced visibility.
Proper surface preparation improves adhesion quality for both finish types. Apply multiple thin layers rather than single thick coats to avoid obscuring fine detail work.
Weathering Powder Applications
When applied correctly, weathering powders transform miniatures from pristine painted models into realistic battle-worn figures with authentic environmental effects. Your pigment selection directly determines the authenticity of these weathering techniques. Use 2-3 related colors for each effect—combine two reds with brown for rust, or layer two yellows with brown for sand accumulation.
| Effect Type | Primary Colors | Secondary Colors | Application Method | Fixing Required |
|---|---|---|---|---|
| Rust | Burnt red, orange | Brown | Dry brush | Matte varnish |
| Dust/Sand | Yellow, ochre | Light brown | Light layers | Alcohol fixer |
| Soot/Smoke | Black | Dark gray | Concentrated areas | Paint thinner |
| Oil Stains | Deep brown | Black | Subtle mixing | Gloss coating |
| Frost/Chalk | Off-white | Light gray | Sparse application | Light varnish |
Layer progressively from light base tones to darker concentrations for realistic depth.
Proper Brush Loading Techniques
You’ll achieve superior dry brushing results by mastering proper paint loading techniques that control both paint quantity and consistency.
Loading your brush correctly means dipping it only halfway to two-thirds full, then immediately removing excess paint through dabbing on a palette edge or paper towel.
This controlled approach prevents paint puddling while ensuring you have sufficient pigment for even coverage across raised surface details.
Between painting sessions, maintain your brush’s performance and extend its lifespan by using a quality brush cleaner that removes dried paint residue and conditions the bristles.
Loading Paint Correctly
Before loading any paint onto your brush, proper preparation determines whether your dry brushing technique will succeed or fail miserably.
Wet the brush thoroughly in clean water to guarantee paint moisture distributes evenly across bristles. Press excess water out by gently pressing against your water container’s side—never blot on towels, which destroys brush shape.
Pull paint from palette puddles rather than dipping directly into containers. This controls paint quantity precisely.
Apply moderate pressure so bristles fan slightly, creating maximum surface area for pickup. Load paint close to the ferrule for ideal capacity without overloading.
Maintain your brush angle at 45 degrees when pulling through paint. After loading, unload excess by dabbing palette edges.
Proper paint consistency—neither thick nor runny—guarantees smooth, controlled application essential for effective dry brushing results.
Removing Excess Paint
Getting rid of excess paint separates successful dry brushing from muddy disasters that obscure miniature details. Your excess paint strategies determine whether you’ll achieve crisp highlights or create thick, detail-killing layers.
| Method | Action | Result |
|---|---|---|
| Paper towel wiping | Remove 80% of paint | Light coverage |
| Palette rubbing | Gentle back-and-forth motion | Controlled paint amount |
| Blotting technique | Press and lift repeatedly | Even paint distribution |
| Visual inspection | Check brush consistency | ideal paint load |
| Practice strokes | Test on spare surface | Technique refinement |
Effective paint removal techniques require systematic approaches. Wipe your brush on paper towels until only trace amounts remain. Blotting works better than dragging motions because it preserves paint texture while removing excess. Always inspect your brush before applying paint to your miniature.
Removing Excess Paint for Perfect Application
Since dry brushing relies on minimal paint application to highlight raised surfaces, removing excess paint from your brush becomes the most critical step in achieving clean, controlled results.
Without proper excess paint removal, you’ll create heavy, uneven coverage that obscures fine details on your miniatures.
Start by loading your brush with paint, then dab it repeatedly on a textured palette or paper towel.
This technique maintains brush moisture while removing surplus paint. The goal is achieving paint control where only trace amounts remain on the bristles.
Test your brush on a practice surface first.
Properly prepared brushes produce subtle highlights rather than thick streaks.
If you’ve applied too much paint accidentally, immediately use a clean, dry brush or cotton swab to lift the excess before it dries completely.
Mastering Basic Application Strokes
Now that you’ve prepared your brush with the right amount of paint, mastering the fundamental application strokes will determine the quality of your highlights and texture enhancement.
Your success depends on three critical elements: maintaining consistent light pressure to prevent paint buildup, following deliberate directional patterns that follow the miniature’s natural forms, and methodically building highlight layers from dark to light tones.
These techniques work together to create professional-looking results that enhance detail rather than obscure it. Having specialized dry brushes with goat hair bristles can significantly improve your texture work, as they’re specifically designed to pick up and distribute just the right amount of paint for effective dry brushing techniques.
Light Pressure Techniques
Light pressure techniques form the foundation of effective dry brushing, requiring precise control over both paint application and brush movement to achieve professional-quality highlights on miniature surfaces.
You’ll need an almost-dry brush with minimal paint residue. Remove excess paint by wiping thoroughly on dry paper towel until no paint transfers easily. Apply gentle, even back-and-forth movements focusing only on raised surfaces.
Light pressure benefits include preserving recessed details while mastering finesse through controlled paint deposits. Use stiff-bristled brushes in good condition for consistent results. Differentiate between “light dry brushing” for subtle highlights and “heavy dry brushing” for broader coverage. Multiple progressive layers work best, starting darker and adding lighter tones gradually.
- Feel the satisfaction of crisp, professional highlights emerging
- Experience control as delicate details come alive
- Master the precision that separates amateur from expert work
- Achieve stunning results through patient, methodical technique
Directional Stroke Patterns
Master your directional stroke patterns by understanding how brush movement directly controls paint placement and visual flow across miniature surfaces. Each stroke should follow the intended light source direction, starting from shadow areas and moving toward highlight zones. Your brush angle techniques determine paint deposition concentration. Flat brushes create even coverage along stroke centers, while angled brushes provide controlled edge emphasis.
Large flat surfaces demand consistent, unidirectional strokes for smooth texture simulation. Curved surfaces require strokes that follow natural contours. Stroke precision becomes critical when building gradients; brushes deposit more paint at stroke endpoints, so maintaining direction prevents muddy overlaps.
Practice confident, controlled movements rather than hesitant jabbing. Turn your miniature frequently to access ideal stroke angles.
Reversing direction on the same area distributes paint evenly but sacrifices strong highlight definition.
Building Highlight Layers
Building successful highlight layers requires methodical paint application that transforms your directional stroke work into dimensional depth.
You’ll achieve ideal highlight contrast by selecting colors one to three shades lighter than your base coat. Start with lighter pressure strokes to establish your first layer, then gradually increase coverage with subsequent passes.
Your layering techniques improve when you maintain consistent brush pressure and stroke direction. Remove excess paint on paper towel before each application to prevent detail loss.
Work from darkest to lightest highlights, building coverage gradually across raised surfaces while preserving shadow areas.
- Watch your miniatures transform from flat surfaces into realistic, three-dimensional masterpieces
- Feel the satisfaction of perfectly controlled highlight placement on intricate details
- Experience the confidence that comes from mastering professional-quality layering techniques
- Discover the pride in creating museum-worthy painted miniatures
Building Highlights With Multiple Layers
Achieving professional-quality highlights on miniatures requires systematic layering of progressively lighter colors across raised surfaces and edges.
You’ll apply thin, translucent coats over your base color, leaving portions of darker layers visible to create natural light shifts. Start with three essential layers: shade, base color, and highlight. Each successive layer should cover a smaller area than the previous one.
Load your brush with properly thinned paint and apply controlled strokes to avoid disturbing underlying work.
These layering techniques produce muted, realistic tones when working light over dark. Focus highlight shifts on edges and raised details where natural light would strike. Keep your brush slightly dry for precise control.
Multiple thin applications prevent texture loss while building smooth highlight shifts that mimic actual light behavior on three-dimensional surfaces.
Creating Realistic Weathering Effects
Once you’ve mastered highlight layering, weathering transforms your miniatures from pristine display pieces into battle-hardened veterans with authentic wear patterns.
Focus on small, irregular chips using sanding sticks or files on edges and raised surfaces where natural wear occurs. Apply weathering pigments sparingly in recesses, fixing them with appropriate mediums to prevent paint degradation.
Your weathering storytelling should reflect the miniature’s environment and usage history—rust for post-apocalyptic themes, mud splatters for recent combat, or dust accumulation for desert scenarios.
Each weathering mark tells a story—let your miniature’s scars reveal where it’s been and what battles it has survived.
- Target contact points and edges where real-world wear naturally concentrates
- Layer earth-tone pigments with dry brushing for cohesive natural wear integration
- Apply controlled abrasion techniques to simulate authentic battle damage
- Build narrative depth through consistent weathering placement across the entire model
Advanced Paint and Material Variations
While acrylic paints dominate most dry brushing applications, mastering advanced material variations unchains professional-grade results that separate exceptional work from standard techniques.
Oil paints excel in specialized techniques requiring extended blending time. You’ll achieve superior gradients through careful thinning and controlled application. Semi-wet brushing combines moisture control with paint mediums for seamless shifts between highlights and shadows.
| Paint Type | Drying Time | Best Application |
|---|---|---|
| Acrylic | 2-5 minutes | Quick highlights |
| Oil-based | 30+ minutes | Smooth blending |
| Metallic | 3-7 minutes | Armor details |
Metallic paints demand modified approaches. Apply multiple thin layers rather than single heavy coats. Non-metallic metal techniques simulate reflective surfaces without actual metal particles.
Gloss varnish protection prevents frosting during subsequent matte sealing. This layering system preserves detail clarity while maintaining professional durability standards.
Troubleshooting Common Mistakes
Even experienced miniature painters encounter frustrating dry brushing failures that stem from five fundamental error categories. Common problems include incorrect paint thickness, excessive brush moisture, and inadequate surface preparation.
Your brush should hold paint halfway up the bristles, then wiped nearly clean before application. Paint consistency matters—slightly thick paint performs better than watery mixtures.
Troubleshooting techniques focus on pressure control and proper drying times. Apply gentle, one-directional strokes instead of scrubbing motions. Match brush size to detail scale for precise highlight placement.
Key failure points that ruin your work:
- Overloaded brushes creating streaky, heavy application instead of subtle highlights
- Wrong brush sizes causing sloppy strokes on delicate miniature textures
- Multi-directional scrubbing that smears paint and destroys blending techniques
- Poor miniature handling without stable supports, leading to smudges and inconsistent color matching
Professional Tips for Refined Results
Professional dry brushing separates amateur work from gallery-worthy miniatures through precise technique refinement and strategic tool selection.
You’ll achieve superior results by implementing advanced techniques that focus on strategic highlight placement rather than uniform coverage. Target edges and ridges that naturally catch light for realistic depth.
Maintain multiple brush sets dedicated exclusively to dry brushing, replacing them regularly as worn bristles compromise highlight crispness. Use up to five progressively lighter paint shades for sophisticated color gradation, starting darker and building to bright highlights with decreasing pressure.
Dedicated brush sets and progressive paint gradation from dark to light create professional-quality highlights that elevate miniature painting craftsmanship.
Master enhancing textures through directional stroke variation that follows miniature topology. Circular motions work exceptionally well for fur and skin surfaces.
Always establish solid base coats before highlighting, ensuring proper color contrast for definition enhancement.
On a final note
You’ve now mastered dry brushing fundamentals through proper tool selection, paint management, and application techniques. Your weathering effects will improve with consistent practice using the specified brush angles and paint ratios. Remember to maintain light pressure and build layers gradually. When you encounter issues, refer back to the troubleshooting section for quick solutions. These techniques will consistently produce professional-quality results on your miniatures with proper execution and patience.
