We are supported by our audience. When you purchase through links on our site, we may earn an affiliate commission, at no extra cost for you. Learn more. Last update on 30th June 2025 / Images from Amazon Product Advertising API.
You’ll achieve professional miniature quality by selecting SLA printing for 25-50 micron resolution over FDM’s 150+ microns, then optimizing your models at 45-degree orientations with 0.05-0.1mm layer heights. Start with standard resin for maximum detail, clean prints with 90-99% IPA, and sand progressively from 400 to 1500-grit before applying primer at 6-8 inches distance. Use Kolinsky sable brushes with thinned acrylics for layering techniques, building from dark base coats to highlighted surfaces. Master these core techniques to reveal advanced finishing methods.
Notable Insights
- Choose SLA printing over FDM for miniatures due to superior 25-50 micron resolution and smooth surfaces ideal for paint application.
- Design models in CAD software like Blender or ZBrush, optimizing scale and orienting at 45 degrees for balanced support needs.
- Use 0.05-0.1mm layer heights with strategic support placement on overhangs exceeding 45 degrees for optimal detail capture.
- Maintain stable 20-25°C temperature and 40-60% humidity during printing, curing, and painting for consistent quality results.
- Export models as STL files for universal printer compatibility, then post-process prints before priming and painting application.
Choosing Between SLA and FDM Technologies for Miniature Quality
Which 3D printing technology delivers the superior results for miniature painting projects?
SLA advantages include exceptional print resolution of 25-50 microns versus FDM’s 150+ microns, producing smooth surfaces ideal for paint application.
FDM drawbacks center on visible layer lines and rough textures requiring extensive surface preparation.
Material characteristics differ considerably—SLA resins create detailed but brittle parts, while FDM thermoplastics offer durability with less precision.
Cost analysis reveals FDM’s faster, cheaper operation, though SLA’s superior quality justifies higher expenses for detail-critical work.
Speed comparison shows FDM wins for rapid prototyping, but SLA’s post-processing extends turnaround times. Resin printers require additional steps including alcohol washing and UV curing that increase overall production time.
Application contexts favor SLA when visual fidelity matters most. SLA excels in applications requiring accuracy and visual appeal.
Design complexity handling excels with SLA’s ability to capture intricate geometries and thin features without support artifacts.
SLA supports achieve high optical clarity compared to FDM’s mechanically removed supports that leave surface marks.
Understanding Resin Types and Their Impact on Detail Resolution
Once you’ve selected SLA technology for your miniature printing, the resin type becomes the critical factor determining your final detail quality and surface finish.
Standard SLA resin delivers exceptional detail capture but becomes brittle after curing. ABS-like resin maintains fine details while offering superior toughness and impact resistance. Tough resin sacrifices some detail resolution for flexibility under stress.
Choose resin based on your priorities: standard for maximum detail, ABS-like for durability, or tough for flexibility.
Water-washable resin matches standard resin’s detail quality while simplifying cleanup procedures. Polymer-like resin prioritizes strength over ultra-fine features but remains suitable for most miniature applications.
Resin brittleness comparison reveals standard resin as most fragile, while ABS-like and tough variants resist chipping.
Impact of temperature affects curing consistency—maintain stable processing temperatures for peak detail reproduction and layer adhesion across all resin types. Always stir resin before use to ensure proper performance and prevent settling of particles that could affect print quality. The resin’s chemical composition includes various additives that enhance both mechanical properties and detail capture capabilities for different miniature applications.
CAD Software and Miniature Design Tools for Model Creation
After selecting your resin and printer, you’ll need software to design or modify your miniatures before printing begins. CAD Software choices range from beginner-friendly to professional-grade options.
| Software | Best For | Key Strengths |
|---|---|---|
| Blender | Organic sculpting | Free, extensive Sculpting Features |
| Fusion 360 | Mechanical parts | Parameter Adjustment, modeling precision |
| ZBrush | High-detail figures | Detail Enhancement, professional tools |
| Tinkercad | Beginners | Simple Modeling Techniques, browser-based |
Mesh Optimization tools like Meshmixer guarantee Printing Compatibility by fixing geometry errors. Design Tweaks become essential when adapting existing models for your printer’s resolution. File Management requires proper export formats—STL remains standard, while 3MF supports advanced features. Software Integration between CAD platforms and slicers streamlines your workflow from design to print-ready files. Advanced CAD formats like STEP provide superior fidelity before converting to STL for your final miniature. Many platforms offer AI-driven tools that provide a beginner-friendly experience for users who want to create custom models without extensive design skills.
Optimizing Model Scale and Orientation for Print Success
When you’re ready to print your miniature models, proper scaling and orientation become critical factors that determine whether your print succeeds or fails entirely.
Scale adjustments greater than 5% require complete rework of support structures and drainage systems, while minor changes within this threshold typically won’t affect your existing print setup.
Your model’s orientation on the build plate directly impacts surface quality, support requirements, and the preservation of fine details that make miniatures truly exceptional. Resin printing technologies can achieve 25 micron resolutions, delivering the precision needed to capture intricate facial features and weapon details.
For optimal detail capture, set your layer heights between 0.05mm and 0.1mm to ensure crisp miniature features while maintaining reasonable print times.
Scale Factor Considerations
Successful miniature printing depends on calculating the precise scale factor between your original model and desired output size.
You’ll need to determine scale ratios by measuring your base model’s dimensions and multiplying by the appropriate factor—scaling from 28mm to 32mm requires a 1.14 multiplier. This mathematical precision prevents uniformity challenges across your collection.
Detail preservation becomes critical when scaling models. Scaling up maintains fine features that might disappear at smaller sizes, while scaling down risks losing intricate details entirely.
You should test printed samples to verify dimensional accuracy before committing to full production runs.
Aesthetic consistency requires maintaining proportional relationships between all miniatures in your collection.
Apply scaling adjustments in your slicer software before printing, ensuring visual cohesion whether you’re building gaming armies or display collections.
Optimal Print Orientation
Model orientation determines how your printer builds each layer and directly impacts print quality, support requirements, and post-processing time. A 45-degree angle typically provides the best balance for miniatures, reducing support material while maintaining print stability.
This approach minimizes orientation challenges by distributing stress evenly across layers and avoiding excessive supports on detailed surfaces.
Vertical orientation improves surface finish on critical faces but increases layer count and print time.
Horizontal placement reduces build height but often requires more supports underneath intricate details. Your orientation choice affects interlayer adhesion strength—prints aligned with anticipated stress directions perform better during handling.
Position detailed faces away from support contact areas to preserve fine features. Flatten base areas when possible to improve bed adhesion and prevent print failures during long builds.
Detail Preservation Strategies
Preserving fine details during miniature printing requires careful balance between model scale, orientation choices, and technical adjustments to your printing parameters.
Minor scaling of 5% or less won’t impact your existing supports or hollowing configurations. Beyond this threshold, you’ll need to rework support structures completely to prevent fragile, thin elements that cause print failures.
For FDM printing, switch to 0.1mm nozzles enabling layer heights near 0.12mm. This dramatically improves print resolution compared to standard 0.8mm nozzles.
Resin printers benefit from optimized exposure times and strategic drainage hole placement when hollowing models.
Scale selection directly affects miniature durability. Highly detailed models require less aggressive downscaling to retain intricate features.
Always recalibrate your printer before switching nozzle sizes to prevent clogging and maintain consistent extrusion quality.
Converting 3D Models to STL and OBJ File Formats
You’ll encounter two primary file formats when preparing 3D models for miniature printing: STL and OBJ files.
STL files offer universal compatibility with all 3D printers and slicing software, storing only the essential triangular mesh geometry without texture or color data.
OBJ files preserve additional information like texture coordinates and material properties, making them valuable for multi-color printing or digital editing workflows before conversion to print-ready formats.
STL Format Benefits
| STL Advantages | STL Limitations |
|---|---|
| Universal printer compatibility | No color/texture data |
| Smaller file sizes | Difficult to edit after creation |
| Fast processing speeds | Large files at high resolution |
| Simple mesh structure | Limited error checking capabilities |
The format’s efficiency becomes apparent during print preparation. STL files process faster than complex alternatives because they contain only coordinate data for triangular facets. You’ll experience reduced computational overhead and quicker slicing times. However, STL limitations include the absence of material properties and challenging post-generation modifications.
OBJ File Advantages
While STL files excel in simplicity, OBJ format offers significant advantages for complex miniature projects requiring detailed surface information.
You’ll find OBJ’s geometry encoding supports texture mapping coordinates and material properties through associated MTL files. This permits precise color information preservation and superior surface rendering quality for your miniatures.
Key advantages include:
- Mesh preservation – Maintains original resolution and NURBS patches for smoother surfaces
- Model compatibility – Universal support across 3D software packages guarantees seamless workflow integration
- Enhanced detail retention – Stores UV coordinates and normal data for accurate texture application
File optimization becomes vital since OBJ files generate larger sizes than STL due to extended geometry data.
You’ll need adequate processing power for slicing operations, but the trade-off delivers exceptional detail fidelity imperative for high-quality miniature painting workflows.
Conversion Software Options
Converting your 3D models between formats requires the right software tools to maintain quality and preserve essential geometry data.
Online converters offer immediate solutions without installation requirements. These tools typically process up to 25 files simultaneously with 50MB size limits per file. However, security concerns arise since your files may remain on converter servers during processing.
CAD software like SolidWorks and Blender provides superior control over conversion parameters. These applications retain complex model features that online tools might eliminate during processing. CAD programs enable direct STL export optimization for 3D printing workflows while integrating seamlessly with design environments.
Consider format limitations before converting. STL files use independent triangular facets without vertex sharing, while OBJ maintains shared vertices with texture data.
This conversion may eliminate color information and parametric details essential for miniature painting projects.
Slicing Software Settings for Layer Height and Support Structures
When you’re preparing miniature models for 3D printing, layer height becomes your primary tool for balancing detail quality against print time.
For high-quality miniatures, use 0.1mm layers as your standard setting. Highly detailed pieces require 0.05mm layers to capture fine features accurately.
Adaptive slicing optimizes your workflow by automatically adjusting layer heights based on model complexity. This technique applies fine layers only where detail matters most.
Support structures require careful configuration to prevent print failures while minimizing post-processing work:
- Support density: Set between 15-25% for adequate strength without excessive removal difficulty
- Placement strategy: Focus supports on critical overhangs exceeding 45-degree angles
- Custom positioning: Use manual support placement for complex geometries like wings or weapons
Proper orientation reduces support requirements considerably, saving both material and finishing time.
Maintaining Optimal Temperature and Environmental Conditions
Your printing environment plays a critical role in achieving consistent results that’ll translate into high-quality miniatures ready for painting.
Temperature fluctuations can cause warping, layer delamination, and dimensional inaccuracies that’ll compromise the fine details essential for miniature work. Maintaining stable room temperature between 20°C to 25°C (68°F to 77°F) for PLA filament or 24°C to 30°C (75°F to 86°F) for resin printing guarantees peak material performance and reduces the likelihood of print failures that waste both time and materials.
Room Temperature Control
Although many miniature painters focus primarily on brush techniques and paint selection, maintaining proper room temperature stands as one of the most critical yet overlooked factors in achieving professional results.
You’ll need to maintain temperatures between 15°C (60°F) and 27°C (80°F) for ideal primer adhesion and paint quality. Temperatures below this range cause primers to dry improperly, creating rough surfaces. Above 27°C, primers become powdery and grainy.
Essential room temperature control measures include:
- Monitor ambient temperature using a thermometer throughout your painting session
- Employ heat mats or controlled heating during cold periods without overheating your workspace
- Balance ventilation with temperature stability to remove fumes while preventing drafts
Freezing temperatures destroy acrylic paints through pigment separation, while excessive heat creates cracked finishes.
Environmental Print Stability
Environmental control extends far beyond simple room temperature management into a complex system of interconnected factors that directly impact your miniature’s final quality.
Environmental moisture levels between 40-60% prevent rapid drying that causes cracking while avoiding extended cure times that compromise adhesion.
Air quality requires filtration to eliminate particulates that embed in wet primer and paint layers.
Temperature stability within 15-27°C during priming guarantees proper surface preparation without powdery textures.
Post-application storage demands consistent 15-25°C temperatures to prevent expansion-contraction cycles that crack finished surfaces.
Controlled ventilation balances drying speed while removing VOCs safely.
Dust covers and sealed storage containers protect curing miniatures from airborne contaminants.
Environmental fluctuations during any phase risk compromising your entire painting investment through surface defects and adhesion failure.
Loading Files and Monitoring Print Progress
Three critical steps transform your 3D model into a finished miniature: loading the properly prepared file, initiating the print sequence, and maintaining vigilant oversight throughout the process.
Effective file management begins with transferring your G-code via USB or SD card to guarantee reliable communication. Proper naming conventions and directory organization streamline retrieval during batch production. Your printer’s firmware must match slicing output specifications to prevent reading errors.
Print monitoring requires continuous attention to several key indicators:
- Layer completion tracking – Monitor real-time progress percentages and estimated completion times
- Visual defect detection – Watch for layer shifting, filament issues, or build plate displacement
- Environmental consistency – Verify temperature sensors maintain stable printing conditions
Modern printers provide thorough monitoring tools, but visual inspection remains essential.
Temperature fluctuations or mechanical problems caught early prevent failed prints and wasted materials.
Safe Removal Techniques From Build Plates
Once your print completes successfully, you’ll face the critical shift from heated build plate to your workbench—a moment where improper technique can destroy hours of careful work.
Wait approximately 10 minutes for cooling before attempting removal. This cooling period weakens print adhesion naturally through material contraction.
Use appropriate removal tools for safe detachment. Thin, rigid spatulas or painter’s knives work best—slide them gently under print edges while avoiding excessive force. For stubborn prints, employ the wiggle method: rock prints back and forth to gradually loosen adhesion.
Remove your build plate from the printer before applying significant pressure to prevent hardware damage.
Flexible build plates simplify this process considerably. Ice packs accelerate cooling for faster turnaround times.
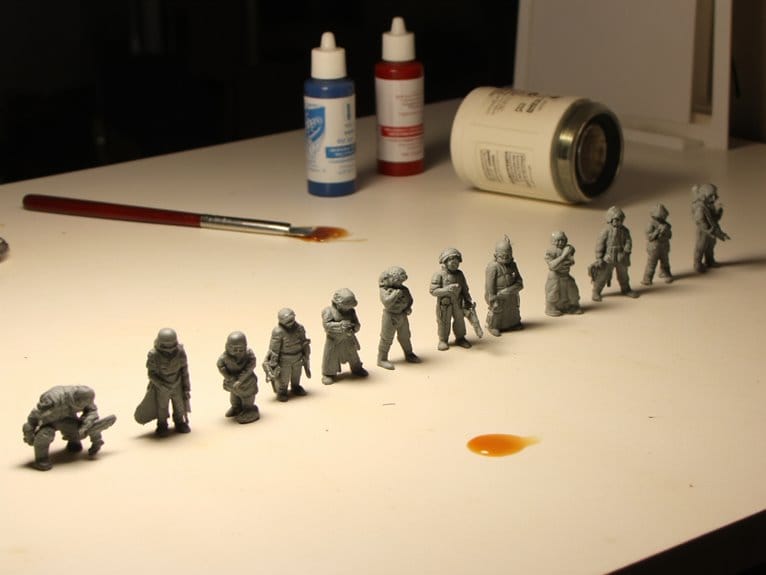
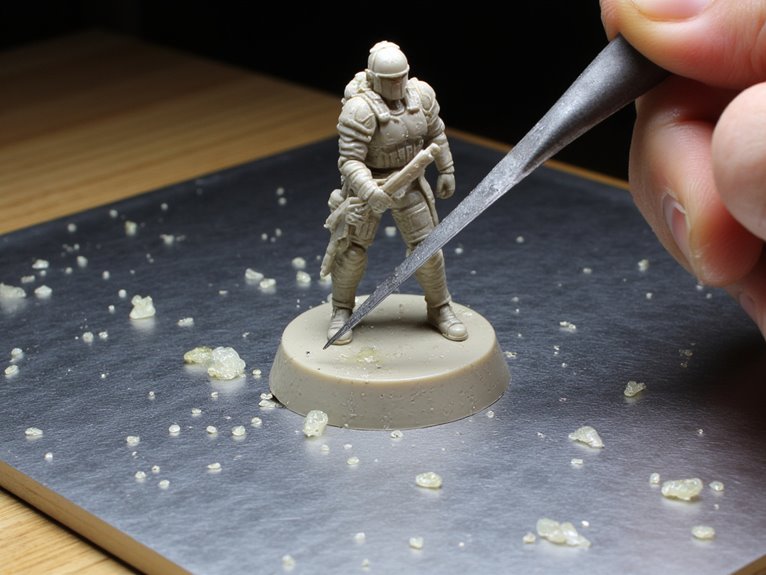
Isopropyl Alcohol Washing Methods for Uncured Resin Removal
Uncured resin clinging to your freshly printed miniatures poses a significant barrier to achieving professional-quality results, making proper cleaning techniques absolutely essential.
IPA effectiveness depends on concentration levels between 90-99%, which dissolve uncured resin rapidly while reducing drying time. You’ll need a dual-bath setup for ideal results.
- First bath: 30-60 second soak with gentle agitation
- Second bath: Clean rinse to remove sticky residue
Air-dry completely before UV curing.
IPA safety requires proper ventilation and nitrile gloves due to flammable vapors and skin irritation risks. Fresh IPA works best—cloudy, reused alcohol loses cleaning power.
For detailed miniatures, extend soaking time and use soft brushes. Monitor IPA clarity regularly and recycle using aluminum sulfate coagulation methods to reduce costs while maintaining environmental responsibility.
Strategic Support Removal Timing and Techniques
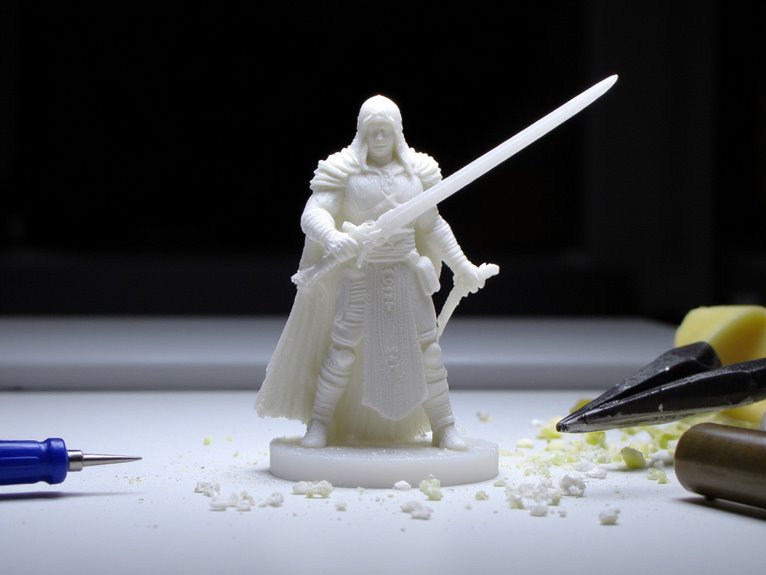
Support removal represents the most critical juncture between successful printing and catastrophic miniature damage, demanding precise timing and calculated technique execution. You’ll achieve ideal results by removing supports immediately after complete cooldown, when detachment remains manageable but bonding hasn’t intensified.
Your removal techniques should prioritize accessible supports first, using needle-nose pliers for twisting motions rather than straight pulls. Flush cutters handle precision work near model surfaces effectively.
| Tool Type | Primary Use | Technique | Damage Risk |
|---|---|---|---|
| Needle-nose pliers | Accessible supports | Twist and grip | Low |
| Flush cutters | Surface-adjacent cuts | Precise cutting | Medium |
| X-acto knives | Detail work | Controlled slicing | High |
| Diamond files | Post-removal smoothing | Light sanding | Low |
Strategic support design during printing considerably impacts removal difficulty. Configure minimal contact points and appropriate top Z heights to balance structural integrity with removal ease. High-speed printing capabilities can reduce overall production time for miniature sets, allowing for quick nozzle swaps between different materials during complex multi-part prints.
Sanding and Surface Smoothing for Paint Preparation of it
After removing supports from your 3D printed miniature, you’ll encounter visible marks and attachment points that require careful sanding to achieve a paint-ready surface.
Start with 400-grit sandpaper to eliminate these support remnants and major layer lines, then progress systematically through finer grits up to 1000-1500 for the best smoothness.
This progressive grit approach guarantees you don’t create new scratches while removing existing imperfections, establishing the foundation for professional paint adhesion.
For intricate details and hard-to-reach areas, consider using sanding sticks with compact dimensions that allow precise access to miniature features without damaging surrounding surfaces.
Support Mark Removal
Once your 3D printed miniature has cooled and cured completely, you’ll face the critical task of removing support structures without damaging delicate details.
Your support strategies during printing directly impact removal difficulty. Start with accessible external supports before tackling internal areas.
Essential removal techniques include:
- Needle-nose pliers – Twist and break hollow supports near joints to prevent surface damage
- Flush cutters and X-acto knives – Cut dense supports precisely with minimal model contact
- Combined approach – Use cutters and pliers together for hard-to-reach internal supports
Work methodically from easy-access points inward.
Exercise patience during extraction to avoid nicks or deformities.
For dual-extrusion prints with soluble supports, submerge in warm water (PVA) or Limonene solution (HIPS) while maintaining proper ventilation and wearing protective equipment.
Progressive Grit Techniques
While support removal eliminates the bulk structural elements from your 3D printed miniature, the real surface preparation begins with progressive grit sanding techniques that systematically transform rough print surfaces into paint-ready canvases.
Start your grit progression with 320-grit sandpaper to remove major surface imperfections and layer lines. Work systematically through increasingly fine grits up to 1000 or higher. Each grit stage removes scratches from the previous coarser paper while creating smaller, more uniform surface textures.
Use wet sanding techniques with running water to reduce dust and improve finish quality. Sand perpendicular to layer lines to minimize visible stepping.
Employ a sanding block for even pressure distribution instead of freehand sanding. Clean surfaces with microfiber cloth between grit changes to inspect progress.
Never skip grit stages—this creates visible scratches that become prominent after paint application.
Selecting and Applying Primers for Different Resin Types of
Successful primer selection forms the foundation of any quality paint job on resin miniatures, determining both adhesion strength and final appearance.
Quality primer selection serves as the critical foundation that determines both paint adhesion and the final visual outcome of your miniature project.
Your resin surface preparation begins with thorough cleaning using 99% isopropyl alcohol to remove uncured residues. Light sanding with 600+ grit sandpaper creates mechanical adhesion points while removing layer lines.
Key primer adhesion techniques include:
- Distance control: Maintain 6-8 inches when spray priming with thin, overlapping coats
- Temperature timing: Allow complete drying between multiple light applications rather than single heavy coats
- Chemical compatibility: Match acrylic polyurethane primers to your specific resin type for ideal bonding
Brush-on primers like Vallejo Grey offer superior detail control, while spray options such as Citadel Chaos Black provide faster, more even coverage across complex geometries. For waterproof protection, oil-based formulations like Rust-Oleum 2X Ultra Cover deliver enhanced durability against moisture and handling.
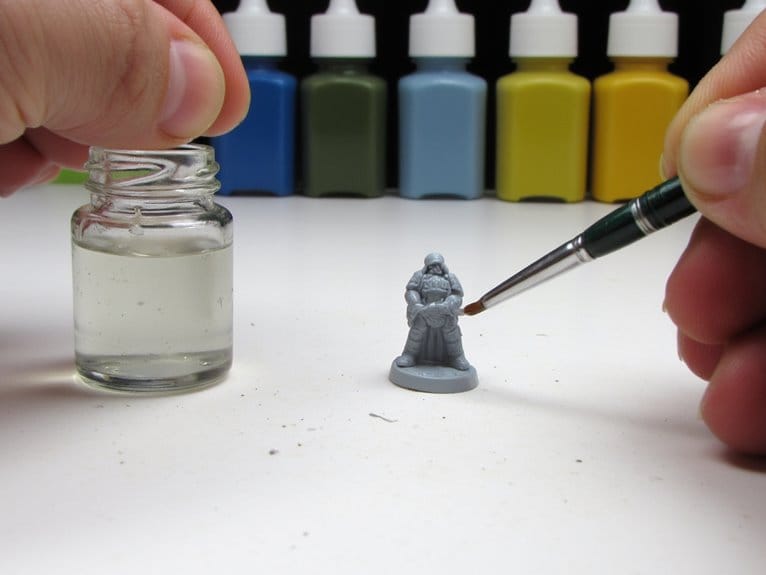
Brush Selection and Acrylic Paint Application Methods
The right brush transforms your 3D printed miniature from a basic model into a detailed masterpiece, making tool selection as critical as your painting technique.
Round brushes dominate miniature work, offering precise control for intricate details through sizes 000 to 00. Flat brushes handle basecoating efficiently on larger surface areas.
Kolinsky red sable provides superior tip retention and paint flow but costs notably more than synthetic alternatives. Synthetic brushes offer cruelty-free options yet require frequent replacement due to faster tip degradation.
Your paint techniques determine application success. Thin acrylics with water or medium to prevent detail obscuration.
Load brushes minimally to avoid dripping during wet blending, glazing, and dry brushing applications. Shorter handles enhance precision control for fine detail work essential in miniature painting.
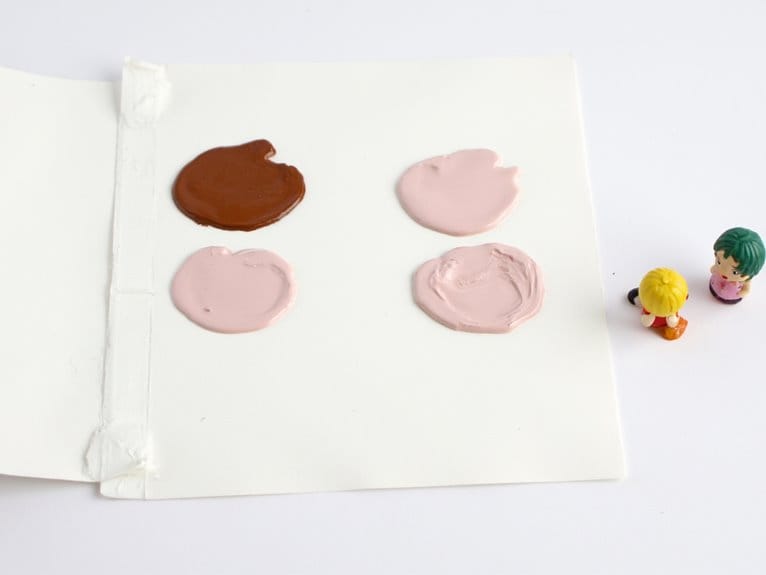
Layering, Shading, and Protective Sealing Techniques
Once you’ve mastered brush control and paint application, layering becomes your primary method for creating realistic depth and dimension on 3D printed miniatures.
This technique involves applying successive paint coats while leaving portions of underlying layers visible, simulating natural lighting techniques on your model’s surface.
Start with dark base colors in recessed areas, then gradually build lighter tones on raised surfaces. Use a 1:1 paint-to-water ratio for smooth shifts without obscuring fine details.
Building from darkness to light with thinned paint creates natural depth while preserving your miniature’s intricate surface details.
Essential layering principles include:
- Paint consistency control – Maintain moderately thinned paint between wash and drybrush thickness
- Progressive shade building – Apply multiple thin coats for controllable opacity and corrections
- Strategic coverage – Preserve deepest recesses while covering most surfaces with new layers
Complete your work with matte varnish spray for durability and unified finish appearance.
On a final note
You’ve now mastered the complete 3D printing to miniature painting pipeline. Your choice between SLA and FDM technologies directly impacts final detail quality. Proper resin selection, model orientation, and file preparation determine print success rates. Surface preparation through sanding and priming creates ideal paint adhesion. Strategic brush selection and layered acrylic application techniques produce professional results. You’ll achieve consistent, high-quality painted miniatures by following these established technical processes and material specifications.